Daewoo 50DM55UQP Colour Television Kullanım kılavuzu
- Kategori
- LCD TV'ler
- Tip
- Kullanım kılavuzu


English - 1 -
Table of Contents
Safety Information .................................................2
Markings on the Product .......................................2
Introduction ........................................................... 4
Accessories Included ............................................4
Features ................................................................4
Stand Installation & Wall Mounting ....................... 5
Antenna Connection..............................................5
Other Connections ................................................6
Turning On/Off the TV ...........................................7
TV Control & Operation .........................................7
Remote Control .....................................................8
Initial Setup Wizard ...............................................9
Home Screen ...................................................... 11
Live TV Mode Menu Content .............................. 12
Channels ........................................................12
TV Options.......................................................12
Record .............................................................13
Settings ...............................................................13
Network & Internet ...........................................13
Channel ...........................................................14
Accounts & Sign In ..........................................16
Apps ................................................................16
Device Preferences .........................................16
Remote & Accessories ........................................19
Channel List ........................................................19
Programme Guide ...............................................20
Connecting to the Internet ...................................21
Multi Media Player...............................................22
From USB Connection ........................................23
From a Mobile Device via DMR .......................... 24
USB Recording ................................................... 24
Instant Recording ............................................24
Watching Recorded Programmes ..................24
Timeshift Recording .........................................24
Disk Format .....................................................24
Schedule List ...................................................25
CEC.....................................................................25
Google Cast ........................................................25
HBBTV System ...................................................26
Quick Standby Search ........................................ 26
Software Update ................................................. 26
Troubleshooting & Tips ....................................... 27
HDMI Signal Compatibility .................................. 27
Supported File Formats for USB Mode ...............28
Video ...............................................................28
Audio ...............................................................28
Picture .............................................................30
Subtitle.............................................................31
Supported DVI Resolutions .................................31
Specification ........................................................32
Licences ..............................................................33
Disposal Information ...........................................33
English - 2 -
Safety Information
CAUTION
RISK OF ELECTRIC SHOCK
DO NOT OPEN
CAUTION: TO REDUCE THE RISK OF ELECTRIC SHOCK DO
NOT REMOVE COVER (OR BACK).
NO USER-SERVICEABLE PARTS INSIDE. REFER
SERVICING TO QUALIFIED SERVICE PERSONNEL.
Note: Follow the on screen instructions for operating the
related features.
In extreme weather (storms, lightning) and long inactivity
periods (going on holiday) disconnect the TV set from the
mains.
The mains plug is used to disconnect TV set from the mains
and therefore it must remain readily operable. If the TV set is
not disconnected electrically from the mains, the device will
still draw power for all situations even if the TV is in standby
PRGHRUVZLWFKHGRႇ
IMPORTANT - Please read these
instructions fully before installing or
operating
WARNING: This device is intended to be
used by persons (including children) who are
capable / experienced of operating such a device
unsupervised, unless they have been given
supervision or instruction concerning the use of
the device by a person responsible for their safety.
• Use this TV set at an altitude of less than 5000 meters
above the sea level, in dry locations and in regions
with moderate or tropical climates.
• The TV set is intended for household and similar
indoor use but may also be used in public places.
• For ventilation purposes, leave at least 5cm of free
space around the TV.
• The ventilation should not be impeded by covering
or blocking the ventilation openings with items, such
as newspapers, table-cloths, curtains, etc.
• The power cord plug should be easily accessible. Do
not place the TV, furniture, etc. on the power cord.
$GDPDJHGSRZHUFRUGSOXJFDQFDXVH¿UHRUJLYH
you an electric shock. Handle the power cord by the
plug, do not unplug the TV by pulling the power cord.
Never touch the power cord/plug with wet hands as
this could cause a short circuit or electric shock.
Never make a knot in the power cord or tie it with
other cords. When damaged it must be replaced, this
VKRXOGRQO\EHGRQHE\TXDOL¿HGSHUVRQQHO
• Do not expose the TV to dripping or splashing of
OLTXLGVDQG GRQRWSODFHREMHFWV ¿OOHGZLWKOLTXLGV
such as vases, cups, etc. on or over the TV (e.g.,
on shelves above the unit).
• Do not expose the TV to direct sunlight or do not
SODFHRSHQÀDPHVVXFKDVOLWFDQGOHVRQWKHWRSRI
or near the TV.
• Do not place any heat sources such as electric
heaters, radiators, etc. near the TV set.
• Do not place the TV on the floor and inclined
surfaces.
• 7R DYRLGGDQJHU RI VXႇRFDWLRQNHHS SODVWLF EDJV
out of the reach of the babies, children and domestic
animals.
• Carefully attach the stand to the TV. If the stand is
SURYLGHGZLWKVFUHZVWLJKWHQ WKH VFUHZV ¿UPO\ WR
prevent the TV from tilting. Do not over-tighten the
screws and mount the stand rubbers properly.
• Do not dispose of the batteries in fire or with
KD]DUGRXVRUÀDPPDEOHPDWHULDOV
WARNING
• Batteries must not be exposed to excessive heat
VXFKDVVXQVKLQH¿UHRUWKHOLNH
• Excessive sound pressure from earphones or
headphones can cause hearing loss.
ABOVE ALL - NEVER let anyone, especially
children, push or hit the screen, push anything
into holes, slots or any other openings in the case.
Caution Serious injury or death
risk
Risk of electric shock Dangerous voltage risk
Maintenance Important maintenance
component
Markings on the Product
The following symbols are used on the product as
a marker for restrictions and precautions and safety
instructions. (DFK H[SODQDWඈRQ VKDOOEH FRQVඈGHUHG
ZKHUHWKHSURGXFWEHDUVUHODWHGPDUNඈQJRQO\Note
such information for security reasons.
Class II Equipment: This appliance is
designed in such a way that it does not require
a safety connection to electrical earth.
Hazardous Live Terminal: The marked
terminal(s) is/are hazardous live under normal
operating conditions.
Caution, See Operating Instructions: The
marked area(s) contain(s) user replaceable
coin or button cell batteries.
Class 1 Laser Product: This
product contains Class 1 laser
source that is safe under rea-
sonably foreseeable condi-
tions of operation.

English - 3 -
WARNING
Do not ingest the battery, Chemical Burn Hazard
This product or the accessories supplied with the
product may contain a coin/button cell battery. If the
coin/button cell battery is swallowed, it can cause
severe internal burns in just 2 hours and can lead
to death.
Keep new and used batteries away from children.
If the battery compartment does not close secure-
ly, stop using the product and keep it away from
children.
If you think batteries might have been swallowed or
placed inside any part of the body, seek immediate
medical attention.
– – – – – – – – – – – –
A television may fall, causing serious personal injury
or death. Many injuries, particularly to children, can
be avoided by taking simple precautions such as:
• ALWAYS use cabinets or stands or mounting
methods recommended by the manufacturer of
the television set.
• ALWAYS use furniture that can safely support the
television set.
• ALWAYS ensure the television set is not overhang-
ing the edge of the supporting furniture.
• ALWAYS educate children about the dangers of
climbing on furniture to reach the television set
or its controls.
• ALWAYS route cords and cables connected to
your television so they cannot be tripped over,
pulled or grabbed.
• NEVER place a television set in an unstable
location.
• NEVER place the television set on tall furniture
(for example, cupboards or bookcases) without
anchoring both the furniture and the television set
to a suitable support.
• NEVER place the television set on cloth or other
materials that may be located between the televi-
sion set and supporting furniture.
• NEVER place items that might tempt children
to climb, such as toys and remote controls, on
the top of the television or furniture on which the
television is placed.
• The equipment is only suitable for mounting at
KHLJKWVP
If the existing television set is going to be retained
and relocated, the same considerations as above
should be applied.
– – – – – – – – – – – –
Apparatus connected to the protective earthing of the
building installation through the MAINS connection
or through other apparatus with a connection to
protective earthing – and to a television distribution
system using coaxial cable, may in some circum-
VWDQFHVFUHDWHD¿UHKD]DUG&RQQHFWLRQWRDWHOHYL-
sion distribution system has therefore to be provided
through a device providing electrical isolation below
a certain frequency range (galvanic isolator)
WALL MOUNTING WARNINGS
• Read the instructions before mounting your TV
on the wall.
• The wall mount kit is optional. You can obtain from
your local dealer, if not supplied with your TV.
• Do not install the TV on a ceiling or on an inclined
wall.
• 8VHWKHVSHFL¿HGZDOOPRXQWLQJVFUHZVDQGRWKHU
accessories.
• 7LJKWHQWKHZDOOPRXQWLQJVFUHZV¿UPO\WRSUHYHQW
the TV from fall. Do not over-tighten the screws.
Figures and illustrations in this user manual are
SURYLGHGIRUUHIHUHQFHRQO\DQGPD\GLႇHUIURPWKH
actual product appearance. Product design and
VSHFL¿FDWLRQVPD\EHFKDQJHGZLWKRXWQRWLFH
English - 4 -
Introduction
Thank you for choosing our product. You’ll soon be
enjoying your new TV. Please read these instructions
carefully. They contain important information which will
help you get the best from your TV and ensure safe
and correct installation and operation.
Accessories Included
• Remote Control
• Batteries: 2 x AAA
• Instruction Book
Features
• Remote controlled colour TV
• AndroidTM operating system
• Google Cast
• Voice Search (optional)
• Fully integrated digital terrestrial/cable/satellite TV
(DVB-T-T2/C/S-S2)
• HDMI inputs to connect other devices with HDMI
sockets
• USB input
• Stereo sound system
• Teletext
• Headphone connection
• Automatic programming system
• Manual tuning
• Sleep timer
• 2Q2ႇWLPHU
• 6ZLWFKRႇWLPHU
• 3LFWXUHRႇIXQFWLRQ
• 1RVLJQDODXWRSRZHURႇIXQFWLRQ
• Ethernet (LAN) for Internet connectivity and service
• 802.11 a/b/g/n/ac built in WLAN Support
• HbbTV
Ultra HD (UHD)
79VXSSRUWV 8OWUD +'8OWUD +LJK 'H¿QLWLRQ DOVR
known as 4K) which provides resolution of 3840 x
2160 (4K:2K). It equals 4 times the resolution of Full
HD TV by doubling the pixel count of the Full HD TV
both horizontally and vertically. Ultra HD contents are
supported from HDMI, some of the Over-the-Top (OTT)
services, USB inputs and over DVB-T2 and DVB-S2
broadcasts.
High Dynamic Range (HDR) / Hybrid Log-
Gamma (HLG)
Using this feature the TV can reproduce greater
dynamic range of luminosity by capturing and then
FRPELQLQJVHYHUDO GLႇHUHQW H[SRVXUHV+'5+/*
promises better picture quality thanks to brighter, more
realistic highlights, more realistic colour and other
LPSURYHPHQWV,W GHOLYHUV WKHORRN WKDW ¿OPPDNHUV
intended to achieve, showing the hidden areas of
dark shadows and sunlight with full clarity, colour and
detail. HDR/HLG contents are supported via native
and market applications, HDMI, USB inputs and
over DVB-S broadcasts. When the input source is
set to the related HDMI input press the Menu button
and set the HDMI EDID Version option in the TV
Options>Settings>Device Preferences>Inputs
menu as EDID 2.0 or Auto EDID in order to watch
HDR/HLG content, if the HDR/HLG content is received
through an HDMI input. The source device should also
be at least HDMI 2.0a compatible in this case.
Dolby Vision
Dolby Vision™ delivers a dramatic visual experience,
astonishing brightness, exceptional contrast, and vivid
colour, that brings entertainment to life. It achieves this
stunning image quality by combining HDR and wide
colour gamut imaging technologies. By increasing the
brightness of the original signal and using a higher
dynamic colour and contrast range, Dolby Vision
presents amazing true-to-life images with stunning
detail that other post-processing technologies in the
TV aren’t able to produce. Dolby Vision is supported
via native and market applications, HDMI and USB in-
puts. When the input source is set to the related HDMI
input press the Menu button and set the HDMI EDID
Version option in the TV Options>Settings>Device
Preferences>Inputs menu as EDID 2.0 or Auto EDID
in order to watch Dolby Vision content, if the Dolby
Vision content is received through an HDMI input.
The source device should also be at least HDMI 2.0a
compatible in this case. In the Picture Mode menu
WZRSUHGH¿QHGSLFWXUHPRGHVZLOOEHDYDLODEOHLI'ROE\
Vision content is detected: Dolby Vision Bright and
Dolby Vision Dark. Both allow the user to experience
the content in the way the creator originally intended
ZLWKGLႇHUHQWDPELHQWOLJKWLQJFRQGLWLRQV7RFKDQJH
the Picture Mode setting press the Menu button while
watching the Dolby Vision content and go to Picture
menu. While watching Dolby Vision Content via an
DSSOLFDWLRQH[FHSW<RX7XEH1HWÀL[DQG0XOWL0HGLD
Player, you will not be able to access the Picture menu
and set the Picture Mode.

English - 5 -
Stand Installation &
Wall Mounting
Assembling / Removing the pedestal
Preparations
Take out the pedestal(s) and the TV from the packing
case and put the TV onto a work table with the screen
panel down on the clean and soft cloth (blanket, etc.)
• 8VHDÀDWDQG¿UPWDEOHELJJHUWKDQWKH79
• Do not hold the screen panel part.
• Make sure not to scratch or break the TV.
Assembling the pedestal
1. Place the stand(s) on the stand mounting
pattern(s) on the rear side of the TV.
2. Insert the screws provided and tighten them gently
XQWLOWKHVWDQGLVSURSHUO\¿WWHG
Removing the pedestal from the TV
Be sure to remove the pedestal in the following way
when using the wall-hanging bracket or repacking
the TV.
• Put the TV onto a work table with the screen panel
down on the clean and soft cloth. Leave the stand(s)
protruding over the edge of the surface.
• 8QVFUHZWKHVFUHZVWKDW¿[WKHVWDQGV
• Remove the stand(s).
When using the wall mount bracket
Your TV is also prepared for a VESA-compliant wall
mount bracket. If it is not supplied with your TV, contact
your local dealer to purchase the recommended wall-
hanging bracket.
Holes and measurements for wall mount bracket
installation;
VESA WALL MOUNT MEASUREMENTS
,ŽůĞWĂƩĞƌŶ
Sizes (mm)
WH
200 200
^ĐƌĞǁ^ŝnjĞƐ
>ĞŶŐƚŚ;yͿ min. (mm) 10
max. (mm) 13
dŚƌĞĂĚ;zͿ M6
Antenna Connection
Connect the aerial or cable TV plug to the AERIAL
INPUT (ANT) socket located on the left side of the TV
or satellite plug to the SATELLITE INPUT (LNB) socket
located on the rear side of the TV.
Rear side of the TV
/1%
1. Satellite
Left side of the TV
$17
2. Aerial or cable
If you want to connect a device to the TV, make
VXUHWKDWERWKWKH79DQGWKHGHYLFHDUHWXUQHGRႇ
before making any connection. After the connection
is done, you can turn on the units and use them.
English - 6 -
Other Connections
,I\RXZDQWWRFRQQHFWDGHYLFHWRWKH79PDNHVXUHWKDWERWKWKH79DQGWKHGHYLFHDUHWXUQHGRႇEHIRUHPDNLQJ
any connection. After the connection is done, you can turn on the units and use them.
Connector Type Cables Device
HDMI
Connection
(back&side)
SPDIF SPDIF
(Optical Out)
Connection
(back)
HEADPHONE Headphone
Connection
(back)
USB
Connection
(side)
CI
Connection
(side)
CAM
module
LAN Ethernet
Connection
(back) LAN / Ethernet Cable
When using the wall mounting kit
(contact your dealer to purchase one,
if not supplied), we recommend that
you plug all your cables into the back
of the TV before mounting on the
wall. Insert or remove the CI module
only when the TV is SWITCHED
OFF. You should refer to the module
instruction manual for details of the
settings. The USB inputs on the
TV support devices up to 500mA.
Connecting devices that have current
value above 500mA may damage
your TV. When connecting equip-
ment using a HDMI cable to your
79WRJXDUDQWHHVXFLHQWLPPXQLW\
against parasitic frequency radiation
and trouble-free transmission of high
GH¿QLWLRQ VLJQDOV VXFK DV . FRQ-
tent, you have to use a high speed
shielded (high grade) HDMI cable
with ferrites.

English - 7 -
Turning On/Off the TV
Connect power
IMPORTANT: The TV set is designed to operate on
220-240V AC, 50 Hz socket.
After unpacking, allow the TV set to reach the ambient
room temperature before you connect the set to the
mains.
Plug the power cable to the mains socket outlet. The
TV will switch on automatically.
To switch on the TV from standby
If the TV is in standby mode the standby LED lights
up. To switch on the TV from standby mode either:
• Press the Standby button on the remote control.
• Press the control button on the TV.
The TV will then switch on.
To switch the TV into standby
The TV cannot be switched into standby mode via
control button. Press and hold the Standby button on
the remote control. 3RZHURႇ dialogue will appear on
the screen. Highlight OK and press the OK button. The
TV will switch into standby mode.
7RVZLWFKRႇWKH79
To power down the TV completely, unplug the power
cord from the mains socket.
Quick Standby Mode
In order to switch the TV into quick standby mode
either;
• Press the Standby button on the remote.
Press again to go back to operating mode.
• Press the control button on the TV.
Press the control button again to go back to operating
mode.
Your TV continues to operate in the quick standby
mode state, as it regularly checks for updates. This is
not a malfunction, it meets the requirements for energy
consumption. In order to minimize energy consumption
switch your TV into standby mode as explained above.
TV Control & Operation
The control button allows you to control the Quick
Standby-On functions of the TV.
Note: 7KHSRVLWLRQRIWKHFRQWUROEXWWRQPD\GL௺HUGHSHQGLQJ
on the model.
7RWXUQWKH79Rႇ4XLFN6WDQGE\ Press the control
button to turn the TV into quick standby mode.
7R WXUQ WKH 79 Rႇ 6WDQGE\ The TV cannot be
switched into standby mode via control button.
To turn on the TV: Press the control button, the TV
will turn on.
Note: Live TV settings menu OSD in Live TV mode cannot be
displayed via the control button.
Operation with the Remote Control
Press the Menu button on your remote control to
display Live TV settings menu when in Live TV mode.
Press Home button to display or return to the Home
Screen of the Android TV. Use the directional buttons
to move the focus, proceed, adjust some settings and
press OK to make selections in order to make changes,
set your preferences, enter a sub-menu, launch an
application etc. Press Return/Back to return to the
previous menu screen.
Input Selection
Once you have connected external systems to your
79\RXFDQVZLWFKWRGLႇHUHQWLQSXWVRXUFHV3UHVVWKH
Source button on your remote control consecutively
or use the directional buttons and then press the OK
EXWWRQWRVZLWFKWRGLႇHUHQWVRXUFHVZKHQLQ/LYH79
mode. Or enter the Inputs menu on the Home Screen,
select the desired source from the list and press OK.
Changing Channels and Volume
You can adjust the volume by using the Volume
+/- buttons and change the channel in Live TV mode
by using the Programme +/- buttons on the remote.
English - 8 -
Remote Control
Inserting the Batteries into the Remote
Remove the screw that secures the battery compart-
PHQWFRYHURQWKHEDFNVLGHRIWKHUHPRWHFRQWURO¿UVW
Lift the cover gently. Insert two 1.5V - size AAA bat-
teries. Make sure the (+) and (-) signs match (observe
correct polarity). Do not mix old and new batteries.
Replace only with same or equivalent type. Place the
cover back on. Then screw the cover back on again.
Standby Button
Press and hold the Standby button on the remote
control. 3RZHURႇ dialogue will appear on the screen.
Highlight OK and press the OK button. The TV will
VZLWFKLQWRVWDQGE\PRGH3UHVVEULHÀ\DQGUHOHDVH
to switch the TV into quick standby mode or to switch
on the TV when in quick standby or standby mode.
1. Standby: Quick Standby / Standby / On
2. Numeric buttons: Switches the channel in Live TV
mode, enters a number or a letter in the text box on
the screen
3. Language: Switches among sound modes (analogue
TV), displays and changes audio language (digital TV,
where available)
4. Home: Opens the Home Screen
5. Mute:&RPSOHWHO\WXUQVRႇWKHYROXPHRIWKH79
6. Volume +/-
7. Guide: Displays the electronic programme guide in
Live TV mode
8. Directional buttons: Navigates menus, setting options,
moves the focus or cursor etc., sets record time and
displays the subpages in Live TV-Teletext mode when
pressed Right or Left. Follow the on-screen instructions.
9. OK: Confirms selections, enters sub-menus, views
channel list (in Live TV mode)
10. Back/Return: Returns to previous menu screen, goes
one step back, closes open windows, closes teletext (in
Live TV-Teletext mode)
11. 1HWÀL[/DXQFKHVWKH1HWÀL[DSSOLFDWLRQ
12. Menu: Displays Live TV Settings menu (in Live TV
mode), displays available setting options such as sound
and picture
13. Stop: Stops the media being played
14. Rewind: Moves frames backwards in media such as
movies
15. Record: Records programmes in Live TV mode
16. Coloured Buttons: Follow the on-screen instructions for
coloured button functions
17. Text: Opens and closes teletext (where available in
Live TV mode)
18. Pause: Pauses the media being played, starts timeshift
recording in Live TV mode
Play: Starts to play selected media
19. Fast forward: Moves frames forward in media such
as movies
20. MyButton1: Opens the picture mode setting menu on
available sources
21. YouTube: Launches the YouTube application
22. Exit: Closes and exits from Live TV Settings menus,
closes the Home Screen, exits from any running
application or menu or OSD banner, switches to last
set source
23. Info: Displays information about on-screen content
24. Source: Shows all available broadcast and content
sources, closes the Home Screen and switches to last
set source
25. Programme +/-: Increases/Decreases channel number
in Live TV mode
26. Subtitles:7XUQVVXEWLWOHVRQDQGRႇZKHUHDYDLODEOH

English - 9 -
Initial Setup Wizard
Note: Follow the on-screen instructions to complete the initial
setup process. Use the directional buttons and the OK button
RQWKHUHPRWHWRVHOHFWVHWFRQ¿UPDQGSURFHHG
:KHQWXUQHGRQIRUWKH¿UVWWLPHDZHOFRPHVFUHHQ
will be displayed. Select your language and press
OK. Follow the on-screen instructions to setup your
TV and install channels. The installation wizard will
guide you through the setup process. You can perform
initial setup anytime using the Reset option in the
Settings>Device Preferences menu. You can access
the Settings menu from the Home screen or from the
TV options menu in Live TV mode.
1. Welcome Message and Language Selection
“Welcome” message will be displayed along with
the language selection options listed on the screen.
Select the desired language from the list and press
OK to continue.
2. Country
In the next step select your Country from the list and
press OK to continue.
3. Initial Setup
After the country selection you can start the initial setup
wizard. Highlight Continue and press OK to proceed.
You will not be able go back and change the language
and country once you proceed. If you need to change
your language or country selection after this step, you
will have to switch the TV into standby mode so the
setup process starts from the beginning when you
next switch on the TV. In order to do this, press and
hold the Standby button. A dialogue will be displayed.
Highlight OK and press OK.
4. Search for accessories
A search for accessories will be performed after
the initial setup has started. Follow the on-screen
instructions to pair your remote control (depends on
the model of the remote control) and other wireless
accessories with your TV. Press Back/Return button
to end adding accessories and proceed.
5. Quick Setup
If you didn’t priorly connect your TV to the Internet via
Ethernet a screen will be displayed where you can
transfer your Android phone’s WLAN network and
Google Account to your TV. Highlight Continue and
press OK to proceed. Follow the on-screen instructions
on your TV and your phone to complete the process.
You can also skip this step by selecting Skip option.
Some steps may be skipped depending on the settings
made in this step.
If you did priorly connect your TV to the Internet via
Ethernet a message will be displayed stating that you
are connected. You can choose to continue with wired
connection or change the network. Highlight Change
network and press OK if you want to use wireless
connection instead of wired connection.
6. Network Connection
You will be directed to the next step automatically, if you
connect your TV to internet via Ethernet at this point. If
not, available wireless networks will be searched and
listed on the next screen. Select your WLAN network
from the list and press OK to connect. Enter the
password using the virtual keyboard if the network is
password protected. Select the Other network option
from the list, if the network that you want to connect
has hidden SSID.
If you prefer not to connect to the Internet at this point
you can skip this step by selecting Skip option. You
can connect to internet later using the Network &
Internet menu options in the Settings menu from
the Home Screen or from the TV options menu in
Live TV mode.
This step will be skipped if internet connection has
been established in the previous step.
7. Sign in to your Google account
If connection succeeds, you can sign in to your Google
account on the next screen. You need to be signed in
to a Google account in order to use Google services.
This step will be skipped if no internet connection has
been established in the previous step or if you already
signed in to your Google account in Quick Setup step.
By signing in, you will be able to discover new
apps for videos, music and games on Google Play;
get personalised recommendations from apps like
YouTube; buy or rent the newest movies and shows on
Google Play Movies & TV; access your entertainment
and control your media. Highlight Sign In and press
OK to proceed. You can sign in to your Google account
by entering your e-mail address or phone number and
your password. You can also create a new account.
If you prefer not to sign in to your Google account at this
point you can skip this step by selecting Skip option.
8. Terms of Service
Terms of Service screen will be displayed next. By
continuing, you will agree to the Google Terms of
Service, the Google Privacy Policy and the Google
Play Terms of Service. Highlight Accept and press
OKRQWKHUHPRWHWRFRQ¿UPDQGSURFHHG<RXFDQ
also view Terms of Service, Privacy Policy and
Play Terms of Service on this screen. To display the
content an internet connection is needed. A message
will be displayed mentioning the web site address on
which this information can also be viewed, in case
internet access is not available.
9. Location
On the next screen, you can allow or disallow Google
and third party apps to use your TV’s location informa-
tion. Select YesWRFRQ¿UPDQGSUHVVOK. To skip this
English - 10 -
VWHSZLWKRXWFRQ¿UPDWLRQVHOHFWNo and proceed by
pressing the OK button. You can change this setting
later using the Settings>Device Preferences>Loca-
tion menu on the Home Screen.
10. Help improve Android
Automatically send diagnostic information to Google,
like crash reports and usage data from your device
and apps. This information won't be used to identify
you. Select YesWRFRQ¿UPDQGSUHVVOK. To skip this
VWHSZLWKRXWFRQ¿UPDWLRQVHOHFWNo and proceed by
pressing the OK button. You can change this setting
later using the Settings>Device Preferences>Usage
& Diagnostics menu on the Home Screen.
Information on Google services and some features of
your TV will be displayed next. You can turn on person-
al results for Assistant by choosing the related option
when prompted. Press OK consecutively to proceed.
11. Password
Depending on the country selection you made in the
HDUOLHUVWHSV\RXPD\EHDVNHGWRGH¿QHDSDVVZRUG
(PIN) at this point. Press OK to proceed. The selected
PIN cannot be 0000. This PIN will be required in order
to access some menus, contents or to release locked
channels, sources etc. You will have to enter it if you
are asked to enter a PIN for any menu operation later.
12. Parental controls
Depending on your earlier selections you may be asked
to set your parental control preference in the next step.
You can block programmes according to their age
rating information by selecting one of the related options
RU\RXFDQWXUQWKLVIXQFWLRQRႇE\VHOHFWLQJWKH2ႇ
option. Highlight your selection and press OK or Right
directional button to continue.
13. Select TV Mode
In the following step of the initial setup, you can set
the TV’s operation mode either as Home or as Store.
Store RSWLRQZLOOFRQ¿JXUH\RXU79¶VVHWWLQJVIRUVWRUH
environment. This option is intended only for store
use. It is recommended to select Home for home use.
14. Chromecast built-in always available
Select your chromecast availability preference. If set as
On your TV will be detected as a Google Cast device
and allow Google Assistant and other services to wake
your TV up to respond to Cast commands, even when
RQVWDQGE\PRGHDQGWKHVFUHHQLVRႇ
15. Tuner Mode
Note: If you don’t want to perform a tuner scan, select one of
the available options anyway. You can skip the scan at some
later stage of the installation wizard. If you skip this step you
can perform a channel search later using the related Channels
menu options.
The next step is the selection of the tuner mode. Select
your tuner preference to install channels for Live TV
function. Antenna/Aerial, Cable and Satellite options
are available. Highlight the option that corresponds to
your environment and press OK or Right directional
button to proceed.
Antenna/Aerial
If Antenna/Aerial option is selected, the TV will search
for digital terrestrial and analogue broadcasts. On the
next screen highlight Scan option and press OK to
start the search or select Skip Scan to continue without
performing a search.
Note: If the country selected does not have analogue
broadcasts, the analogue search option may not be available.
Cable
If Cable option is selected, the TV will search for
digital cable and analogue broadcasts. If any, available
operator options will be listed on the Select Operator
screen. Otherwise this step will be skipped. You
can select only one operator from the list. Highlight
the desired operator and press OK or the Right
directional button to proceed. On the next screen
select Scan option to start a search or select Skip
Scan to continue without performing a search. If Scan
LVVHOHFWHG D FRQ¿JXUDWLRQ VFUHHQ ZLOO EH GLVSOD\HG
next. Scan Mode, Frequency(KHz), Modulation,
Symbol Rate(Ksym/s), Network ID options may need
to be set. To perform a full scan set the Scan Mode as
Full/Advance if available. Depending on the selected
operator and/or Scan Mode some options may not be
available to be set.
Note: If the country selected does not have analogue
broadcasts, the analogue search option may not be available.
Once you are done with setting available options,
press the Right directional button to proceed. The TV
will start to search available broadcasts.
Satellite
If Satellite option is selected, Satellite Type screen
will be displayed next. Preferred Satellite and General
Satellite options will be available. Select one and press
OK to proceed.
Note: Preferred Satellite and General Satellite options may
not be available depending on the selected country. In this case
the '9%6 &RQ¿JXUDWLRQ 6HWWLQJ screen will be displayed
after selecting the tuner mode as Satellite.
If Preferred Satellite option is selected, next screen
will be Select Operator screen. You can select only
one operator from the list. Highlight the desired
operator and press OK or the Right directional button
to proceed. Some of the following options may be
preset depending on the selected operator in this
step. Check the parameters before proceeding and
adjust if necessary.
7KH¿UVWRIWKH'9%6&RQ¿JXUDWLRQ6HWWLQJ screens
will be displayed next. First antenna type should be set.
Direct, Single Cable, DiSEqC 1.0 and DiSEqC 1.1
options are available. Highlight the antenna type that

English - 11 -
corresponds to your satelite system and press OK or
the Right directional button to proceed to the next step.
Depending on the country and antenna type selections
you made in the earlier steps of the initial setup
process, Load Preset List screen may be displayed
next. Highlight Load Preset List and press OK or the
Right directional button to proceed with the SatcoDX
installation. You can also skip this step by selecting
Skip option.
After selecting the antenna type and preset list
LQVWDOODWLRQSUHIHUHQFH FRQ¿JXUHWKHSDUDPHWHUV RQ
the second '9%6 &RQ¿JXUDWLRQ 6HWWLQJ screen
according to your environment. You may be able to
VHWXSGLႇHUHQWVDWHOOLWHVGHSHQGLQJRQWKHVHOHFWHG
antenna type and operator in the previous steps. The
VDWHOOLWHRSWLRQVDUHQDPHGGLႇHUHQWO\GHSHQGLQJRQWKH
antenna type. Direct, Satellite Position or DiSEqC
options may be available. Highlight the desired satellite
option and press OK. Then select the satellite for that
option from the list of available satellites. After you
FRPSOHWHGWKHFRQ¿JXUDWLRQFKDQJHVSUHVVWKHRight
directional button to proceed.
If Load Preset List option is selected in the previous
step next steps will be skipped and the preset channel
list installation will start. If the correct satellite has not
been selected for SatcoDX installation, a warning
dialogue will be displayed on the screen. The satellite/s
that can be selected will be listed. Press OK to close
the dialogue and then set the satellite accordingly.
Select Operation screen will be displayed next. Select
Scan and press OK or the Right directional button
WRSURFHHGZLWK WKH VFDQQLQJ FRQ¿JXUDWLRQV6HOHFW
Skip Scan to proceed without performing a scan and
complete the initial setup.
DVBS Scan Configure screen will be displayed
next if Scan option is selected. Following options
will be available: Scan Mode and Channels. You
can choose to perform a full scan or a network scan.
Set the Scan Mode accordingly. If you are going to
perform a network scan, make sure that you have
selected the correct transponder under the Reference
Transponder option on the second of the DVBS
Configuration Setting screens or adjusted the
Frequency, Symbol Rate (Ksym/s) and Polarisation
parameters accurately using the 8VHU'H¿QHG option.
You may not be able to change the Scan mode setting
depending on the previous selections. If the Channels
option is set as Free encrypted channels will not be
installed. Additional options may also be available
GHSHQGLQJRQWKHVHOHFWHGRSHUDWRUFRQ¿JXUHWKHVH
settings according to your preferences. Once you are
done with setting the available options, press the Right
directional button to start scan while Scan Mode or
Channels is highlighted.
While the search continues you can press the Back/
Return button twice, highlight Skip Scan and press
OK or Right directional button to stop the search. The
channels that have already been found will be stored
in the channel list.
When the initial setup is completed a message will be
displayed. Press OKWR¿QLVKWKHVHWXS
You will be asked to give your consent to the
collection of your usage data. Read the text on the
screen for detailed information. Highlight Accept and
press OK to give your consent and proceed. To skip
without giving your consent, select Skip. You can
change this setting later using the Settings>Device
Preferences>Manufacturer Usage & Diagnostics
menu on the Home Screen.
Home Screen will be displayed. You can press the
Exit button on the remote or highlight Live TV app
and press OK to switch to Live TV mode and watch
TV channels.
Home Screen
7RHQMR\WKHEHQH¿WVRI\RXU$QGURLG79\RXU79PXVW
be connected to the Internet. Connect the TV to a
home network with a high-speed Internet connection.
You can connect your TV wirelessly or wired to your
modem/router. Refer to the Network & Internet
and Connecting to the Internet sections for further
information on how to connect your TV to the internet.
The Home menu is the centre of your TV. Press the
Home button to display Home Screen. From the
Home menu you can start any application, switch to a
TV channel, watch a movie or switch to a connected
device. Depending on your TV setup and your country
selection in the initial setup the Home menu may
FRQWDLQGLႇHUHQWLWHPV
The available options of the Home Screen are posi-
tioned in rows. To navigate through the Home Screen
options use the directional buttons on the remote.
Apps, YouTube, Google Play Movies & TV, Google
Play Music and Google Play related rows and rows of
the applications you have installed might be available.
Select a row then move the focus to the desired item
in the row. Press OK button to make a selection or to
enter a sub-menu.
On the upper left of the screen, search tools will be
located. You can choose either to type a word to start
a search via the virtual keyboard or try voice search
option if your remote has a built-in microphone.
Move the focus to the desired option and press OK
to proceed.
On the upper right of the screen, 1RWL¿FDWLRQV, Inputs,
Network & Internet (will be named as Connected or
Not Connected according to the current connection
status), Settings and the current time will be displayed.
<RX FDQ FRQ¿JXUH\RXU GDWH DQG WLPH SUHIHUHQFHV
English - 12 -
using the Date & time menu options from the
Settings>Device Preferences menu.
First row will be the Apps row. Live TV and Multi
Media Player apps will be available alongside with
other apps. Highlight Live TV and press OK to switch
to Live TV mode. If the source was set to an option
other than TV previously, press the Source button and
set as TV in order to watch live TV channels. Highlight
Multi Media Player and press OK to browse the
connected USB devices or media servers and play/
display the installed media content on the TV. The
DXGLR¿OHVFDQEHSOD\HGWKURXJKWKHVSHDNHUVRIWKH
TV or through the speaker systems connected to the
79<RXFDQFRQ¿JXUH\RXUVRXQGRXWSXWSUHIHUHQFH
from the Speakers option in the Settings>Device
Preferences>Sound menu. To browse the internet,
you will need an internet browser application. Make a
VHDUFKRUODXQFKWKH*RRJOH3OD\DSS¿QGDEURZVHU
and download it.
Live TV Mode Menu Content
6ZLWFKWKH79WR/LYH79PRGH¿UVWDQGWKHQSUHVV
the Menu button on the remote to see Live TV menu
options. To switch to Live TV mode you can either press
the Exit button or highlight the Live TV app from the
Apps row and press OK on the Home Screen.
Channels
Add to My Favourites: Add the channel that is
currently being watched to the previously selected
favourite list.
Programme Guide: Open the electronic programme
guide. Refer to the Programme Guide section for
detailed information.
New Channels Available: Start a search for new
channels. Select the channel source application
or tuner. Then make the settings according to your
environment and preferences if necessary. You
can use the Channel menu options to search for
broadcast channels. Refer to the Channel section
for more information. When complete highlight Done
and press OK.
TV Options
Source: Display the list of input sources. Select the
desired one and press OK to switch to that source.
Picture Mode: Set the picture mode to suit your
preference or requirements. Picture mode can be
set to one of these options: User, Standard, Vivid,
Sport, Movie and Game. You can use User mode to
create customised settings. Go to Settings>Device
Preferences>Picture for detailed setting options.
Display Mode: Set the aspect ratio of the screen.
6HOHFWRQH RI WKHSUHGH¿QHG RSWLRQV DFFRUGLQJWR
your preference.
Speakers: To hear the TV audio from the connected
compatible audio device set as External Audio
System. Set as TV Speakers to use the speakers of
your TV for sound output.
Power
Sleep Timer: 'H¿QHDQLGOHWLPHDIWHUZKLFK\RX
want your TV to enter sleep mode automatically.
3LFWXUHRႇ 6HOHFW WKඈV RSWඈRQDQG SUHVV OK to
WXUQWKHVFUHHQRႇ3UHVVDEXWWRQRQWKHUHPRWH
or on the TV to turn the screen on again. Note that
you can not turn the screen on via the Volume +/-,
Mute and Standby buttons. These buttons will
function normally.
1R6LJQDO$XWR3RZHU2ႇ Set the behaviour of
the TV, when no signal is detected from the currently
set input source. 'H¿QHDWLPHDIWHUZKLFK\RXZDQW
\RXU79WRWXUQLWVHOIRႇRUVHWDV2ႇ to disable.
CI Card: Display available menu options of the CI card
in use. This item may not be available depending on
the input source setting.
Advanced Options
Audio Language: Set your language preference for
audio. This item may not be available depending on
the input source setting.
Blue Mute:7XUQWKLVIXQFWLRQRQRႇDFFRUGLQJWR
your preference. When turned on, blue background
will be displayed on the screen when no signal is
available.
Default Channel: Set your default startup channel
preference. When the Select Mode is set as
User Select, Show Channels option will become
available. Highlight and press OK to see channel
list. Highlight a channel and press OK to make a
selection. Selected channel will be displayed, every
time the TV is turned back on from any standby
mode. If the Select Mode is set as Last Status, the
last watched channel will be displayed.
Interaction Channel: Turn the Interaction Channel
IXQFWLRQRQRURႇ7KLVIHDWXUHLVXVHIXOLQWKH8.
and Ireland only.
MHEG PIN Protection: Turn the MHEG PIN
SURWHFWLRQIXQFWLRQRQRURႇ7KLVVHWWLQJHQDEOHVRU
disables access some of the MHEG applications.
Disabled applications can be released by entering
the right PIN. This feature is useful in the UK and
Ireland only.
HBBTV Settings
HBBTV Support: Turn the HBBTV function on
RURႇ
Do Not Track: Set your preference regarding the
tracking behaviour for HBBTV services.
Cookie Settings: Set your cookie setting
preference for HBBTV services.

English - 13 -
Persistent Storage: Turn the Persistent Storage
IXQFWLRQRQ RU Rႇ,I VHW DVOn cookies will be
stored with an expiry date in the persistent
memory of the TV.
Block Tracking Sites: Turn the Block Tracking
6LWHVIXQFWLRQRQRURႇ
Device ID:7XUQWKH'HYLFH,'IXQFWLRQRQRURႇ
Reset Device ID: Reset the device ID for HBBTV
VHUYLFHV&RQIÕࡆUPDWÕࡆon dialogue will be displayed.
Press OK to proceed, Back to cancel.
Subtitle
Analogue Subtitle: Set this option as 2ႇ, On
or Mute. If Mute option is selected, the analogue
subtitle will be displayed on the screen but the
speakers will be muted simultaneously.
Digital Subtitle: Set this option as 2ႇ or On.
Subtitle Tracks: Set your subtitle track preference,
if any available.
Digital Subtitle Language: Set one of the listed
ODQJXDJHRSWLRQVDV¿UVWGLJLWDOVXEWLWOHODQJXDJH
preference.
Second Digital Subtitle Language: Set one
of the listed language options as second digital
subtitle language preference. If the selected
language in the Digital Subtitle Language option
is not available, the subtitles will be displayed in
this language.
Subtitle Type: Set this option as Normal or
Hearing Impaired. If Hearing Impaired option
is selected, it provides subtitle services to deaf
and hard of hearing viewers with additional
descriptions.
Teletext
Digital Teletext Language: Set the teletext
language for digital broadcasts.
Decoding Page Language: Set the decoding
page language for teletext display.
BISS Key: “Click To Add Biss Key” message will
be displayed. Press OK button to add a biss key.
Frequency, Symbol Rate (KSym/s), Polarisation,
Programme ID and CW Key parameters will be
available to be set. Once you are done with the
settings highlight Save Key and press OK to
save and add the biss key. This option will not be
available if the Channel Installation Mode under
the Settings>Channel menu is not set as Preferred
Satellite, General Satellite or Satellite. Available
RSWLRQVZLOOGLႇHUGHSHQGLQJRQWKHselected country
during the initial setup process.
Auto Sleep: 'H¿QH DQ LGOH WLPHDIWHU ZKLFK \RX
want your TV to enter sleep mode automatically. 4
Hours, 6 Hours and 8 Hours options are available.
Set as Never to disable.
System Information: Display detailed system
information on the current channel such as Signal
Level, Signal Quality, Frequency etc.
Version Info: Display system information such as
Model Name and Version.
Settings: Refer to Settings section for detailed
information.
Record
Record List: The recordings will be displayed if any
available. Highlight a recording of your choice and
press the Yellow button to delete it or press the Blue
button to view detailed information. You can use Red
and Green buttons to scroll the page up and down.
Device Info: Connected USB storage devices will
be displayed. Highlight the device of your choice and
press OK to see available options.
Set TimeShift: Tag the selected USB storage
device or a partition on it for time shift recording.
Set PVR: Tag the selected USB storage device or
a partition on it for PVR.
Format: Format the selected USB storage
device. Refer to USB Recording section for more
information
Speed Test: Start a speed test for the selected USB
storage device. The test result will be displayed
when completed.
Schedule List: Add reminders or record timers using
the Schedule List menu.
Time Shift Mode: Enable or disable timeshift recording
feature. Refer to USB Recording section for more
information.
Settings
You can access the Settings menu from the Home
Screen or from the TV options menu in Live TV mode.
Network & Internet
<RXFDQFRQ¿JXUH\RXU79¶VQHWZRUN VHWWLQJVXVLQJ
the options of this menu. You can also highlight the
Connected/Not Connected icon on the Home screen
and press OK to access this menu.
Wi-Fi: Turn the wireless LAN (WLAN) function on
DQGRႇ
Available networks
When the WLAN function is turned on, available
wireless networks will be listed. Highlight See all and
press OK to see all networks. Select one and press OK
to connect. You may be asked to enter a password to
connect to the selected network, in case the network
English - 14 -
is password protected. Additionally you can add new
networks by using the related options.
Other options
Add new network: Add networks with hidden SSID’s.
Scanning always available: You can let the location
service and other apps scan for networks, even when
:/$1IXQFWLRQ LVWXUQHGRႇ3UHVV OK to turn it on
DQGRႇ
Wow:7XUQWKLVIXQFWLRQRQDQGRႇ7KLVIXQFWLRQDOORZV
you to turn on or awaken your TV via wireless network.
Wol:7XUQWKLVIXQFWLRQRQDQGRႇ7KLVIXQFWLRQDOORZV
you to turn on or awaken your TV via network.
Ethernet
Connected/Not connected: Displays the status of
the internet connection via Ethernet, IP and MAC
addresses.
Proxy settings: Set a HTTP proxy for browser manu-
ally. This proxy may not be used by other apps.
IP settings:&RQ¿JXUH\RXU79¶V,3VHWWLQJV
Channel
Channels
Options of this menu may change or become inac-
tive depending on the Channel Installation Mode
selection.
Channel Installation Mode - Antenna
Automatic Channel Search: Start a scan for analogue
and digital channels. You can press the Back button to
cancel the scan. The channels that have already been
found will be stored in the channel list.
Update Scan: Search for updates. Previously added
channels will not be deleted, but any newly found
channels will be stored in the channel list.
Analogue Manual Scan: Start a manual scan for
analogue channels. Enter the Start Frequency and
then select Scan Up or Scan Down. When a channel
is found the scan will be completed and the found
channel will be stored in the channel list.
Single RF Scan: Select the RF Channel by using
the Right/Left directional buttons. Signal Level and
Signal Quality of the selected channel will be shown.
Press OK to start scan on the selected RF channel.
The found channels will be stored in the channel list.
Manual Service Update: Start a service update
manually.
LCN: Set your preference for LCN. LCN is the Logical
Channel Number system that organizes available
broadcasts in accordance with a recognizable channel
number sequence (if available).
Channel Scan Type: Set your scan type preference.
Channel Store Type: Set your store type preference.
Favourite Network Select: Select your favourite
network. This menu option will be active, if more than
one network is available.
Channel Skip: Set channels to be skipped when
switching the channels via Programme +/- buttons
on the remote. Highlight the desired channel/s on the
list and press OK to select/unselect.
Channel Swap: Replace the positions of the two
selected channels in the channel list. Highlight the
desired channels on the list and press OK to select.
When the second channel is selected, the position of
this channel will be replaced with the position of the
¿UVWVHOHFWHGFKDQQHO<RXVKRXOGVHWWKHLCN option
to 2ႇ or Default in order to enable this feature.
Channel Move: Move a channel to the position of
another channel. Highlight the channel you want to
move and press OK to select. Then do the same for a
second channel. When the second channel is selected,
WKH¿UVWVHOHFWHGFKDQQHOZLOOEHPRYHGWRWKHSRVLWLRQ
of that channel. You should set the LCN option to 2ႇ
or Default in order to enable this feature.
Channel Edit: Edit channels in the channel list. Edit the
name and channel number of the selected channel and
display Network Name, Frequency, Colour System
and Sound System information related to that channel
if available. Depending on the channel other options
may also be editable. You can press the Blue button
to delete the highlighted channel.
Analogue Channel Fine-tune: Fine-tune an analogue
channel. A list of available analogue channels will be
displayed. Select the desired one from the list and
press OK button. Then change the frequency of the
channel by pressing Left/Right directional buttons.
Press OK to store the new frequency for that channel.
Press Back to cancel. This item may not be visible,
depending on whether or not the last watched channel
was analogue.
Clear Channel List: Delete all channels stored in the
channel list of the selected channel installation mode.
$GLDORJXHZLOOEHGLVSOD\HGIRUFRQ¿UPDWLRQ+LJKOLJKW
OK and press OK button to proceed. Highlight Cancel
and press OK to cancel.
Channel Installation Mode - Cable
Automatic Channel Search: Start a scan for analogue
and digital cable channels. If available, operator op-
tions will be listed. Select the desired one and press
OK. Scan Mode, Channel Scan Type, Frequency
and Network ID options may be available. The options
may vary depending on the operator and the Scan
Mode selections. Set the Scan Mode as Full if you
don’t know how to set up other options. Highlight Scan
and press OK to start the scan. You can press the Back
button to cancel the scan. The channels that have
already been found will be stored in the channel list.

English - 15 -
Single RF Scan: Enter the Frequency value. Signal
Level and Signal Quality of the selected Frequency
will be shown. Highlight the Scan option and press
OK to start scan. The found channels will be stored
in the channel list.
LCN: Set your preference for LCN. LCN is the Logical
Channel Number system that organizes available
broadcasts in accordance with a recognizable channel
number sequence (if available).
Channel Scan Type: Set your scan type preference.
Channel Store Type: Set your store type preference.
Favourite Network Select: Select your favourite net-
work. This menu option will be active, if more than one
network is available. This option may not be available
depending on the selected country during the initial
setup process.
Channel Skip: Set channels to be skipped when
switching the channels via Programme +/- buttons
on the remote. Highlight the desired channel/s on the
list and press OK to select/unselect.
Channel Swap: Replace the positions of the two
selected channels in the channel list. Highlight the
desired channels on the list and press OK to select.
When the second channel is selected, the position of
this channel will be replaced with the position of the
¿UVWVHOHFWHGFKDQQHO<RXVKRXOGVHWWKHLCN option
to 2ႇ or Default in order to enable this feature.
Channel Move: Move a channel to the position of
another channel. Highlight the channel you want to
move and press OK to select. Then do the same for a
second channel. When the second channel is selected,
WKH¿UVWVHOHFWHGFKDQQHOZLOOEHPRYHGWRWKHSRVLWLRQ
of that channel. You should set the LCN option to 2ႇ
or Default in order to enable this feature.
Channel Edit: Edit channels in the channel list. Edit
the name and channel number of the selected channel
and display Network Name, Frequency, Colour Sys-
tem, Sound System, Modulation and Symbol Rate
information related to that channel. Depending on the
channel other options may also be editable. You can
press the Blue button to delete the highlighted channel.
Analogue Channel Fine-tune: Fine-tune an analogue
channel. A list of available analogue channels will be
displayed. Select the desired one from the list and
press OK button. Then change the frequency of the
channel by pressing Left/Right directional buttons.
Press OK to store the new frequency for that channel.
Press Back to cancel. This item may not be visible,
depending on whether or not the last watched channel
was analogue.
Clear Channel List: Delete all channels stored in the
channel list of the selected channel installation mode.
$GLDORJXHZLOOEHGLVSOD\HGIRUFRQ¿UPDWLRQ+LJKOLJKW
OK and press OK button to proceed. Highlight Cancel
and press OK to cancel.
Channel Installation Mode - Preferred/General
Satellite/Satellite
Satellite Re-scan: Start a satellite scan beginning
with the operator selection screen for the Preferred
Satellite channel installation mode or with the satellite
selection screen for the General Satellite or Satellite
channel installation mode. When this scanning option
LVSUHIHUUHGVRPHVFDQQLQJFRQ¿JXUDWLRQVZLOOQRWEH
available and thus the preferences you made during
the initial setup process may not be changed.
Satellite Add: Add satellite and perform a satellite
scan.
Satellite Update: Search for any updates by repeating
the previous scan with the same settings. You will also
EHDEOHWRFRQ¿JXUHWKHVHVHWWLQJVEHIRUHWKHVFDQ If
Channel Installation Mode is set to Preferred Satel-
liteWKLVRSWLRQPD\EHQDPHGGLႇHUHQWO\GHSHQGLQJRQ
the available services. Highlight the satellite and press
OKEXWWRQWRFRQ¿JXUHGHWDLOHGVDWHOOLWHSDUDPHWHUV
Press the Right directional button to proceed.
Satellite Manual Tuning: Start a manual satellite scan.
Favourite Network Select: Select your favourite net-
work. This menu option will be active, if more than one
network is available. This option may not be available
depending on the selected country during the initial
setup process.
Channel Skip: Set channels to be skipped when
switching the channels via Programme +/- buttons
on the remote. Highlight the desired channel/s on the
list and press OK to select/unselect.
Channel Swap: Replace the positions of the two
selected channels in the channel list. Highlight the
desired channels on the list and press OK to select.
When the second channel is selected, the position of
this channel will be replaced with the position of the
¿UVWVHOHFWHGFKDQQHO
Channel Move: Move a channel to the position of
another channel. Highlight the channel you want to
move and press OK to select. Then do the same for a
second channel. When the second channel is selected,
WKH¿UVWVHOHFWHGFKDQQHOZLOOEHPRYHGWRWKHSRVLWLRQ
of that channel.
Channel Edit: Edit channels in the channel list. Edit the
name and channel number of the selected channel and
display Network Name, Frequency, Colour System
and Sound System information related to that channel
if available. Depending on the channel other options
may also be editable. You can press the Blue button
to delete the highlighted channel.
Clear Channel List: Delete all channels stored in the
channel list of the selected channel installation mode.
$GLDORJXHZLOOEHGLVSOD\HGIRUFRQ¿UPDWLRQ+LJKOLJKW
OK and press OK button to proceed. Highlight Cancel
and press OK to cancel.
English - 16 -
Note: Some options may not be available and appear as
grayed out depending on the operator selection and operator
related settings.
Channel Installation Mode
Set this option as Antenna, Cable, Preferred Satel-
lite, General Satellite or Satellite.
Auto Channel Update
7XUQWKHDXWRFKDQQHOXSGDWHIXQFWLRQRQRURႇ
Channel Update Message
7XUQWKHFKDQQHOXSGDWHPHVVDJHIXQFWLRQRQRURႇ
This item may not be visible, depending on the Chan-
nel Installation Mode selection.
Parental Controls
7R HQWHU WKLV PHQX 3,1 VKRXOG EH HQWHUHG ¿UVW 'HIDXOW
PIN is set to 1234,I\RXKDYHGH¿QHGD QHZ 3,1 DIWHUWKH
LQLWLDOVHWXSSURFHVVXVHWKH3,1WKDW\RXKDYHGH¿QHG6RPH
options may not be available or vary depending on the country
selection during the initial setup.
Channels Blocked: Select channel/s to be blocked
from the channel list. Highlight a channel and press
OK to select/unselect. To watch a blocked channel PIN
VKRXOGEHHQWHUHG¿UVW
Programme Restrictions: Block programmes accord-
ing to the age rating information that is being broad-
FDVWHGZLWKWKHP<RXFDQWXUQRQRURႇUHVWULFWLRQV
set rating systems, restriction levels and age limits
using the options of this menu.
Inputs Blocked: Prevent access to the selected input
source content. Highlight the desired input option and
press OK to select/unselect. To switch to a blocked
input source PINVKRXOGEHHQWHUHG¿UVW
Change PIN: Change the default PIN. Highlight this
option and press OK. You will need to enter the old
3,1¿UVW7KHQQHZ3,1HQWU\VFUHHQZLOOEHGLVSOD\HG
(QWHUWKHQHZ3,1WZLFHIRUFRQ¿UPDWLRQ
Audio Channel
Set the audio channel preference, if available. This
item may not be visible, depending on whether or not
the last watched channel was analogue.
Audio Language
6HWRQHRIWKHOLVWHGODQJXDJHRSWLRQVDV¿UVWDXGLR
language preference. This item may not be visible,
depending on whether or not the last watched channel
was digital.
Second Audio Language
Set one of the listed language options as second
audio language preference. If in the Audio Language
setting selected language option is not supported, this
language preference will be considered. This item may
not be visible, depending on whether or not the last
watched channel was digital.
Open Source Licenses
Display Open Source Software license information.
Version
Displays system version number.
Accounts & Sign In
Google: This option will be available if you have signed
LQWR\RXU*RRJOHDFFRXQW<RXFDQFRQ¿JXUH\RXUGDWD
syncing preferences or remove your registered account
on the TV. Highlight a service listed in the Choose
synced apps section and press OK to enable/disable
data sync. Highlight Sync now and press OK to sync
all enabled services at once.
Add account: Add a new one to available accounts
by signing in to it.
Apps
Using the options of this menu, you can manage the
apps on your TV.
Recently opened apps
You can display recently opened apps. Highlight See
all apps and press OK to see all the apps installed
on your TV. The amount of storage space that they
needed will also be displayed. You can see the version
of the app, open or force to stop the running of the app,
uninstall a downloaded app, see the permissions and
WXUQWKHPRQRႇWXUQRQRႇWKHQRWL¿FDWLRQVFOHDUWKH
data and cache etc. Highlight an app and press OK to
see available options.
Permissions
Manage the permissions and some other features
of the apps.
App permissions: The apps will be sorted by
permission type categories. You can enable disable
permissions for the apps from within these categories.
Special app access: &RQ¿JXUH VRPH DSSIHDWXUHV
and special permissions.
Security & restrictions: Using the options of this
menu;
• You can allow or restrict installation of apps from
sources other than the Google Play Store.
• Set the TV to disallow or warn before installation of
apps that may cause harm.
Device Preferences
About: Check for system updates, change the device
name, restart the TV and display system information
such as network addresses, serial numbers, versions
etc. You can also display legal information, manage
advertisings, display your advertising ID, reset it and
WXUQRQRႇ WKH SHUVRQDOLVHGDGYHUWLVLQJV EDVHG RQ
your interests.

English - 17 -
Netflix ESN: Display your ESN number. ESN
QXPEHULVDQXQLTXH,'QXPEHUIRU1HWÀL[FUHDWHG
especially to identify your TV.
Date & time: Set the date and time options of your
TV. You can set your TV to automatically update
the time and date data over the network or over the
broadcasts. Set corresponding to your environment
and preference. Disable by setting as 2ႇ if you want
to manually change the date or time. Then set date,
time, time zone and hour format options.
Timer
Power On Time Type: Set your TV to turn on by
itself. Set this option as On or Once to enable a
power on timer to be set, set as 2ႇ to disable. If
set as Once the TV will turn on only once at the
GH¿QHGWLPHLQAuto Power On Time option below.
Auto Power On Time: Available if the Power On
Time Type is enabled. Set the desired time for your
TV to come on from standby using the directional
buttons and press OK to save the new set time.
3RZHU2ႇ7LPH7\SH6HW\RXU79WRWXUQRႇE\
itself. Set this option as On or Once to enable a
SRZHURႇWLPHUWREHVHWVHWDV2ႇ to disable. If
set as OnceWKH79 ZLOOWXUQRႇRQO\ RQFHDWWKH
GH¿QHGWLPHLQ$XWR3RZHU2ႇ7LPH option below.
$XWR3RZHU2ႇ7LPHAvailable if the 3RZHU2ႇ
Time Type is enabled. Set the desired time for your
TV to go to standby using the directional buttons and
press OK to save the new set time.
Language: Set your language preference.
Keyboard: Select your keyboard type and manage
keyboard settings.
Inputs: Show or hide an input terminal, change the
ODEHOIRUDQLQSXWWHUPLQDODQGFRQ¿JXUHWKHRSWLRQV
for HDMI CEC(Consumer Electronic Control) function
and display the CEC device list.
Power
Sleep Timer: 'H¿QHDQLGOHWLPHDIWHUZKLFK\RX
want your TV to enter sleep mode automatically.
3LFWXUHRႇ 6HOHFW WKඈVRSWඈRQ DQG SUHVVOK to
WXUQWKHVFUHHQRႇ3UHVVDEXWWRQRQWKHUHPRWH
or on the TV to turn the screen on again. Note that
you can not turn the screen on via the Volume +/-,
Mute and Standby buttons. These buttons will
function normally.
1R6LJQDO$XWR3RZHU2ႇ Set the behaviour of
the TV, when no signal is detected from the currently
set input source. 'H¿QHDWLPHDIWHUZKLFK\RXZDQW
\RXU79WRWXUQLWVHOIRႇRUVHWDV2ႇ to disable.
Picture
Picture Mode: Set the picture mode to suit your
preference or requirements. Picture mode can be
set to one of these options: User, Standard, Vivid,
Sport, Movie and Game. You can use User mode
to create customised settings.
Dolby Vision Modes: If Dolby Vision content is detected
Dolby Vision Dark and 'ROE\9LVLRQ%ULJKW picture mode
options will be available instead of other picture modes.
Backlight, Brightness, Contrast, Colour, Hue,
Sharpness settings will be adjusted according to
the selected picture mode. If one of these settings
is changed manually, Picture Mode option will be
changed to User, if not already set as User.
'ROE\9LVLRQ1RWL¿FDWLRQ 6HW\RXUQRWL¿FDWLRQDS-
pearance preference for Dolby Vision content. When
turned on, Dolby Vision logo will be displayed on
the screen when Dolby Vision content is detected.
Auto Backlight: Set your auto backlight preference.
2ႇ, Low, Middle and Eco options will be available.
Set as 2ႇ to disable.
Backlight: Adjust the backlight level of the screen
manually. This item will not be available if the Auto
Backlight is not set as 2ႇ.
Brightness: Adjust the brightness value of the
screen.
Contrast: Adjust the contrast value of the screen.
Colour: Adjust the colour saturation value of the
screen.
Hue: Adjust the hue value of the screen.
Sharpness: Adjust the sharpness value for the
objects displayed on the screen.
Gamma: Set your gamma preference. Dark, Middle
and Bright options will be available.
Colour Temperature: Set your colour temperature
preference. User, Cool, Standard and Warm op-
tions will be available. You can adjust red, green and
blue gain values manually. If one of these values
is changed manually, Colour Temperature option
will be changed to User, if not already set as User.
Display Mode: Set the aspect ratio of the screen.
6HOHFWRQHRIWKHSUHGH¿QHGRSWLRQVDFFRUGLQJWR
your preference.
HDR:7XUQWKH+'5IXQFWLRQRQRURႇThis item will
be available if HDR content is detected.
Advanced Video
DNR: Dynamic Noise Reduction (DNR) is the
process of removing noise from digital or analogue
signal. Set your DNR preference as Low, Medi-
um, Strong, Auto RUWXUQLWRႇE\VHWWLQJDV2ႇ.
MPEG NR: MPEG Noise Reduction cleans up
block noise around outlines and noise on the back-
ground. Set your MPEG NR preference as Low,
Medium, StrongRUWXUQLWRႇE\VHWWLQJDV2ႇ.
Adaptive Luma Control: Adaptive Luma control
adjusts contrast settings globally according to
content histogram in order to provide deeper black
English - 18 -
and brighter white perception. Set your Adaptive
Luma Control preference as Low, Medium,
StrongRUWXUQLWRႇE\VHWWLQJDV2ႇ.
Local Contrast Control: Local contrast control
GLYLGHVHDFKIUDPHWRGH¿QHGVPDOOUHJLRQVDQG
provides ability to apply independent contrast set-
WLQJIRUHDFKUHJLRQ7KLVDOJRULWKPLPSURYHV¿QH
details and provides better contrast perception.
It makes higher depth impression by enhancing
dark and bright areas without any detail loss. Set
your Local Contrast Control preference as Low,
Medium, HighRUWXUQLWRႇE\VHWWLQJDV2ႇ.
DI Film Mode: It is the function for 3:2 or 2:2
FDGHQFHGHWHFWLRQ IRU ISV ¿OP FRQWHQWV DQG
LPSURYHVWKHVLGHHႇHFWV OLNH LQWHUODFLQJ HႇHFW
or judder) which are caused by these pull down
methods. Set your DI Film Mode preference as
Auto or WXUQLWRႇE\VHWWLQJDV2ႇ. This item will
not be available if Game Mode is turned on.
Blue Stretch: Human eye perceives cooler whites
as brighter white, Blue Stretch feature changes
White balance of mid-high grey levels to cooler
colour temperature. Turn the Blue Stretch function
RQRURႇ
Game Mode: Game mode is the mode which cuts
down some of the picture processing algorithms
to keep up with video games that have fast frame
rates. 7XUQWKH*DPH0RGHIXQFWLRQRQRURႇ
HDMI RGB Range: This setting should be ad-
justed according to input RGB signal range on
HDMI source. It can be limited range (16-235)
or full range (0-255). Set your HDMI RGB range
preference. Auto, Full and Limit options will be
available. This item will not be available, if the
input source is not set as HDMI.
Colour Tuner: Colour saturation, hue, brightness
can be adjustable for red, green, blue, cyan, ma-
JHQWD\HOORZDQGÀHVKWRQHVNLQWRQHIRUKDYLQJ
more vivid or more natural image. Set the Hue,
Colour, Brightness, Offset and Gain values
manually. Highlight Enable and press OK to turn
this function on.
11 Point White Balance Correction: White bal-
ance feature calibrates TV’s colour temperature in
detailed grey levels. By visually or measurement,
grey scale uniformity can be improved. Adjust the
strength of the Red, Green, Blue colours and Gain
value manually. Highlight Enable and press OK to
turn this function on.
Reset to Default: Reset the video settings to factory
default settings.
Note: Depending on the currently set input source some menu
options may not be available.
Sound
System Sounds: System sound is the sound
played when navigating or selecting an item on the
TV screen. Highlight this option and press OK to
WXUQWKLVIXQFWLRQRQRURႇ
Sound Style: For easy sound adjustment, you
can select a preset setting. User, Standard, Viv-
id, Sport, Movie, Music or News options will be
available. Sound settings will be adjusted according
to the selected sound style. Some other sound
options may become unavailable depending on
the selection.
Balance: Adjust the left and right volume balance
for speakers and headphones.
Equaliser Detail: Adjust the equaliser values ac-
cording to your preferences.
Speakers: To hear the TV audio from the connected
compatible audio device set as External Audio
System. Set as TV Speakers to use the speakers
of your TV for sound output.
Digital Output: Set the digital sound output prefer-
ence. Auto, Bypass, PCM, Dolby Digital Plus and
Dolby Digital options will be available. Highlight the
option you prefer and press OK to set.
SPDIF Delay: Adjust the SPDIF delay value.
Auto Volume Control: With Auto Volume Control,
you can set the TV to automatically level out sudden
YROXPHGLႇHUHQFHV7\SLFDOO\DW WKH EHJLQQLQJ RI
adverts or when you are switching channels. Turn
WKLVRSWLRQRQRႇE\SUHVVLQJOK.
Downmix Mode: Set your preference to convert mul-
ti-channel audio signals to two-channel audio signals.
Press OK to see the options and set. Stereo and
Surround options will be available. Highlight the
option you prefer and press OK to set.
Dolby Audio Processing: With Dolby Audio Pro-
cessing, you can improve the sound quality of your
TV. Press OK to see the options and set. Some other
sound options may become unavailable and appear
as grayed out depending on the settings made here.
Dolby Audio Processing: Highlight this option
and press OKWRWXUQWKLVIXQFWLRQRQRႇ
Sound Mode: If the Dolby Audio Processing
option is turned on Sound Mode option will be
available to set. Highlight the Sound Mode option
and press OK to see the preset sound modes.
Smart, Movie, Music and News options will be
available. Highlight the option you prefer and
press OK to set.
Reset to Default: Resets the sound settings to
factory defaults.
Storage: View the total storage space status of the TV
and connected devices if available. To see detailed in-

English - 19 -
formation on the usage details highlight and press OK.
There will also be options for ejecting and formatting
the connected storage devices.
Home screen: Customise your home screen. Select
channels which will be displayed on the home screen.
Organize apps and games, change their order or get
more of them.
Store mode: Highlight Store mode and press OK.
Read the description, highlight Continue and press OK
if you want to proceed. Then highlight On to activate
or 2ႇ to deactivate and press OK. In store mode your
79¶VVHWWLQJVZLOOEHFRQ¿JXUHGIRUVWRUHHQYLURQPHQW
and the supported features will be displayed on the
screen. Once activated, Store messaging setting
will become available. Set according to your prefer-
ences. It is recommended not to activate store mode
for home use.
Google Assistant: Select your active account, view
permissions, select which apps to include in search
UHVXOWVDFWLYDWHVDIHVHDUFK¿OWHUDFWLYHRႇHQVLYHZRUG
blocking and view open source licenses.
Screen saver: Set screensaver and sleep mode
options for your TV. You can choose a screensaver,
set wait time for the screensaver, set when the TV
goes into sleep mode or start the screensaver mode.
Location: You can allow the use of the wireless
connection to estimate the location, see the recent
location requests and allow or restrict the listed apps
to use your location information.
Usage & Diagnostics: Automatically send usage data
and diagnostic information to Google. Set according
to your preference.
Manufacturer Usage & Diagnostics: If you accept,
your TV will send diagnostic information (such as MAC
DGGUHVVFRXQWU\ODQJXDJH VRIWZDUH DQG¿UPZDUH
versions, bootloader versions and the source of the
TV) and anonymous usage data from your device to
a server located in Ireland. We are not able to identify
you and are only collecting and storing this diagnostic
information and anonymous usage data to ensure your
device operates properly.
Accessibility:&RQ¿JXUH Visually Impaired, AC4
Dialogue Enhancement, Captions, Text to speech,
Accessibility shortcut settings and/or turn Audio
Description, Hearing Impaired, High contrast text
RQRႇ6RPHRIWKHFDSWLRQVHWWLQJVPD\QRWEHDSSOLHG
Visually Impaired: Digital TV channels can
broadcast special audio commentary describing
on-screen action, body language, expressions and
movements for people with visual disabilities.
Speaker: Turn this option on if you want to hear
the audio commentary through the TV speakers.
Headphone: Turn this option on if you want to
route the sound of the audio commentary to the
TV’s headphone output.
Volume: Adjust the volume level of the audio
commentary.
Pan and Fade: Turn this option on if you want to
hear the audio commentary more clearly, when it
is available through broadcast.
Audio for the Visually Impaired: Set the audio
type for visually impaired. Options will be available
depending on the selected broadcast.
Fader Control: Adjust the volume balance
between the main TV audio (Main) and audio
commentary (AD).
Reset: Reset all TV settings to the factory default.
Highlight Reset and press OK$FRQ¿UPDWLRQPHVVDJH
will be displayed, select Erase everything to proceed
ZLWKUHVHWWLQJ7KH79ZLOOVZLWFKRႇRQ¿UVWDQGWKH
initial setup will start. Select Cancel to exit.
Note: You may be asked to enter a PIN to proceed with the
UHVHWRSHUDWLRQ(QWHUWKH3,1\RXKDYHGH¿QHGGXULQJWKH¿UVW
WLPHLQVWDOODWLRQ,I\RXGLGQWVHWD3,1GXULQJWKH¿UVWWLPHLQ-
stallation, you can use the default PIN. The default PIN is 1234.
Remote & Accessories
You can use wireless accessories, such as your remote
control (depends on the model of the remote control),
headphones, keyboards or game controllers with your
Android TV. Add devices to use them with your TV.
Select this option and press OK to start searching
available devices in order to pair them with your TV. If
available highlight Add accessory option and press
OK to start the search. Set your device to pairing
mode. Available devices will be recognized and listed
or pairing request will be displayed. Select your device
from the list and press OK or highlight OK and press
OK to start pairing.
Connected devices will also be listed here. To unpair
a device, highlight it and press OK. Then highlight
Unpair option and press OK. Then select OK and
press OK again to unpair the device from the TV. You
can also change the name of an connected device.
Highlight the device and press OK, then highlight
Change name and press OK again. Press OK again
use the virtual keyboard to change the name of the
device.
Channel List
The TV sorts all stored channels in the Channel List.
Press the OK button to open the Channel List in Live
TV mode. You can press the Red button to scroll up
the list page by page, or press the Green button to
scroll down.
,IGHVLUHG\RXFDQ¿OWHURUVRUWWKHFKDQQHOVRU¿QGD
channel in the channel list. Press the Yellow button
English - 20 -
to display the Select More options. Available options
are Select Type, Sort and Find. Sort option may not
be available depending on the selected country during
the initial setup process.
7R¿OWHUWKHFKDQQHOVKLJKOLJKWSelect Type and press
the OK button. You can select among Categories,
Digital, Radio, Free, Encrypted, Analogue,
Favourite and NetworkRSWLRQVWR¿OWHUWKHFKDQQHO
list or select Broadcast option to see all installed
channels in the channel list. Available options may
GLႇHUGHSHQGLQJRQWKHRSHUDWRUVHOHFWLRQ
To sort the channels highlight Sort and press the OK
button. Select one of the available options and press
OK again. The channels will be sorted according to
your selection.
7R¿QG D FKDQQHOKLJKOLJKW Find and press the OK
button. Virtual keyboard will be displayed. Enter all or
a portion of the name or number of the channel you
ZDQWWR¿QGKLJKOLJKWWKHFKHFNPDUNV\PERORQWKH
keyboard and press OK. Matching results will be listed.
Note: If any option except Broadcast is selected in the Select
Type menu, you can only scroll through the channels that
are currently listed in the channel list using the 3URJUDPPH
+/- buttons on the remote.
Editing the Channels and the Channel List
You can edit the channels and the channel list using
the Channel Skip, Channel Swap, Channel Move
and Channel Edit options under the Settings>Chan-
nel>Channels menu. You can access the Settings
menu from the Home Screen or from the TV options
menu in Live TV mode.
Note: The options Channel Swap, Channel Move and Chan-
nel Edit may not be available and appear as grayed out de-
pending on the operator selection and operator related settings.
<RXFDQ WXUQ R௺ WKH LCN setting in the 6HWWLQJV!&KDQQHO
menu, as it prevents channel editing. This option might be set
to On by default depending on the selected country during the
initial setup process.
Managing Favourite Channel Lists
<RX FDQ FUHDWHIRXU GLႇHUHQW OLVWVRI \RXU IDYRXULWH
channels. These lists include only the channels that
DUHVSHFL¿HGE\\RX3UHVVWKHOK button to display
the channel list. Then press Blue button to access
favourite lists. If one of the lists is being displayed on
the screen you can press the Left or Right directional
button to switch from one list to another. In order to
change the position of a channel highlight that channel
and press the Yellow button. Then use the Up and
Down directional buttons to move the channel to the
desired position and press OK. Highlight a channel in
the list and press the OK button to watch.
To add the currently watched channel to one of your
favourite lists select the desired favourite list as
described above and press the Menu button on the
remote. Then enter the Channels menu, highlight
Add to My Favourites option and press OK. The
channel will be added to the selected favourite list.
Only the currently watched channel can be added to
a favourite list. To remove a channel from a favourite
list open the favourite list, highlight that channel and
press the Blue button.
If you want to set one of your Favourite channel lists
as the main channel list, you need to select the desired
favourite list as described above. Then set the Select
Type option to Favourite. Open the channel list and
press the Yellow button to see the options. Depending
on the operator selection this feature may be blocked
and not work properly.
Programme Guide
By means of Electronic Programme Guide (EPG)
function of your TV you can browse the event schedule
of the currently installed channels on your channel
list. It depends on the related broadcast whether this
feature is supported or not.
In order to access the Electronic Programme Guide
on the Home Screen press the Guide button on the
remote. Electronic Programme Guide is also available
in Live TV mode. You can switch to Live TV mode by
either launching the Live TV application on the Home
Screen or selecting Channels input source from the
Inputs menu on the Home Screen. To access the
programme guide while in Live TV mode, press the
Guide button on your remote.
Use the directional buttons to navigate through
the programme guide. You can use the Up/Down
directional buttons or Programme +/- buttons to
switch to previous/next channel on the list and Right/
Left directional buttons to select a desired event of
the currently highlighted channel. If available, the full
name, start-end time and date, genre of the highlighted
event and a brief information about it will be displayed
on the screen.
Press Blue EXWWRQ WR¿OWHU WKH HYHQWV'XH WR WKH
ODUJHYDULHW\RI¿OWHURSWLRQV\RX FDQ ¿QG HYHQWV RI
the desired type quicker. Press Yellow button to see
detailed information on the highlighted event. You
can also use Red and Green buttons to see events
of previous day and next day. The functions will be
assigned to the coloured buttons on the remote when
they are available. Follow the on-screen information
for accurate button functions.
Press Record button to add a timer for the highlighted
HYHQWLQWKHJXLGH<RXFDQGH¿QHWKHW\SHRIWKHWLPHU
by setting the Schedule type option as Reminder or
Record. When other parameters are set highlight Add
and press OK. The timer will be added to the schedule
list. You can access the schedule list from the Record
menu in Live TV mode.
The guide can not be displayed if TV input source
is blocked from the Settings>Channel>Parental

English - 21 -
Controls>Inputs Blocked menu in Live TV mode or
on Home Screen.
Connecting to the Internet
You can access the Internet via your TV, by connecting
LWWRDEURDGEDQGV\VWHP,WLVQHFHVVDU\WRFRQ¿JXUH
the network settings in order to enjoy a variety of
streaming content and internet applications. These
VHWWLQJVFDQEHFRQ¿JXUHGIURPSettings>Network &
Internet menu. You can also highlight the Connected/
Not Connected icon on the Home screen and press OK
to access this menu. For further information refer to
Network & Internet section under the title of Settings.
Wired Connection
Connect your TV to your modem/router via an Ethernet
cable. There is a LAN port on the rear side of your TV.
The status of the connection under the Ethernet
section in the Network & Internet menu will change
from Not connected to Connected.
1. Broadband ISP connection
2. LAN (Ethernet) cable
3. LAN input on the rear side of the TV
You might be able to connect your TV to a network
ZDOOVRFNHWGHSHQGLQJRQ\RXUQHWZRUN¶VFRQ¿JXUDWLRQ
In that case, you can connect your TV directly to the
network using an Ethernet cable.
1. Network wall socket
2. LAN input on the rear side of the TV
Wireless Connection
A wireless LAN modem/router is required to connect
the TV to the Internet via wireless LAN.
Highlight Wi-Fi option in the Network & Internet menu
and press OK to enable wireless connection. Available
networks will be listed. Select one and press OK to
connect. For more information refer to Network &
Internet section under the title of Settings.
1. Broadband ISP connection
A network with hidden SSID can not be detected by
other devices. If you want to connect to a network with
hidden SSID, highlight the Add new network option
under the Settings>Network & Internet menu on
the Home Screen and press OK. Add the network by
entering its name manually using the related option.
Some networks may have an authorisation system
that requires a second login as such in a work
environment. In this case, after connecting to the
wireless network you want to connect to, highlight
1RWL¿FDWLRQV situated on the upper right of the Home
Screen and press OK. Then highlight the Sign in to
Wi-Fi networkQRWL¿FDWLRQDQGSUHVVOK. Enter your
credentials to log in.
A Wireless-N router (IEEE 802.11a/b/g/n/ac) with
simultaneous 2.4 and 5 GHz bands is designed to
increase bandwidth. These are optimized for smoother
DQGIDVWHU +' YLGHRVWUHDPLQJ ¿OH WUDQVIHUVDQG
wireless gaming.
Use a LAN connection for quicker data transfer
between other devices like computers.
7KHWUDQVPLVVLRQ VSHHG GLႇHUVGHSHQGLQJ RQ WKH
distance and number of obstructions between the
transmission products, the configuration of these
SURGXFWVWKH UDGLR ZDYHFRQGLWLRQV WKH OLQHWUDႈF
and the products that you use. The transmission may
DOVREHFXW Rႇ RU PD\ JHWGLVFRQQHFWHGGHSHQGLQJ
English - 22 -
on the radio wave conditions, DECT phones or any
other WLAN 11b appliances. The standard values of
the transmission speed are the theoretical maximum
values for the wireless standards. They are not the
actual speeds of data transmission.
7KHORFDWLRQZKHUHWKHWUDQVPLVVLRQLVPRVWHႇHFWLYH
GLႇHUVGHSHQGLQJRQWKHXVDJHHQYLURQPHQW
The Wireless feature of the TV supports 802.11 a,b,g,n
& ac type modems. It is highly recommended that
you should use the IEEE 802.11n communication
protocol in order to avoid any possible problems while
watching videos.
You must change your modem’s SSID when there are
any other modems around with the same SSID. You
can encounter connection problems otherwise. Use a
wired connection if you experience problems with a
wireless connection.
A stable connection speed is required to play back
streaming content. Use an Ethernet connection if the
wireless LAN speed is unstable.
Multi Media Player
On the Home Screen scroll to Apps row, select Multi
Media Player (MMP) and press the OK button to
launch.
Select the media type on the main media player screen.
On the next screen, you can press the Menu button to
access a list of menu options while the focus is on a
IROGHURUDPHGLD¿OH8VLQJWKHRSWLRQVRIWKLVPHQX
\RXFDQFKDQJHWKHPHGLDW\SHVRUWWKH¿OHVFKDQJH
the thumbnail size and turn your TV into a digital photo
frame. You will also be able to copy, paste and delete
WKHPHGLD¿OHVXVLQJWKHUHODWHGRSWLRQVRIWKLVPHQXLI
a FAT32 formatted USB storage device is connected to
the TV. Additionally you can switch the viewing style by
selecting either Normal Parser or Recursive Parser.
In Normal ParserPRGHWKH¿OHVZLOOEHGLVSOD\HGZLWK
folders if any available. So only the selected type of
PHGLD¿OHVLQWKHURRWIROGHURULQWKHVHOHFWHGIROGHU
ZLOOEHGLVSOD\HG,IWKHUHLVQ¶WDQ\PHGLD¿OHVRIWKH
selected type, the folder will be assumed as empty. In
Recursive Parser mode the source will be searched
IRUDOODYDLODEOHPHGLD¿OHVRIWKHVHOHFWHGW\SHDQG
WKHIRXQG¿OHVZLOOEHOLVWHG3UHVVWKHBack/Return
button to close this menu.
In order to activate photo frame feature select Photo
as the media type. Then press the Menu button,
highlight Photo Frame and press OK. If you select
One Photo mode option and press OK the image that
you set as photo frame image earlier will be displayed
when photo frame feature is activated. If you select the
USB storage deviceRSWLRQWKH¿UVW¿OHLQRecursive
Parser mode) will be displayed. To set the photo frame
image press the MenuEXWWRQZKLOHWKHSKRWR¿OHRI
your choice is displayed, highlight Photo Frame Image
and press OK.
:KLOHEURZVLQJ IRU WKHYLGHR ¿OHV D SUHYLHZ RI WKH
highlighted video will be displayed in a small window
on the left side of the screen if the view style is set to
List View. Press the Blue button to switch between the
List View and Grid View. You can also use Programme
+/-EXWWRQVWRMXPSGLUHFWO\WRWKH¿UVWDQGODVWIROGHU
RU¿OHLIWKHYLHZVW\OHLVVHWWR*ULG9LHZ
Video Files
Press OKWRSOD\EDFNWKHKLJKOLJKWHGYLGHR¿OH
Info: Display the info bar. Press twice to display the
H[WHQGHGLQIRUPDWLRQDQGWKHQH[W¿OH
Play/pause: Pause and resume the playback.
Rewind: Start reverse playback. Press consecutively
to set the rewind speed.
Fast Forward: Start fast forward playback. Press
consecutively to set the forward playback speed.
Stop: Stop the playback and return to the media
player screen.
Programme +:6ZLWFKWRQH[W¿OH
Programme -:6ZLWFKWRSUHYLRXV¿OH
Back/Return: Return to the media player screen.
Music Files
Press OKWRSOD\EDFNWKHKLJKOLJKWHGPXVLFDXGLR¿OH
Info:'LVSOD\WKHH[WHQGHGLQIRUPDWLRQDQGWKHQH[W¿OH
Play/pause: Pause and resume the playback.
Rewind: Press and hold to rewind.
Fast Forward: Press and hold to fast forward.
Stop: Stop the playback.
Programme +:6ZLWFKWRQH[W¿OH
Programme -:6ZLWFKWRSUHYLRXV¿OH
Back/Return: Return to the media player screen.
If you press Back/Return button without stopping the
SOD\EDFN¿UVWWKHSOD\EDFNZLOOFRQWLQXHZKLOH\RXDUH
browsing in the multimedia player. You can use the
media player buttons to control the playback. The
playback will stop if you exit the media player or switch
the media type to Video.
Photo Files
Press OKWRGLVSOD\WKHKLJKOLJKWHGSKRWR¿OH When
you press the Play button slide show will start and
DOOSKRWR¿OHV LQ WKHFXUUHQWIROGHURULQWKHVWRUDJH
device, depends on the viewing style, will be displayed
in order. If the Repeat option is set to None only the
¿OHV between the highlighted one and the last listed
one will be displayed. The slide show will stop after
WKHODVWOLVWHG¿OHLVGLVSOD\HG
Info: Display the info bar. Press twice to display the
extended information.

English - 23 -
Play/pause: Pause and resume the slide show.
Green button (Rotate/Duration): Rotate the image /
Set the interval between the slides.
<HOORZEXWWRQ=RRP(ႇHFW Zoom in on the image
$SSO\YDULRXVHႇHFWVWRWKHVOLGHVKRZ
Programme +:6ZLWFKWRQH[W¿OH
Programme -:6ZLWFKWRSUHYLRXV¿OH
Back/Return: Return to the media player screen.
Text Files
When you press the OK button slide show will start
and DOOWH[W¿OHVLQWKHFXUUHQWIROGHURULQWKHVWRUDJH
device, depends on the viewing style, will be displayed
in order. If the Repeat option is set to None only the
¿OHV between the highlighted one and the last listed
one will be displayed. The slide show will stop after
WKHODVWOLVWHG¿OHLVGLVSOD\HG
Info: Display the info bar. Press twice to display the
extended information.
Play/pause: Pause and resume the slide show.
Programme +:6ZLWFKWRQH[W¿OH
Programme -:6ZLWFKWRSUHYLRXV¿OH
Directional buttons (Down or Right / Up or Left):
Switch to next page. / Switch to previous page.
Back/Return: Stop the slide show and return to the
media player screen.
Menu Options
Press the Menu button to see available options while
SOD\LQJEDFNRUGLVSOD\LQJPHGLD¿OHV7KHFRQWHQWRI
WKLVPHQXGLႇHUVGHSHQGLQJRQWKHPHGLD¿OHW\SH
Pause/Play: Pause and resume the playback or the
slide show.
Repeat: Set the repeat option. Highlight an option and
press OK to change the setting. If Repeat One option is
VHOHFWHGWKHFXUUHQWPHGLD¿OHZLOOEHUHSHDWHGO\SOD\HG
back or displayed. If the Repeat All option is selected
DOOPHGLD¿OHVRIWKHVDPHW\SHLQWKHFXUUHQWIROGHURU
in the storage device, depends on the viewing style,
will be repeatedly played back or displayed.
6KXႉH2Q2ႇ7XUQWKHVKXႉHRSWLRQRQRURႇ3UHVV
OK to change the setting.
Duration: Set the interval between the slides. Highlight
an option and press OK to change the setting. You can
also press the Green button to set. This option will not
be available if the slide show is paused.
Rotate: Rotate the image. The image will be rotated
90 degrees clockwise each time you press OK. You
can also press the Green button to rotate. This option
will not be available if the slide show is not paused.
Effect: Apply various effects to the slide show.
Highlight an option and press OK to change the setting.
You can also press the Yellow button to set. This option
will not be available if the slide show is paused.
Zoom: Zoom in on the image that is currently being
displayed. Highlight an option and press OK to change
the setting. You can also press the Yellow button to
zoom in. This option will not be available if the slide
show is not paused.
Font: Set the font options. Size, style and colour can
be set according to your preferences.
Show Info: Display the extended information.
Photo Frame Image: Set the currently displayed
image as photo frame image. This image will be
displayed if the One Photo mode is selected instead
of the connected storage device while activating the
SKRWRIUDPHIHDWXUH2WKHUZLVHDOO¿OHVZLOOEHSOD\HG
back as a slide show when photo frame feature is
activated.
Hide/Show Spectrum: Hide or show the spectrum
if available.
Lyric Options: Display lyric options if available.
3LFWXUH2ႇ Open the power menu of your TV. You
can use the 3LFWXUHRႇ option here to turn the screen
Rႇ3ress a button on the remote or on the TV to turn
the screen on again.
Picture Settings: Display the picture settings menu.
Sound Settings: Display the sound settings menu.
Audio Settings: Set the soundtrack option if more
then one available.
Last Memory: Set to Time if you want to resume the
playback from the position where it was stopped next
WLPH\RXRSHQ WKH VDPH YLGHR ¿OH ,IVHWWR2ႇ the
playback will start from the beginning. Highlight an
option and press OK to change the setting.
Seek:-XPSWRDVSHFL¿FWLPHRIWKHYLGHR¿OH8VH
the numeric and directional buttons to enter the time
and press OK.
Subtitle: Set your subtitle preference if any available.
Set to 2ႇWRWXUQWKHVXEWLWOHVRႇ
Subtitle Encoding: Display subtitle encoding options
if available.
From USB Connection
IMPORTANT!%DFNXSWKH¿OHVRQ\RXU86%VWRUDJHGHYLFHV
before connecting them to the TV. Manufacturer will not be
UHVSRQVLEOHIRU DQ\¿OH GDPDJHRU GDWDORVV &HUWDLQW\SHV
of USB devices (e.g. MP3 Players) or USB hard disk drives/
memory sticks may not be compatible with this TV. The TV
supports FAT32 and NTFS disk formatting. FAT32 formatted
devices with a storage capacity larger than 192TB are not
supported. NTFS formatted devices with a storage capacity
larger than 16TB are not supported.
You can view your photos, text documents or play your
PXVLFDQGYLGHR¿OHVLQVWDOOHGRQDFRQQHFWHG86%
English - 24 -
storage device on the TV. Plug in the USB storage
device to one of the USB inputs on the TV.
On the main media player screen select the desired
PHGLDW\SH2QWKHQH[WVFUHHQKLJKOLJKWD¿OHQDPH
IURPWKHOLVWRIDYDLODEOHPHGLD¿OHVDQGSUHVVWKHOK
button. Follow the on-screen instructions for more
information on other available button functions.
Note: Wait a little while before each plugging and unplugging
DVWKHSOD\HUPD\VWLOOEHUHDGLQJ¿OHV)DLOXUHWRGRVRPD\
cause physical damage to the USB player and the USB device
LWVHOI'RQRWSXOORXW\RXUGULYHZKLOHSOD\LQJD¿OH
From a Mobile Device via DMR
Make sure that your mobile device is connected to the
same network as your TV. On the TV, scroll to Apps
row on the Home Screen, select Multi Media Player
(MMP) and press the OK button to launch. Select
the media type on the main media player screen. On
the next screen, press the Blue button to switch the
List View layout. Then press the Back button. DMR
(Digital Media Renderer) option will appear among
the media type options. Highlight the DMR option and
press the OK button. The TV is ready to receive the
PHGLD¿OHVHQWIURP\RXUPRELOHGHYLFH2QWKHPRELOH
GHYLFHRSHQWKH¿OH\RXZDQWWRVKDUHDQGWDSRQWKH
sharing icon or on the related option from the options
menu of your mobile device. Available devices will be
listed. Select your TV from the list. You can get the
device name of your TV from the Settings>Device
Preferences>About menu on the Home screen. If
desired, the name of the TV can also be changed
E\HLWKHU VHOHFWLQJ RQHRI WKH SUHGH¿QHG QDPHV RU
entering a custom name using the options of the
Device name menu. If the connection is successfully
HVWDEOLVKHGWKH VHOHFWHG PHGLD¿OH ZLOO EHSOD\HG
displayed on your TV.
USB Recording
7RUHFRUGDSURJUDPPH\RXVKRXOG¿UVWFRQQHFWD86%
storage device to your TV while the TV is switched
Rႇ<RXVKRXOGWKHQVZLWFKRQWKH79WRHQDEOHWKH
recording feature.
To record long duration programmes such as movies, it
is recommended to use USB Hard disk drives (HDD’s).
Recorded programmes are saved onto the connected
USB storage device. If desired, you can store/copy
UHFRUGLQJVRQWRDFRPSXWHUKRZHYHUWKHVH¿OHVZLOO
not be available to be played on a computer. You can
play the recordings only via your TV.
Lip Sync delay may occur during the timeshifting. Radio
record is supported.
If the writing speed of the connected USB storage
GHYLFHLVQRWVXႈFLHQWWKHUHFRUGLQJPD\IDLODQGWKH
timeshifting feature may not be available.
It is recommended to use USB hard disk drives for
recording HD programmes.
Do not pull out the USB/HDD during a recording. This
may harm the connected USB/HDD.
Some stream packets may not be recorded because
of signal problems, as a result sometimes videos may
freeze during playback.
If a recording starts from timer when teletext is on, a
dialogue will be displayed. If you highlight Yes and press
OKWHOHWH[WZLOOEHWXUQHGRႇDQGUHFRUGLQJZLOOVWDUW
Instant Recording
Press Record button to start recording an event
instantly while watching a programme. Press Stop
button to stop and save the instant recording.
You can not switch broadcasts during the recording
mode.
Watching Recorded Programmes
Select Record List from the Record menu in Live
TV mode and press OK. Select a recorded item from
the list (if previously recorded). Press the OK button
to watch.
Press the Stop or Back/Return button to stop a
playback.
The recordings will be named in the following
format: Channel Name_Date(Year/Month/Day)_
Duration(Hour/Minute/Second)_Programme Name.
Timeshift Recording
In order to use timeshift recording feature Time Shift
Mode option in the Record>Time Shift Mode menu
VKRXOGEHHQDEOHG¿UVW
In timeshifting mode, the programme is paused and
simultaneously recorded to the connected USB storage
device. Press Pause/Play button while watching a
broadcast to activate timeshifting mode. Press Pause/
Play button again to resume the paused programme
from where you stopped. Press the Stop button to stop
timeshift recording and return to the live broadcast.
:KHQWKLVIHDWXUHLVXVHGIRUWKH¿UVWWLPHDisk Setup
wizard will be displayed when the Pause/Play button is
pressed. You can either choose Auto or Manual setup
mode. In Manual mode, if you prefer, you can format
your USB storage device and specify the storage space
that will be used for timeshift function. When the setup
is complete, the Disk Setup Result will be displayed.
Press Exit button.
Timeshift function will not be available for radio
broadcasts.
Disk Format
When using a new USB storage device, it is
UHFRPPHQGHGWKDW\RX¿UVWIRUPDWLWXVLQJWKHFormat
option in the Record>Device Info menu in Live TV
mode. Highlight the connected device on the Device
Info screen and press OK or Right directional button
to see the list of available options. Then highlight

English - 25 -
Format and press OKWR SURFHHG$FRQ¿UPDWLRQ
dialogue will be displayed. Highlight Yes and press
OK to start formatting.
IMPORTANT: Formatting your USB storage device
ZLOOHUDVH$//WKHGDWDRQLWDQGLWV¿OHV\VWHPZLOOEH
converted to FAT32. In most cases operation errors will
EH¿[HGDIWHUDIRUPDWEXW\RXZLOOORVH$//\RXUGDWD
Schedule List
You can add reminders or record timers using the
Schedule List menu. You can access the Schedule
List from the Record menu in Live TV mode. Highlight
Schedule List and press OK. Previously set timers
will be listed if any available.
Press Record button to add a timer while the Schedule
List menu is displayed on the screen. You can
GH¿QHWKHW\SHRIWKHWLPHUE\VHWWLQJWKHSchedule
Type option as Reminder or Record. When other
parameters are set highlight Add and press OK. The
timer will be added to the list.
If any available, you can also edit or delete the timers
on this list. Highlight the timer of your choice and press
OK. Edit and Delete options will appear at the bottom
of the screen. Highlight the desired option and press
OK. After you edited a timer you can choose either
to replace it or add it as a new timer. If you choose
the Replace option, the timer will be saved with the
new settings. If you choose the Add option, the timer
will be added to the list as a new timer. Highlight
Replace or Add according to your preference and
press OK to proceed. When you choose to delete
DWLPHUDFRQ¿UPDWLRQGLDORJXHZLOOEHGLVSOD\HGRQ
the screen. Highlight Yes and press OK to delete the
selected timer.
A warning message will be displayed if the time
intervals of two timers overlap. You can not set more
than one timer for the same time interval.
Press EXIT button to close the Schedule List.
CEC
With CEC function of your TV you can operate a
connected device with the TV remote control. This
function uses HDMI CEC (Consumer Electronics
Control) to communicate with the connected devices.
Devices must support HDMI CEC and must be
connected with an HDMI connection.
In order to make use of the CEC functionality the
related option in the menu should be switched on.
7RFKHFNVZLWFKRQRURႇWKH&(&IXQFWLRQGR WKH
following:
• Enter the Settings>Device Preferences>Inputs
menu on the Home Screen or TV options>Set-
tings>Device Preferences>Inputs menu in Live
TV mode.
• Scroll down to Consumer Electronic Control
(CEC) section. Check if the HDMI control option
is switched on.
• Highlight the HDMI control option and press OK to
VZLWFKRQRURႇ
Make sure that all CEC settings are properly set up
on the connected CEC device. The CEC functionality
KDVGLႇHUHQWQDPHVRQGLႇHUHQWEUDQGV&(&IXQFWLRQ
might not work with all devices. If you connect a device
with HDMI CEC support to your TV, the related HDMI
input source will be renamed with the connected
device's name.
To operate the connected CEC device, select the
related HDMI input source from the Inputs menu on
the Home Screen. Or press the Source button if the TV
is in Live TV mode and select the related HDMI input
source from the list. To terminate this operation and
control the TV via the remote again, press the Source
button, which will still be functional, on the remote and
switch to another source.
The TV remote is automatically able to control the
device once the connected HDMI source has been
selected. However not all buttons will be forwarded
to the device. Only devices that support CEC Remote
Control function will respond to the TV remote control.
The TV supports also ARC(Audio Return Channel)
feature. This feature is an audio link meant to replace
other cables between the TV and the audio system
(A/V receiver or speaker system). Connect the audio
system to the HDMI2 input on the TV to enable ARC
feature.
In order to activate ARC feature the Speakers option
should be set as External Audio System. You can
access this option from the TV options or TV options>-
Settings>Device Preferences>Sound menu in Live TV
mode or from Settings>Device Preferences>Sound
menu on the Home Screen. When ARC is active, TV
will mute its other audio outputs automatically. So you
will hear audio from connected audio device only. The
volume control buttons of the remote will be directed
to connected audio device and you will be able to
control the volume of the connected device with your
TV remote.
Note: ARC is supported only via the HDMI2 input.
Google Cast
With the built-in Google Cast technology you can cast
the content from your mobile device straight to your
TV. If your mobile device has Google Cast feature, you
can mirror your device’s screen to your TV wirelessly.
Select Cast screen option on your android device.
Available devices will be detected and listed. Select
your TV from the list and tap on it to start casting.
You can get the network name of your TV from the
Settings>Device Preferences>About menu on the
English - 26 -
Home screen. Device name will be one of the shown
articles. You can also change the name of your TV.
Highlight Device name and press OK. Then highlight
Change and press OK again. You can either select
RQHRIWKHSUHGH¿QHGQDPHVRUHQWHUDFXVWRPQDPH
To cast your device’s screen to the TV screen…
1. On your android device, go to ‘Settings’ from the
QRWL¿FDWLRQSDQHORUKRPHVFUHHQ
2. Tap on ‘Device Connectivity’
3. Tap on the ‘Easy projection’ and enable ‘Wireless
projection’. Available devices will be listed
4. Select the TV you would like to cast to
or
1. 6OLGHGRZQWKHQRWL¿FDWLRQSDQHO
2. Tap on ‘Wireless projection’
3. Select the TV you would like to cast to
If the mobile app is Cast-enabled, such as YouTube,
'DLO\PRWLRQ1HWÀL[\RXFDQFDVW\RXUDSSWR\RXU79
On the mobile app, look for the Google Cast icon and
tap on it. Available devices will be detected and listed.
Select your TV from the list and tap on it to start casting.
To cast an app to the TV screen…
1. On your smartphone or tablet, open an app that
supports Google Cast
2. Tap the Google Cast icon
3. Select the TV you would like to cast to
4. The app you selected should start playing on TV
Notes:
Google Cast works on Android and iOS. Make sure that your
mobile device is connected to the same network as your TV.
The menu options and namings for Google Cast function on
\RXU$QGURLGGHYLFHFDQGL௺HUIURPEUDQGWREUDQGDQGFDQ
change with time. Refer to your device’s manual for latest
informations on Google Cast function.
HBBTV System
HbbTV (Hybrid Broadcast Broadband TV) is a stand-
ard that seamlessly combines TV services delivered
via broadcast with services delivered via broadband
and also enables access to Internet only services
for consumers using connected TVs and set-top
boxes. Services delivered through HbbTV include
traditional broadcast TV channels, catch-up services,
video-on-demand, electronic programme guide, in-
teractive advertising, personalisation, voting, games,
social networking and other multimedia applications.
HbbTV applications are available on channels where
they are signalled by the broadcaster.
The HbbTV applications are generally launched with
the press of a coloured button on the remote. Generally
a small red button icon will appear on the screen in
order to notify the user that there is an HbbTV appli-
cation on that channel. Press the button indicated on
the screen to launch the application.
HbbTV applications use the buttons on the remote
control to interact with the user. When an HbbTV
application is launched, the control of some buttons
are owned by the application. For example, numeric
channel selection may not work on a teletext applica-
tion where the numbers indicate teletext pages.
HbbTV requires AV streaming capability for the plat-
form. There are numerous applications providing VOD
(video on demand) and catch-up TV services. The
OK (play&pause), Stop, Fast forward, and Rewind
buttons on the remote control can be used to interact
with the AV content.
Note: You can enable or disable this feature from the TV
2SWLRQV!$GYDQFHG 2SWLRQV!+%%79 6HWWLQJV menu in
Live TV mode.
Quick Standby Search
If earlier an automatic search is performed, your TV will
search for new or missing digital channels at 05:00 am
every morning while in quick standby mode.
And if the Auto Channel Update option in the Set-
tings>Channel menu is enabled the TV will wake up
within 5 minutes after it is switched into quick standby
mode and search for channels. Standby LED will blink
during this process. Once the standby LED stops
blinking the search process is completed. Any new
found channels will be added to the channel list. If the
channel list is updated, you will be informed on the
changes at the next power on.
Software Update
<RXU79LVFDSDEOHRI¿QGLQJDQGXSGDWLQJWKH¿UPZDUH
automatically via Internet.
7RH[SHULHQFH WKH EHVWXVH RI \RXU79 DQG EHQH¿W
from the latest improvements make sure your system
is always up to date.
Software update via internet
On the Home Screen enter the Settings>Device Pref-
erences>About menu in order to update your Android
system version. Move the focus to the System update
option and press OK. You will be informed about the
system status and the time at which the device was last
checked for an update will be displayed. The Check
for update option will be highlighted, press OK if you
want to check for an available update.
Note: Do not unplug the power cord during the reboot process.
If the TV fails to come on after the upgrade, unplug, wait for
two minutes then plug it back in.

English - 27 -
Troubleshooting & Tips
TV does not switch on
• Make sure the power cord is plugged in securely to
power outlet.
• Disconnect the power cable from the power outlet.
Wait for one minute then reconnect it.
• Press the Standby/On button on the TV.
TV does not respond to the remote control
• The TV requires some time to start up. During this
time, the TV does not respond to the remote control
or TV controls. This is normal behaviour.
• Check if the remote control is working by means of
a mobile phone camera. Put the phone in camera
mode and point the remote control to the camera
lens. If you press any key on the remote control
DQG\RXQRWLFHWKHLQIUDUHG/('ÀLFNHUWKURXJKWKH
camera, the remote control is working. The TV needs
to be checked.
,I\RXGRQRWQRWLFHWKHÀLFNHULQJWKHEDWWHULHVPD\
be exhausted. Replace the batteries. If the remote is
still not working, the remote control might be broken
and needs to be checked.
This method of checking the remote control is not
possible with remote controls which are wirelessly
paired with the TV.
No Channels
• Make sure that all cables are properly connected and
that the correct network is selected.
• Make sure that the correct channel list is selected.
• Make sure that you have entered the correct channel
frequency if you have done manual tuning.
No picture / distorted picture
• Make sure that the antenna is properly connected
to the TV.
• Make sure that the antenna cable is not damaged.
• Make sure that the correct device is selected as the
input source.
• Make sure that the external device or source is
properly connected.
• Make sure that the picture settings are set correctly.
• Loud speakers, unearthed audio devices, neon
lights, high buildings and other large objects can
LQÀXHQFHUHFHSWLRQTXDOLW\,ISRVVLEOHWU\WRLPSURYH
the reception quality by changing the antenna
direction or moving devices away from the TV.
• &KDQJH WRDGLႇHUHQWSLFWXUH IRUPDW LIWKHSLFWXUH
GRHVQRW¿WWKHVFUHHQ
• Make sure that your PC uses the supported
resolution and refresh rate.
No sound / poor sound
• Make sure that the sound settings are correctly set.
• Make sure that all cables are properly connected.
• Make sure that the volume is not muted or set to
zero, increase the volume to check.
• Make sure that the TV audio output is connected to
the audio input on the external sound system.
• Sound may be coming from only one speaker. Check
the balance settings from Sound menu.
Input sources - can not be selected
• Make sure that the device is connected to the TV.
• Make sure that all cables are properly connected.
• Make sure that you select the right input source which
is dedicated to the connected device.
• Make sure that the right input source is not hidden
from the Inputs menu.
HDMI Signal Compatibility
Source Supported Signals
HDMI
480i 60Hz
480p 60Hz
576i, 576p 50Hz
720p 50Hz,60Hz
1080i 50Hz,60Hz
1080p 24Hz, 25Hz, 30Hz,
50Hz, 60Hz
3840x2160p 24Hz, 25Hz, 30Hz,
50Hz, 60Hz
4096x2160p 24Hz, 25Hz, 30Hz,
50Hz, 60Hz
In some cases a signal on the TV may not be displayed
properly. The problem may be an inconsistency with
standards from the source equipment (DVD, Set-top
box, etc. ). If you do experience such a problem please
contact your dealer and also the manufacturer of the
source equipment.
English - 28 -
Supported File Formats for USB Mode
Video
Video Codec Resolution Bit Rate 3UR¿OH Container
MPEG 1/2 1080P@ 60fps 80Mbps MP@HL
MPEG program stream (.DAT, .VOB,
.MPG, .MPEG), MPEG transport stream
(.ts, .trp, .tp), MP4 (.mp4, .mov), 3GPP
(.3gpp, .3gp), AVI (.avi), MKV (.mkv),
ASF (.asf)
MPEG4 1080P@60fps 40Mbps
• 6LPSOH3UR¿OH
• Advanced Simple
3UR¿OH#/HYHO
• GMC is not supported
MPEG program stream (.MPG, .MPEG),
MP4 (.mp4, .mov), 3GPP (.3gpp, .3gp),
AVI (.avi), MKV (.mkv), ASF (.asf)
Sorenson H.263 1080P@60fps 40Mbps )/9ÀY$9,DYL6:)VZI
H.263 1080P@60fps 40Mbps MP4 (.mp4, .mov), 3GPP (.3gpp, .3gp),
AVI (.avi), MKV (.mkv)
H.264 4096x2176@60fps
1080P@60fps 135Mbps
• 0DLQ3UR¿OH
• +LJK3UR¿OH#/HYHO
5.1
)/9ÀY03PSPRY*33
(.3gpp, .3gp), MPEG transport stream
(.ts, .trp, .tp), ASF (.asf), WMV (.wmv),
AVI (.avi), MKV (.mkv)
HEVC/H.265 4096x2176@60fps 100Mbps 0DLQ0DLQ3UR¿OH
High Tier @Level 5.1
MP4 (.mp4, .mov), 3GPP (.3gpp, .3gp),
MPEG transport stream (.ts, .trp, .tp),
MKV (.mkv)
MVC 1080P@30fps 80Mbps MPEG transport stream (.ts, .trp, .tp)
AVS 1080P@60fps 40Mbps -L]KXQSUR¿OH#/HYHO
6.0 MPEG transport stream (.ts, .trp, .tp)
AVS+ 1080P@60fps 50Mbps %URDGFDVWLQJSUR¿OH#
Level 6.0.1.08.60 MPEG transport stream (.ts, .trp, .tp)
WMV3 1080P@60fps 40Mbps ASF (.asf), AVI (.avi), MKV (.mkv), WMV
(.wmv)
VC1 1080P@60fps 40Mbps
• $GYDQFHG3UR¿OH#
Level 3
• 6LPSOH3UR¿OH
• 0DLQ3UR¿OH
MPEG program stream (.MPG, .MPEG),
MPEG transport stream (.ts, .trp, .tp),
ASF (.asf), WMV (.wmv), AVI (.avi),
MKV (.mkv)
Motion JPEG 1080P@30fps 10Mbps AVI (.avi), 3GPP (.3gpp, .3gp), MP4
(.mp4, .mov), MKV (.mkv), ASF (.asf)
VP8 1080P@60fps 20Mbps MKV (.mkv), WebM (.webm)
VP9 4096x2176@60fps 100Mbps 3UR¿OH MKV (.mkv), WebM (.webm)
RV30/RV40 1080P@60fps 40Mbps RM (.rm, .rmvb)
Audio
Audio Codec Sample rate Channel Bit Rate Container Note
MPEG1/2 Layer1 16KHz ~ 48KHz Up to 2 32Kbps ~
448Kbps
Movie: AVI (.avi), ASF (.asf),
Matroska (.mkv), MPEG transport
stream (.ts, .trp, .tp), MPEG program
stream (.DAT, .VOB, .MPG, .MPEG)
Music: MP3 (.mp3), WAV (.wav)

English - 29 -
Audio Codec Sample rate Channel Bit Rate Container Note
MPEG1/2 Layer2 16KHz ~ 48KHz Up to 2 8Kbps ~
384Kbps
Movie: AVI (.avi), ASF (.asf),
Matroska (.mkv), MPEG transport
stream (.ts, .trp, .tp), MPEG program
stream (.DAT, .VOB, .MPG, .MPEG)
Music: MP3 (.mp3), WAV (.wav)
MPEG1/2 Layer3 16KHz ~ 48KHz Up to 2 8Kbps ~
320Kbps
Movie: AVI (.avi), ASF (.asf),
Matroska (.mkv), 3GPP (.3gpp,
.3gp), MP4 (.mp4, .mov), MPEG
transport stream (.ts, .trp, .tp),
MPEG program stream (.DAT, .VOB,
03*03(*)/9ÀY6:)
(.swf)
Music: MP3 (.mp3), WAV (.wav),
MP4 (.m4a)
AC3 32KHz, 44.1KHz,
48KHz Up to 5.1 32Kbps ~
640 Kbps
Movie: AVI (.avi), Matroska (.mkv),
3GPP (.3gpp, .3gp), MP4 (.mp4,
.mov), MPEG transport stream (.ts,
.trp, .tp), MPEG program stream
(.DAT, .VOB, .MPG, .MPEG)
Music: AC3 (.ac3), MP4 (.m4a)
EAC3 32KHz, 44.1KHz,
48KHz Up to 5.1 32Kbps ~ 6
Mbps
Movie: 3GPP (.3gpp, .3gp), MP4
(.mp4, .mov), MPEG transport
stream (.ts, .trp, .tp), MPEG program
stream (.DAT, .VOB, .MPG, .MPEG)
Music: EAC3 (.ec3), MP4 (.m4a)
AAC-LC, HEAAC 8KHz ~ 48KHz Up to 5.1
Movie: AVI (.avi), Matroska (.mkv),
3GPP (.3gpp, .3gp), MP4 (.mp4,
.mov), MPEG transport stream (.ts,
.trp, .tp), MPEG program stream
(.DAT, .VOB, .MPG, .MPEG), FLV
ÀY50UPUPYE
Music: AAC (.aac), MP4 (.m4a)
WMA 8KHz ~ 48KHz Up to 2 128bps ~
320Kbps
Movie: ASF (.wmv, .asf), AVI (.avi),
Matroska (.mkv)
Music: ASF (.wma)
WMA 7, WMA 8,
WMA 9, Standard
WMA 10 Pro M0 48KHz Up to 2 < 192kbps
Movie: ASF (.wmv, .asf), AVI (.avi),
Matroska (.mkv)
Music: ASF (.wma)
No LBR mode
WMA 10 Pro M1 48KHz Up to 5.1 < 384kbps
Movie: ASF (.wmv, .asf), AVI (.avi),
Matroska (.mkv)
Music: ASF (.wma)
WMA 10 Pro M2 96KHz Up to 5.1 < 768kbps
Movie: ASF (.wmv, .asf), AVI (.avi),
Matroska (.mkv)
Music: ASF (.wma)
VORBIS Up to 48KHz Up to 2
Movie: Matroska (.mkv), WebM
(.webm), 3GPP (.3gpp, .3gp), MP4
(.mp4, .mov)
Music: MP4 (.m4a), OGG (.ogg)
Supports stereo
decoding only
DTS Up to 48KHz Up to 5.1 < 1.5Mbps
Movie: MPEG transport stream (.ts,
.trp, .tp), MPEG program stream
(.DAT, .VOB, .MPG, .MPEG), MP4
(.mp4, .mov), Matroska (.mkv)
English - 30 -
Audio Codec Sample rate Channel Bit Rate Container Note
LPCM 8KHz ~ 48KHz Up to 5.1 64Kbps ~
1.5Mbps
Movie: AVI (.avi), Matroska (.mkv),
3GPP (.3gpp, .3gp), MP4 (.mp4,
.mov), MPEG transport stream (.ts,
.trp, .tp), MPEG program stream,
(.DAT, .VOB, .MPG, .MPEG)
Music: WAV (.wav), MP4 (.m4a)
IMA-ADPCM
MS-ADPCM 8KHz ~ 48KHz Up to 2 384Kbps
Movie: AVI (.avi), Matroska (.mkv),
3GPP (.3gpp, .3gp), MP4 (.mp4,
.mov)
Music: WAV (.wav), MP4 (.m4a)
G711 A/mu-law 8KHz Up to 2 64Kbps ~
128Kbps
Movie: AVI (.avi), Matroska (.mkv),
3GPP (.3gpp, .3gp), MP4 (.mp4,
.mov)
Music: WAV (.wav), MP4 (.m4a)
LBR (cook)
8KHz
11.025KHz,
22.05KHz,
44.1KHz
Up to 5.1 6Kbps ~
128Kbps Movie: RM (.rm, .rmvb)
FLAC 8KHz~96KHz Up to 5.1 < 1.6Mbps Movie: Matroska (.mkv, .mka)
Music:)/$&ÀDF
DTS LBR
12KHz, 22KHz,
24KHz, 44.1KHz,
48KHz
Up to 5.1 up to 2Mbps Movie: MP4 (.mp4, .mov)
DTS XLL Up to 96KHz Up to 6 Movie: MPEG transport stream (.ts,
.trp, .tp), MP4 (.mp4, .mov)
DRA 8KHZ~96KHz Up to 7.1 < 1533Kbps Movie: MPEG transport stream
(.ts, .trp)
Picture
Image Photo Resolution
(width x height)
JPEG Base-line 15360x8640 (1920x8 x 1080x8)
Progressive 1024x768
PNG non-interlace 9600x6400
interlace 1200x800
BMP 9600x6400
MPO Base-line 15360x8640 (1920x8 x 1080x8)
Progressive 1024x768
GIF 6400x4800 (800x8 x 600x8)

English - 31 -
Subtitle
Internal
File Extension Container Subtitle Codec
dat, mpg, mpeg, vob MPG, MPEG DVD Subtitle
ts, trp, tp TS DVB Subtitle
mp4 MP4 DVD Subtitle
UTF-8 Plain Text
mkv MKV
ASS
SSA
UTF-8 Plain Text
VobSub
DVD Subtitle
avi AVI(1.0, 2.0),
DMF0, 1, 2
XSUB
XSUB+
External
File Extension Subtitle Parser Remark
.srt SubRip
.ssa/ .ass SubStation Alpha
.smi SAMI
.sub
SubViewer
MicroDVD
DVDSubtitleSystem
SubIdx (VobSub)
SubViewer 1.0 & 2.0 Only
.txt TMPlayer
Supported DVI Resolutions
When connecting devices to your TV’s connectors by using DVI converter cable(DVI to HDMI cable - not
supplied), you can refer to the following resolution information.
56Hz 60Hz 66Hz 70Hz 72Hz 75Hz
640x480 xx
800x600 xx x
1024x768 xxx
1280x768 xx
1280x960 x
1360x768 x
1366x768 x
1280x1024 xxx
1400x1050 x
1600x900 x
English - 32 -
6SHFL¿FDWLRQ
TV Broadcasting PAL BG/I/DK
SECAM BG/DK
Receiving Channels VHF (BAND I/III) - UHF
(BAND U) - HYPERBAND
Digital Reception
)XOO\ඈQWHJUDWHGGඈJඈWDO
WHUUHVWUඈDOFDEOHVDWHOOඈWH
TV(DVB-T-C-S)
'9%7'9%6FRPSOඈDQW
Number of Preset
Channels 12 200
Channel Indicator On Screen Display
RF Aerial Input 75 Ohm (unbalanced)
Operating Voltage 220-240V AC, 50Hz.
Audio DTS HD
Audio Output Power
(WRMS.) (10% THD) 2 x 10
Power Consumption (W) 135W
Networked Standby
Power Consumption (W) < 2
TV Dimensions DxLxH
(with foot) (mm) 244 x 1119 x 715
TV Dimensions DxLxH
(without foot) (mm) 32/66 x 1119 x 647
'ඈVSOD\ 50"
Operation temperature
and operation humidity
0ºC up to 40ºC, 85%
humidity max
:LUHOHVV/$17UDQVPLWWHU6SHFL¿FDWLRQV
Frequency Ranges Max Output
Power
2400 - 2483,5 MHz (CH1-CH13) < 100 mW
5150 - 5250 MHz (CH36 - CH48) < 200 mW
5250 - 5350 MHz (CH52 - CH64) < 200 mW
5470 - 5725 MHz (CH100 - CH140) < 200 mW
Country Restrictions
7KLVGHYLFHLVLQWHQGHGIRUKRPHDQGRႈFHXVHLQDOO
EU countries (and other countries following the rele-
vant EU directive) without any limitation except for the
countries mentioned below.
Country Restriction
Bulgaria General authorization required for outdoor
use and public service
Italy If used outside of own premises, general
authorization is required
Greece In-door use only for 5470 MHz to 5725
MHz band
Luxembourg General authorization required for network
and service supply(not for spectrum)
Norway
Radio transmission is prohibited for the
geographical area within a radius of 20 km
from the centre of Ny-Ålesund
Russian
Federation In-door use only
Israel 5 GHz band only for 5180 MHz-5320
MHz range
The requirements for any country may change at any
time. It’s recommended that user checks with local
authorities for the current status of their national reg-
ulations for 5 GHz wireless LAN’s.

English - 33 -
Licences
7KHWHUPV +'0, +'0,+LJK'H¿QLWLRQ 0XOWLPHGLD
Interface, and the HDMI Logo are trademarks or regis-
tered trademarks of HDMI Licensing Administrator, Inc.
Dolby, Dolby Vision, Dolby Audio, and the double-D
symbol are trademarks of Dolby Laboratories
Licensing Corporation. Manufactured under license
IURP'ROE\ /DERUDWRULHV &RQ¿GHQWLDOXQSXEOLVKHG
works. Copyright © 1992-2021 Dolby Laboratories.
All rights reserved.
Google, Android, Android TV, Chromecast, Google
Play and YouTube are trademarks of Google LLC.
For DTS patents, see http://patents.dts.com.
Manufactured under license from DTS Licensing
Limited. DTS, the Symbol, DTS and the Symbol
together, DTS-HD, and the DTS-HD logo are registered
trademarks or trademarks of DTS, Inc. in the United
States and/or other countries. © DTS, Inc. All Rights
Reserved.
This product contains technology subject to certain
intellectual property rights of Microsoft. Use or
distribution of this technology outside of this product
is prohibited without the appropriate license(s) from
Microsoft.
Content owners use Microsoft PlayReady™ content
access technology to protect their intellectual property,
including copyrighted content. This device uses
PlayReady technology to access PlayReady-protected
content and/or WMDRM-protected content. If the
device fails to properly enforce restrictions on content
usage, content owners may require Microsoft to revoke
the device’s ability to consume PlayReady-protected
FRQWHQW5HYRFDWLRQ VKRXOG QRWDႇHFW XQSURWHFWHG
content or content protected by other content access
technologies. Content owners may require you to
upgrade PlayReady to access their content. If you
decline an upgrade, you will not be able to access
content that requires the upgrade.
The “CI Plus” Logo is a trademark of CI Plus LLP.
This product is protected by certain intellectual property
rights of Microsoft Corporation. Use or distribution of
such technology outside of this product is prohibited
without a license from Microsoft or an authorized
Microsoft subsidiary.
Disposal Information
[European Union]
These symbols indicate that the electrical and
electronic equipment and the battery with this symbol
should not be disposed of as general household
waste at its end-of-life. Instead, the products should
be handed over to the applicable collection points for
the recycling of electrical and electronic equipment as
well as batteries for proper treatment, recovery and
recycling in accordance with your national legislation
and the Directive 2012/19/EU and 2013/56/EU.
By disposing of these products correctly, you will help
to conserve natural resources and will help to prevent
SRWHQWLDOQHJDWLYH HႇHFWV RQWKH HQYLURQPHQW DQG
human health which could otherwise be caused by
inappropriate waste handling of these products.
For more information about collection points and
recycling of these products, please contact your
ORFDOPXQLFLSDORႈFH\RXUKRXVHKROGZDVWHGLVSRVDO
service or the shop where you purchased the product.
Penalties may be applicable for incorrect disposal of
this waste, in accordance with national legislation.
[Business users]
If you wish to dispose of this product, please contact
your supplier and check the terms and conditions of
the purchase contract.
[Other Countries outside the European Union]
These symbols are only valid in the European Union.
Contact your local authority to learn about disposal
and recycling.
The product and packaging should be taken to your
local collection point for recycling.
Some collection points accept products free of charge.
Note: The sign Pb below the symbol for batteries indicates
that this battery contains lead.
1. Products
2. Battery
Deutsch - 1 -
Inhaltsverzeichnis
Sicherheitsinformationen.......................................2
Kennzeichnungen auf dem Gerät ......................... 3
Einleitung .............................................................. 4
Zubehör im Lieferumfang ......................................4
Funktionen ............................................................ 4
Standinstallation & Wandmontage ........................ 5
Anschluss der Antenne ......................................... 5
Andere Verbindungen ........................................... 6
Ein- / Ausschalten des TV-Geräts ......................... 7
TV-Steuerung & Betrieb ........................................7
Fernbedienung ......................................................8
Ersteinrichtungsassistent ......................................9
Startbildschirm .................................................... 12
Menüinhalt des Live-TV-Modus...........................13
Kanälen ..........................................................13
TV-Optionen ....................................................13
Aufnahme ........................................................14
Einstellungen.......................................................15
Netzwerk & Internet .........................................15
Kanal ...............................................................15
Konten & Anmelden .........................................18
Apps ................................................................18
Geräteeinstellungen ........................................18
Fernbedienung & Zubehör .................................. 22
Kanalliste.............................................................22
Programmführer ..................................................23
Anschluss an das Internet ...................................23
Multimediaplayer .................................................25
Über die USB-Verbindung ...................................27
Von einem mobilen Gerät über DMR ..................27
USB-Aufzeichnung ..............................................27
Instantaufnahme ..............................................28
Aufgenommene Sendungen ansehen ............28
Timeshift-Aufnahme ........................................28
Festplattenformat.............................................28
Zeitplanliste .....................................................28
CEC.....................................................................29
Google Cast ........................................................29
HBBTV-System ...................................................30
Schnelle Standby-Modus ....................................30
Softwareaktualisierung ........................................30
Fehlerbehebung & Tipps .....................................31
HDMI-Signalkompatibilität ...................................32
Beim USB Modus unterstützte Dateiformate ...... 33
Video ...............................................................33
Audio ...............................................................34
Bild...................................................................36
Untertitel ..........................................................36
Unterstützte DVI-Auflösungen.............................37
Technische Daten................................................38
Lizenzen ..............................................................38
Informationen zur Entsorgung .............................39

Deutsch - 2 -
Sicherheitsinformationen
VORSICHT
STROMSCHLAGGEFAHR
NICHT ÖFFNEN
VORSICHT: UM DAS RISIKO AUF EINEN ELEKTRISCHEN
SCHOCK ZU REDUZIEREN, DEN DECKEL (ODER
DAS RÜCKTEIL) NICHT ENTFERNEN
IN DIESEM GERÄT BEFINDEN SICH KEINE TEILE,
DIE VOM BENUTZER GEWARTET WERDEN
KÖNNEN. WENDEN SIE SICH AN QUALIFIZIERTES
SERVICEPERSONAL.
Hinweis: Für die entsprechenden Eigenschaften befolgen
Sie bitte die Instruktionen auf dem Bildschirm.
In extremen Wetterbedingungen (Stürme, Blitzschlag) und
wenn das TV-Gerät über einen langen Zeitraum nicht benutzt
wird (im Urlaub) trennen Sie den das Gerät vom Netz
Der Netzstecker wird verwendet, um das TV-Gerät vom Netz
zu trennen und muss daher stets gut zugänglich sein. Wenn
das Gerät nicht vollständig vom Netz getrennt wird, wird es
auch im Standby-Modus oder sogar im ausgeschalteten
Zustand weiter Strom ziehen.
Bitte lesen Sie diese Anleitung
vollständig vor der Installation oder
Inbetriebnahme durch.
WARNUNG: Dieses Gerät ist nur zur Benutzung
von Personen (einschl. Kindern) gedacht, die in der
Lage (körperlich oder geistig) bzw. erfahren genug
sind, mit dem Gerät unbeaufsichtigt umzugehen.
Andernfalls sind solche Personen unter Aufsicht
eines für ihre Sicherheit verantwortlichen
Erwachsenen zu stellen.
• Dieses TV-Gerät ist für den Einsatz in einer Höhe von
weniger als 5000 Metern über dem Meeresspiegel,
an einem trockenen Standort und in Regionen mit
gemäßigtem oder tropischem Klima vorgesehen.
• Das TV-Gerät ist für den Hausgebrauch und ähnliche
Zwecke in Innenräumen vorgesehen, kann jedoch
DXFKDQ|ႇHQWOLFKHQ2UWHQYHUZHQGHWZHUGHQ
• Lassen Sie für Lüftungszwecke mindestens 5 cm
Abstand um das TV-Gerät herum.
• Die Ventilation darf nicht durch Abdecken oder
Verstellen der Ventilationsöffnungen durch
Gegenstände wie Zeitungen, Tischdecken, Gardinen
o.ä. behindert werden.
• Der Stecker des Stromkabels sollte leicht zugänglich
sein. Stellen Sie keine Gegenstände auf das
Netzkabel (weder das Gerät selbst, noch Möbel
usw.), und klemmen Sie das Kabel nicht ein.
Beschädigungen am Netzkabel/Netzstecker können
zu Bränden oder Stromschlägen führen. Handhaben
Sie das Netzkabel immer am Stecker, trennen Sie
das TV-Gerät nicht durch Ziehen des Netzkabels
vom Netz. Berühren Sie niemals das Netzkabel
/ den Stecker mit nassen Händen, da dies einen
Kurzschluss oder elektrischen Schlag verursachen
kann. Machen Sie niemals Knoten in das Netzkabel,
und binden Sie es nie mit anderen Kabeln zusammen.
Wenn es beschädigt ist, muss das Kabel ersetzt
werden. Diese Arbeit darf ausschließlich durch eine
TXDOL¿]LHUWH)DFKNUDIWDXVJHIKUWZHUGHQ
• Setzen Sie das TV-Gerät möglichst keinen tropfenden
oder spritzenden Flüssigkeiten aus, und stellen Sie
keine mit Flüssigkeiten gefüllte Objekte, wie z.B.
Vasen, Tassen usw. auf dem bzw. oberhalb (z. B. in
Regalfächern darüber) des TV-Geräts ab.
• Setzen Sie das TV-Gerät nicht direkter
Sonneneinstrahlung aus, und stellen Sie keine
RႇHQHQ)ODPPHQZLH]%HUOHXFKWHWH.HU]HQDXI
oder neben das TV-Gerät.
• Stellen Sie keine Hitzequellen, wie z. B. Elektroheizer,
Radiatoren usw. in die unmittelbare Nähe des Geräts.
• Stellen Sie das TV-Gerät nicht auf dem Fußboden
oder geneigte Unterlagen.
• Um Erstickungsgefahr zu vermeiden, müssen Sie
.XQVWVWRႇWWHQDXVGHU5HLFKZHLWHYRQ6lXJOLQJHQ
Kindern und Haustieren halten.
• Befestigen Sie den Ständer sorgfältig am TV-Gerät
Sollten der Ständer mit Schrauben geliefert worden
sein, müssen Sie die Schrauben fest nachziehen, um
das TV-Gerät vor dem Kippen zu bewahren. Ziehen
Sie die Schrauben nicht zu fest und montieren Sie
die Gummistopfen vorschriftsmäßig.
• (QWVRUJHQ 6LHGLH %DWWHULHQ QLHPDOVLP RႇHQHQ
Feuer oder zusammen mit gefährlichen bzw.
HQWÀDPPEDUHQ6WRႇHQ
WARNUNG
• Batterien dürfen nicht zu großer Hitze, wie direkter
Sonneneinstrahlung, Feuer oder Vergleichbarem
ausgesetzt werden.
• Zu hoher Schalldruck oder zu hohe Lautstärken von
Kopf- oder Ohrhörern können zu Gehörschäden
führen.
VOR ALLEM ABER lassen Sie NIEMALS zu,
dass jemand, insbesondere Kinder, gegen den
Bildschirm drückt oder dagegen schlägt oder
irgendwelche Gegenstände in Löcher, Schlitze
RGHUDQGHUHgႇQXQJHQLQGHU$EGHFNXQJVWHFNW
Vorsicht Schweres oder tödliches
Verletzungsrisiko
Stromschlaggefahr
Gefährliches
Spannungsrisiko
Wartung Wichtige
Wartungskomponente
Deutsch - 3 -
Kennzeichnungen auf dem Gerät
Die folgenden Symbole werden auf dem Gerät
als Kennzeichnungen für Einschränkungen und
Vorsichtsmaßnahmen sowie Sicherheitshinweise
verwendet. -HGH .HQQ]HඈFKQXQJ ඈVWQXU GDQQ ]X
EHDFKWHQZHQQ GඈHVH DXIGHP *HUlW DQJHEUDFKW
ZRUGHQඈVW Beachten Sie diese Informationen aus
Sicherheitsgründen.
Gerät der Schutzklasse II: Dieses Gerät ist
so gebaut, das es keinen Schutzleiter
(elektrische Erdung) für die Verbindung zum
Stromnetz erfordert.
Lebensgefährdende Klemme: Die markierte(n)
Klemme(n) ist/sind im normalen Betriebszustand
lebensgefährdend.
Vorsicht. Bitte beachten Sie die
Bedienungsanleitung: Der markierte Bereich
bzw. die markierten Bereiche enthalten durch
den Benutzer auszutauschende Knopfzellenbatterien.
Gerät der Laserklasse 1:
Dieses Gerät enthält eine
Laserquelle der Klasse 1, die
unter vernünftigerweise vor-
hersehbaren Betriebsbedin-
gungen ungefährlich ist.
WARNUNG
Batterien dürfen nicht verschluckt werden, es besteht
chemische Verätzungsgefahr.
Dieses Gerät bzw. das zum Gerät mitgelieferte Zube-
hör enthält möglicherweise eine Knopfzellenbatterie.
Wenn die Knopfzellenbatterie verschluckt wird, führt
dies innerhalb 2 Stunden zu schweren internen Ver-
ätzungen mit möglicher Todesfolge.
Halten Sie gebrauchte und neue Batterien von Kin-
dern fern.
Wenn das Batteriefach nicht sicher geschlossen ist,
stoppen Sie die Verwendung des Geräts und halten
Sie Kinder fern.
Falls Sie den Verdacht haben, dass Batterien ver-
schluckt wurden oder in irgendeinen Körperteil platziert
wurde, suchen Sie sofort medizinische Hilfe auf.
– – – – – – – – – – – –
Ein TV-Gerät kann umfallen und dabei ernste Ver-
letzungen mit möglicher Todesfolge verursachen.
Viele Verletzungen, insbesondere bei Kindern, können
vermieden werden, wenn die folgenden einfachen
9RUVLFKWVPDQDKPHQJHWURႇHQZHUGHQ
• Verwenden Sie IMMER vom Hersteller des TV-Ge-
räts empfohlene TV-Möbel oder Standfüße oder
Montagemethoden.
• Verwenden Sie IMMER Möbelstücke, die das Ge-
wicht des TV-Geräts sicher tragen können.
• Stellen Sie IMMER sicher, dass das TV-Gerät nicht
über die Ränder des Möbelstücks hinausragt.
• Klären Sie IMMER Ihre Kinder darüber auf, dass es
gefährlich ist, auf hohe Möbelstücke zu klettern, um
das TV-Gerät oder die Fernbedienung zu erreichen.
• Verlegen Sie Kabel und Leitungen, die an Ihr
TV-Gerät angeschlossen sind, IMMER so, dass sie
QLFKWGDUEHU JHVWROSHUW JH]RJHQRGHU HUJULႇHQ
werden können.
• Stellen Sie das TV-Gerät NIEMALS auf eine instabile
Unterlage.
• Stellen Sie das TV-Gerät NIEMALS auf hohe Mö-
belstücke (z.B. Regale oder Bücherregale), ohne
das Möbelstück selbst und das TV-Gerät an einem
sicheren Halt abzustützen.
• 'DV79*HUlW1,(0$/6DXI6WRႇRGHUDQGHUH0D-
terialien stellen, die sich möglicherweise zwischen
79*HUlWXQG0|EHOEH¿QGHQ
• Stellen Sie NIEMALS Gegenstände auf das TV-Gerät
oder die Möbel, auf denen das TV-Gerät aufgestellt
ist, die Kinder zum Klettern verleiten könnten, z. B.
Spielzeug und Fernbedienungen.
• 'DV*HUlWLVWQXU IUGLH0RQWDJHLQ+|KHQP
geeignet.
Wenn Sie Ihr vorhandenes TV-Gerät weiterhin nutzen
und an einen neuen Platz stellen, sind die gleichen
Vorsichtsmaßnahmen zu beachten.
– – – – – – – – – – – –
Der Anschluss von Geräten, die über die Netzverbin-
dung oder andere Geräte an die Schutzerdung des
Gebäudes angeschlossen sind, über Koaxialkabel an
ein TV-Verteilersystem kann unter Umständen eine
mögliche Feuergefahr darstellen. Eine Verbindung
über einen Kabelverteilersystem ist nur dann zulässig,
wenn die Vorrichtung eine Isolierung unterhalb eines
gewissen Frequenzbereichs liefert (Galvanische
Isolation)
WARNHINWEISE ZUR
WANDMONTAGE
• Lesen Sie sich die Bedienungsanleitung durch,
bevor Sie das Gerät an der Wand befestigen.
• Das Set für Wandbefestigung ist optional. Sie
können es bei Ihrem lokalen Händler kaufen, falls
es nicht dem Gerät gekauft wurde.
• Installieren Sie das TV-Gerät nicht an der Decke
oder einer geneigten Wand.
• Verwenden Sie für die Wandmontage nur die dazu
vorgesehenen Schrauben und Zubehörteile
• Ziehen Sie die Schrauben zu Wandmontage fest
nach, um das TV-Gerät vor dem Herabfallen zu
bewahren. Ziehen Sie die Schrauben nicht zu
stark an.
Abbildungen und Illustrationen in diesem
Benutzerhandbuch dienen nur der Anschauung und
können sich in der Erscheinung vom eigentlichen
Gerät unterscheiden. Das Produktdesign und
die Technischen Daten können ohne vorherige
Ankündigung geändert werden.
Sayfa yükleniyor...
Sayfa yükleniyor...
Sayfa yükleniyor...
Sayfa yükleniyor...
Sayfa yükleniyor...
Sayfa yükleniyor...
Sayfa yükleniyor...
Sayfa yükleniyor...
Sayfa yükleniyor...
Sayfa yükleniyor...
Sayfa yükleniyor...
Sayfa yükleniyor...
Sayfa yükleniyor...
Sayfa yükleniyor...
Sayfa yükleniyor...
Sayfa yükleniyor...
Sayfa yükleniyor...
Sayfa yükleniyor...
Sayfa yükleniyor...
Sayfa yükleniyor...
Sayfa yükleniyor...
Sayfa yükleniyor...
Sayfa yükleniyor...
Sayfa yükleniyor...
Sayfa yükleniyor...
Sayfa yükleniyor...
Sayfa yükleniyor...
Sayfa yükleniyor...
Sayfa yükleniyor...
Sayfa yükleniyor...
Sayfa yükleniyor...
Sayfa yükleniyor...
Sayfa yükleniyor...
Sayfa yükleniyor...
Sayfa yükleniyor...
Sayfa yükleniyor...
Sayfa yükleniyor...
Sayfa yükleniyor...
Sayfa yükleniyor...
Sayfa yükleniyor...
Sayfa yükleniyor...
Sayfa yükleniyor...
Sayfa yükleniyor...
Sayfa yükleniyor...
Sayfa yükleniyor...
Sayfa yükleniyor...
Sayfa yükleniyor...
Sayfa yükleniyor...
Sayfa yükleniyor...
Sayfa yükleniyor...
Sayfa yükleniyor...
Sayfa yükleniyor...
Sayfa yükleniyor...
Sayfa yükleniyor...
Sayfa yükleniyor...
Sayfa yükleniyor...
Sayfa yükleniyor...
Sayfa yükleniyor...
Sayfa yükleniyor...
Sayfa yükleniyor...
Sayfa yükleniyor...
Sayfa yükleniyor...
Sayfa yükleniyor...
Sayfa yükleniyor...
-
 1
1
-
 2
2
-
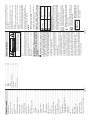 3
3
-
 4
4
-
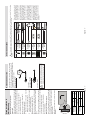 5
5
-
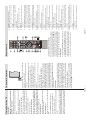 6
6
-
 7
7
-
 8
8
-
 9
9
-
 10
10
-
 11
11
-
 12
12
-
 13
13
-
 14
14
-
 15
15
-
 16
16
-
 17
17
-
 18
18
-
 19
19
-
 20
20
-
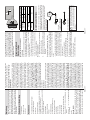 21
21
-
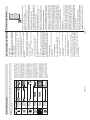 22
22
-
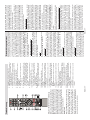 23
23
-
 24
24
-
 25
25
-
 26
26
-
 27
27
-
 28
28
-
 29
29
-
 30
30
-
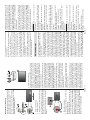 31
31
-
 32
32
-
 33
33
-
 34
34
-
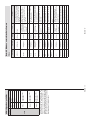 35
35
-
 36
36
-
 37
37
-
 38
38
-
 39
39
-
 40
40
-
 41
41
-
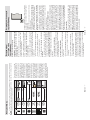 42
42
-
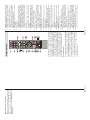 43
43
-
 44
44
-
 45
45
-
 46
46
-
 47
47
-
 48
48
-
 49
49
-
 50
50
-
 51
51
-
 52
52
-
 53
53
-
 54
54
-
 55
55
-
 56
56
-
 57
57
-
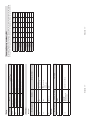 58
58
-
 59
59
-
 60
60
-
 61
61
-
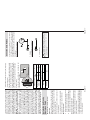 62
62
-
 63
63
-
 64
64
-
 65
65
-
 66
66
-
 67
67
-
 68
68
-
 69
69
-
 70
70
-
 71
71
-
 72
72
-
 73
73
-
 74
74
-
 75
75
-
 76
76
-
 77
77
-
 78
78
-
 79
79
-
 80
80
-
 81
81
-
 82
82
-
 83
83
-
 84
84


Daewoo 50DM55UQP Colour Television Kullanım kılavuzu
- Kategori
- LCD TV'ler
- Tip
- Kullanım kılavuzu
diğer dillerde
İlgili makaleler
Diğer belgeler
-
Panasonic TX50HXW604 Kullanma talimatları
-
-
-
VESTEL 55UA8990 Operating Instructions Manual
-
LG 60LA8609 Kullanım kılavuzu
-
LG 49LH604V.AEU Kullanım kılavuzu
-
LG 39LB561V Kullanım kılavuzu
-