
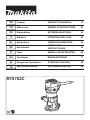
RT0702C
EN Trimmer INSTRUCTION MANUAL 12
FR MANUEL D’INSTRUCTIONS 20
DE BETRIEBSANLEITUNG 29
IT ISTRUZIONI PER L’USO 39
NL GEBRUIKSAANWIJZING 49
ES MANUAL DE
INSTRUCCIONES 59
PT MANUAL DE INSTRUÇÕES 68
DA BRUGSANVISNING 77
EL 86
TR KULLANMA KILAVUZU 96

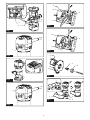
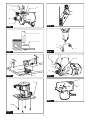
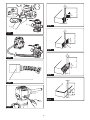
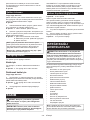
1
3
4
5
6
2
Fig.1
1
Fig.2
1
Fig.3
1
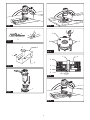
Fig.4
1
2
3
4
Fig.5
1
2
3
4
Fig.6
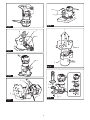
1
2
Fig.7
1
2
3
Fig.8
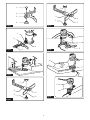
2

Fig.9
12
3
44
2
Fig.10
1
23
4
Fig.11
1
Fig.12
Fig.13
1
22
Fig.14
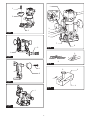
1
2
3
5
6
4
(X)
Fig.15
Fig.16
3

1
2
3
4
Fig.17
1
2
3
4
Fig.18
Fig.19
1
2
3
4
5
Fig.20
1
2
3
4
5
Fig.21
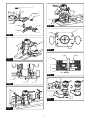
2
1
3
Fig.22
Fig.23
4

1
A
B
2
3
Fig.24
1
2
3
Fig.25
2
1
Fig.26
1
2
Fig.27
Fig.28
1
2
3
Fig.29
1
2
3
Fig.30
2
1
Fig.31
5

Fig.32
1
2
Fig.33
1
Fig.34
1
2
3
Fig.35
Fig.36
1
2
3
Fig.37
1
2
3
Fig.38
6

1
2
3
Fig.39
2
1
Fig.40
1
2
Fig.41
1
Fig.42
2
3
4
5
7
8
1
Fig.43
12
3
44
2
Fig.44
1
23
4
Fig.45
7

1
2
3
8
4
5
6
7
Fig.46
Fig.47
1
23
Fig.48
Fig.49
Fig.50
12
3
Fig.51
1
2
3
5
6
4
(X)
Fig.52
1
2
3
Fig.53
8

1
2
3
Fig.54
Fig.55
1
Fig.56
1
Fig.57
D
L1
L2
A
Fig.58
L2
L1
D
AR
Fig.59
θθ
D
L2
L1
A
Fig.60
Fig.61
9

Fig.62
Fig.63
Fig.64
Fig.65
Fig.66
Fig.67
Fig.68
Fig.69
10

Fig.70
Fig.71
11

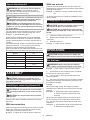
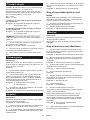
12 ENGLISH
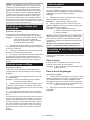
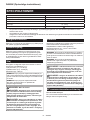
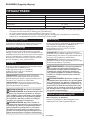
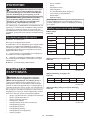
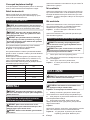
SPECIFICATIONS
RT0702C
Collet chuck capacity
No load speed 10,000 - 34,000 min-1
Overall height 210 mm
Net weight 1.8 - 2.8 kg
Safety class /II
without notice.
wood, plastic and similar materials.
the same voltage as indicated on the nameplate, and
from sockets without earth wire.
The typical A-weighted noise level determined accord-
ing to EN62841-2-17:
pA
WA
another.
exposure.
WARNING:
WARNING:
WARNING: -
-
mined according to EN62841-2-17:
Work mode: rotation without load
h2 or less
2
measured in accordance with a standard test method
WARNING:
-
WARNING:
-
-
For European countries only
The EC declaration of conformity is included as Annex A
to this instruction manual.
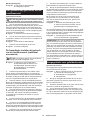
SAFETY WARNINGS
WARNING: -
Failure to follow all instructions

13 ENGLISH
-
The term "power tool" in the warnings refers to your
1.
Cutting a "live" wire may make
exposed metal parts of the power tool "live" and
could give the operator an electric shock.
2.
3.
4.
6.
7.
8.
10.
11.
12.
13.
14.
16.
-
17. -
18.
20. Otherwise falling
SAVE THESE INSTRUCTIONS.
WARNING:
-
-
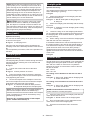
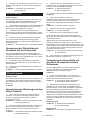
FUNCTIONAL
DESCRIPTION
CAUTION:
1. 2. Scale 3. 4.
lever 5. 6. Hex nut
When the tool is not secured even if the lock-
ing lever is closed, tighten the hex nut and then close
the locking lever.
CAUTION:
To start the tool, press the I side of the switch. To stop
the tool, press the O side of the switch.
1. Switch
The tool is equipped with the electronic functions for
easy operation.
1. Indication lamp
The indication lamp lights up green when the tool is
plugged. If the indication lamp does not light up, the
-
out, or the controller, the motor or the ON/OFF switch
The tool does not start with the I side of the switch
pressed even when the tool is plugged.
the unintentional restart proof device is on function.
To cancel the unintentional restart proof, press the O
side of the switch.
Soft-start feature minimizes start-up shock, and makes
the tool start smoothly.
kept constant even under the loaded condition.

14 ENGLISH
WARNING:
CAUTION:
CAUTION:
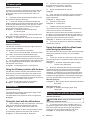
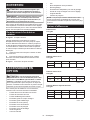
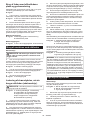
1.
-
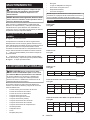
min-1
110,000
212,000
317,000
422,000
27,000
634,000
ASSEMBLY
CAUTION:
CAUTION: -
CAUTION:
either way.
tighten the collet nut securely with one wrench while
holding the neck with the other wrench.
1. Tighten 2. 3. Neck 4. Collet nut
and tighten the collet nut securely with the wrench while
pressing the shaft lock.
1. Tighten 2. 3. Shaft lock 4. Collet
nut
-
dure in reverse.
CAUTION:
CAUTION: -
1.
2. Replace the installed collet cone with desired
collet cone.
3. Reinstall collet nut.
1. Collet cone 2. Collet nut
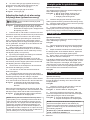
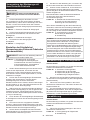
OPERATION
CAUTION:
WARNING:
1. Dust nozzle 2. 3.
1.
2.
attains full speed.
3. Move the tool forward over the workpiece surface,
the cutting is complete.
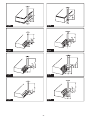
Fig.9
When doing edge cutting, the workpiece surface
direction.
1. Workpiece 2.
3. View from the top of the tool 4. Feed
direction
When using the straight guide or the trimmer guide,
-
workpiece.
1. Feed direction 2.
3. Workpiece 4. Straight guide

15 ENGLISH
Moving the tool forward too fast may cause
and mar the cut. The proper feed rate will depend on
CAUTION: Since excessive cutting may cause
at a pass when cutting grooves. When you wish to cut
grooves more than 3 mm deep, make several passes
Optional accessory
1. Clamping screw
clamping screw at the desired protrusion of the trimmer
For the operation procedures, refer to the operation for
Optional accessory
The templet guide provides a sleeve through which the
templet patterns.
Fig.13
1.
protector.
1. 2. Screws
2.
-
3. Secure the templet to the workpiece. Place the
tool on the templet and move the tool with the templet
guide sliding along the side of the templet.
1. 2. 3.
4. Templet 5. Workpiece 6. Templet guide
the following equation:
Optional accessory
when chamfering or grooving.
Fig.16
1. Attach the guide plate to the straight guide with
1. 2. Guide plate 3. Straight guide
4. Wing nut
2. -
ing screw.
1. Clamping screw 2. Straight guide 3. Wing
nut 4.
3. -
the straight guide. At the desired distance, tighten the
wing nut securely.
4. When cutting, move the tool with the straight guide
the cutting position is too wide for the straight guide, or
if the side of the workpiece is not straight, the straight
of the arrow.
Fig.19
Min.: 70 mm
Max.: 221 mm
1. Wing nut 2. Guide plate 3. Straight guide
4. Center hole 5.
1. Wing nut 2. Guide plate 3. Straight guide
4. Center hole 5.
1. Align the center hole in the straight guide with the
1. Nail 2. Center hole 3. Straight guide
2. Drive a nail less than 6 mm in diameter into the
center hole to secure the straight guide.
3. Pivot the tool around the nail in clockwise
direction.

16 ENGLISH
Optional accessory
Trimming, curved cuts in veneers for furniture and the
Fig.23
1. Install the trimmer guide and guide holder on the
2.
secure the trimmer guide in place.
1. 2. Guide holder
3. Trimmer guide
3. When cutting, move the tool with the guide roller
riding the side of the workpiece.
1. Workpiece 2. 3. Guide roller
Optional accessory
sheet or similar materials.
1. -
ing screws, and tilt the tool at the desired angle.
2.
Close the locking lever at the desired protrusion of the
3.
the direction of the arrow.
1. Clamping screws 2.
1.
loosening and removing the four screws.
2.
1. 2. Screw
Optional accessory
-
nate sheet or similar materials.
Fig.28
1.
1. Pulley 2. Collet nut 3. Collet cone
2.
1. Wrench 2. Pulley 3. Shaft lock
3. Place the collet cone and screw the collet nut on
1. Collet nut 2. Collet cone
4.
Fig.32
5.
pulley completely.
1. Pulley 2.
6. Close the locking lever.
1.
7.
With the hex wrench held in the position as shown in
1. Wrench 2. Hex wrench 3.
8.
procedure in reverse.
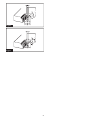
Fig.36
1.
1. Screws 2. 3. Upper
2.
place it on the grip attachment and secure it with a screw.
1. 2. Grip attachment 3.
1. Screw 2. 3. Grip
attachment
Optional accessory
CAUTION:
1. To use the tool as a router, install the tool on a
1. 2.

17 ENGLISH
2.
1. Screw 2.
3.
1.
CAUTION:
grips during operation.
1. 2. 3. Depth
pointer 4. Stopper pole setting nut 5. Fast-
6. Stopper pole 7.
8.
1.
2. Turn the stopper pole setting nut counterclock-
the "0" graduation. The depth of cut is indicated on the
3.
4.
5.
6.
7.
attains full speed.
8.
advancing smoothly until the cutting is complete.
When doing edge cutting, the workpiece surface should
1. Workpiece 2.
3. View from the top of the tool 4. Feed
direction
sure to keep it on the right side in the feed direction. This
1. Feed direction 2.
3. Workpiece 4. Straight guide
Moving the tool forward too fast may cause
and mar the cut. The proper feed rate will depend on
Optional accessory
when chamfering or grooving.
1. 2. Guide holder 3.
4. 5. 6. Guide plate
7. Straight guide 8.
1. I
2. Insert the guide holder into the holes in the plunge
3.
Optional accessory
when chamfering or grooving.
Fig.47
1.
1. 2. Wing nut 3. Straight guide
2.
the straight guide. At the desired distance, tighten the
wing nuts to secure the straight guide in place.
3. When cutting, move the tool with the straight guide
cutting position is too wide for the straight guide, or if the
side of the workpiece is not straight, the straight guide
to the workpiece and use it as a guide against the router
Fig.49
Optional accessory
The templet guide provides a sleeve through which the
templet patterns.
Fig.50
1.
templet guide and then tighten the screws.
1. Screw 2. 3. Templet guide
2. Secure the templet to the workpiece. Place the
tool on the templet and move the tool with the templet
guide sliding along the side of the templet.
1. 2. 3.
4. Templet 5. Workpiece 6. Templet guide
the following equation:

18 ENGLISH
Use the dust nozzle for dust extraction.
screw.
1. Dust nozzle 2. 3.
Optional accessory
1.
1. Dust nozzle 2. 3. Plunge
2. Connect a vacuum cleaner to the dust nozzle.
Fig.55
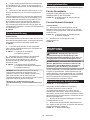
MAINTENANCE
CAUTION:
NOTICE:
Centers, always using Makita replacement parts.
1.
Replace them when they wear down to the limit mark.
1.
caps.
2.
1.
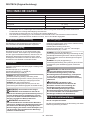
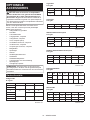
OPTIONAL
ACCESSORIES
CAUTION:
The use of any other
accessories or attachments might present a risk of
for its stated purpose.
If you need any assistance for more details regarding
these accessories, ask your local Makita Service Center.
•Templet guide
•Collet cone
•Wrench
•Dust nozzle
•Guide rail
•Guide rail adapter set
•Side grip
•Grip attachment
tool package as standard accessories. They may
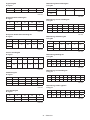
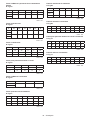
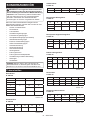
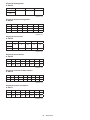
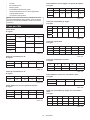
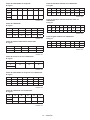
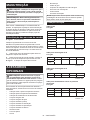
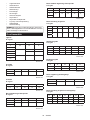
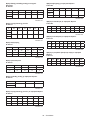
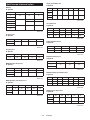
Fig.58
D A L1 L2
620
8 8 60
6 18
6 6 18
Unit:mm
Fig.59
D A L1 L2 R
6 6 60 28 3
Unit:mm

19 ENGLISH
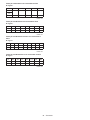
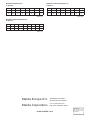
Fig.60
D A L1 L2
20
Unit:mm
Fig.61
D A L1 L2 L3
8 8 60 20
6 6 60 18 28
Unit:mm
Fig.62
D A L1 L2 L3 L4
8 8 80 20
6 6 70 40 12 14
Unit:mm
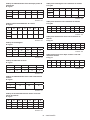
Fig.63
DA1 A2 L1 L2 L3 R
6 48 13 8
620 8 10 4 4
Unit:mm
Fig.64
D A L1 L2 L3
623 46 11 6
620 13
620 14 2
Unit:mm
Fig.65
D A L1 L2 R
620 43 8 4
6 48 13 8
Unit:mm
Fig.66
D A L1 L2
610 20
Unit:mm
Fig.67
DA1 A2 L1 L2 L3 R
6 837 7 3
621 840 10 6
21 840 10 6
Unit:mm
Fig.68
DA1 A2 L1 L2
626 842 12
620 841 11
Unit:mm
Fig.69
DA1 A2 A3 L1 L2 L3 R
620 12 840 10 4
626 12 842 12 7
Unit:mm
Fig.70
DA1 A2 A3 A4 L1 L2 L3 R
620 18 12 840 10 3
626 22 12 842 12
Unit:mm
Fig.71
DA1 A2 L1 L2 L3 R1 R2
620 840 10
626 842 12 3 6
Unit:mm

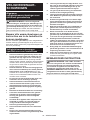
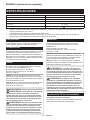
20 FRANÇAIS
SPÉCIFICATIONS
RT0702C
Vitesse à vide 10 000 - 34 000 min-1
Hauteur hors tout 210 mm
Poids net 1,8 - 2,8 kg
Catégorie de sécurité /II
-
-
tique, et il ne pourra fonctionner que sur un courant secteur
EN62841-2-17 :
pA
WA
-
rées ont été mesurées conformément à la méthode
-
parer les outils entre eux.
-
préliminaire de l’exposition.
AVERTISSEMENT :
AVERTISSEMENT :
AVERTISSEMENT :
déterminée selon EN62841-2-17 :
Mode de travail : rotation sans charge
h 2 ou moins
2
-
rées ont été mesurées conformément à la méthode
-
parer les outils entre eux.
-
préliminaire de l’exposition.
AVERTISSEMENT :
AVERTISSEMENT :
Pour les pays européens uniquement
A à ce mode d’emploi.
Sayfa yükleniyor...
Sayfa yükleniyor...
Sayfa yükleniyor...
Sayfa yükleniyor...
Sayfa yükleniyor...
Sayfa yükleniyor...
Sayfa yükleniyor...
Sayfa yükleniyor...
Sayfa yükleniyor...
Sayfa yükleniyor...
Sayfa yükleniyor...
Sayfa yükleniyor...
Sayfa yükleniyor...
Sayfa yükleniyor...
Sayfa yükleniyor...
Sayfa yükleniyor...
Sayfa yükleniyor...
Sayfa yükleniyor...
Sayfa yükleniyor...
Sayfa yükleniyor...
Sayfa yükleniyor...
Sayfa yükleniyor...
Sayfa yükleniyor...
Sayfa yükleniyor...
Sayfa yükleniyor...
Sayfa yükleniyor...
Sayfa yükleniyor...
Sayfa yükleniyor...
Sayfa yükleniyor...
Sayfa yükleniyor...
Sayfa yükleniyor...
Sayfa yükleniyor...
Sayfa yükleniyor...
Sayfa yükleniyor...
Sayfa yükleniyor...
Sayfa yükleniyor...
Sayfa yükleniyor...
Sayfa yükleniyor...
Sayfa yükleniyor...
Sayfa yükleniyor...
Sayfa yükleniyor...
Sayfa yükleniyor...
Sayfa yükleniyor...
Sayfa yükleniyor...
Sayfa yükleniyor...
Sayfa yükleniyor...
Sayfa yükleniyor...
Sayfa yükleniyor...
Sayfa yükleniyor...
Sayfa yükleniyor...
Sayfa yükleniyor...
Sayfa yükleniyor...
Sayfa yükleniyor...
Sayfa yükleniyor...
Sayfa yükleniyor...
Sayfa yükleniyor...
Sayfa yükleniyor...
Sayfa yükleniyor...
Sayfa yükleniyor...
Sayfa yükleniyor...
Sayfa yükleniyor...
Sayfa yükleniyor...
Sayfa yükleniyor...
Sayfa yükleniyor...
Sayfa yükleniyor...
Sayfa yükleniyor...
Sayfa yükleniyor...
Sayfa yükleniyor...
Sayfa yükleniyor...
Sayfa yükleniyor...
Sayfa yükleniyor...
Sayfa yükleniyor...
Sayfa yükleniyor...
Sayfa yükleniyor...
Sayfa yükleniyor...
Sayfa yükleniyor...
Sayfa yükleniyor...
Sayfa yükleniyor...
Sayfa yükleniyor...
Sayfa yükleniyor...
Sayfa yükleniyor...
Sayfa yükleniyor...
Sayfa yükleniyor...
Sayfa yükleniyor...
Sayfa yükleniyor...
Sayfa yükleniyor...
-
 1
1
-
 2
2
-
 3
3
-
 4
4
-
 5
5
-
 6
6
-
 7
7
-
 8
8
-
 9
9
-
 10
10
-
 11
11
-
 12
12
-
 13
13
-
 14
14
-
 15
15
-
 16
16
-
 17
17
-
 18
18
-
 19
19
-
 20
20
-
 21
21
-
 22
22
-
 23
23
-
 24
24
-
 25
25
-
 26
26
-
 27
27
-
 28
28
-
 29
29
-
 30
30
-
 31
31
-
 32
32
-
 33
33
-
 34
34
-
 35
35
-
 36
36
-
 37
37
-
 38
38
-
 39
39
-
 40
40
-
 41
41
-
 42
42
-
 43
43
-
 44
44
-
 45
45
-
 46
46
-
 47
47
-
 48
48
-
 49
49
-
 50
50
-
 51
51
-
 52
52
-
 53
53
-
 54
54
-
 55
55
-
 56
56
-
 57
57
-
 58
58
-
 59
59
-
 60
60
-
 61
61
-
 62
62
-
 63
63
-
 64
64
-
 65
65
-
 66
66
-
 67
67
-
 68
68
-
 69
69
-
 70
70
-
 71
71
-
 72
72
-
 73
73
-
 74
74
-
 75
75
-
 76
76
-
 77
77
-
 78
78
-
 79
79
-
 80
80
-
 81
81
-
 82
82
-
 83
83
-
 84
84
-
 85
85
-
 86
86
-
 87
87
-
 88
88
-
 89
89
-
 90
90
-
 91
91
-
 92
92
-
 93
93
-
 94
94
-
 95
95
-
 96
96
-
 97
97
-
 98
98
-
 99
99
-
 100
100
-
 101
101
-
 102
102
-
 103
103
-
 104
104
-
 105
105
-
 106
106


diğer dillerde
- español: Makita RT0702C Manual de usuario
- français: Makita RT0702C Manuel utilisateur
- italiano: Makita RT0702C Manuale utente
- Deutsch: Makita RT0702C Benutzerhandbuch
- português: Makita RT0702C Manual do usuário
- dansk: Makita RT0702C Brugermanual
- Nederlands: Makita RT0702C Handleiding