
Active DVB-T indoor antenna
Antenne intérieure active TNT
Aktive DVB-T Zimmerantenne
ANT1418BK
mythomson.com

GOperating Instructions
FMode d‘emploi
DBedienungsanleitung
EInstrucciones de uso
IIstruzioni per l‘uso
OManual de instruções
RРуководство по эксплуатации
NGebruiksaanwijzing
PInstrukcja obsługi
HHasználati útmutató
JΟδηγίες χρήσης
CNávod k použití
QNávod na použitie
TKullanma kılavuzu
SBruksanvisning
LKäyttöohje
MManual de utilizare
BРаботна инструкция

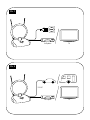
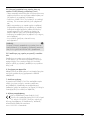
Pic. 1
Pic. 2
SetTopBox TV
SetTopBox
12V DC
TV

2
GOperating Instructions
Thank you for choosing a Thomson product.
Take your time and read the following instructions and
information completely. Please keep these instructions in a
safe place for future reference. If you sell the device, please
pass these operating instructions on to the new owner.
1. Explanation of Warning Symbols and Notes
Warning
This symbol is used to indicate safety instructions or to
draw your attention to specic hazards and risks.
Note
This symbol is used to indicate additional information or
important notes.
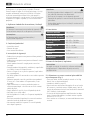
2. Package Contents
•Indoor antenna
•Power supply unit
•These operating instructions
3. Safety Notes
•The product is intended for private, non-commercial use
only.
•The product is intended for indoor use only.
•Use the product for its intended purpose only.
•Protect the product from dirt, moisture and overheating
and use it in dry rooms only.
•Children should be supervised to ensure that they do not
play with the device.
•Do not use the product in areas where the use of
electronic devices is not permitted.
•Connect the product only to a socket that has been
approved for the device. The electrical socket must always
be easily accessible.
•Disconnect the product from the network using the power
button – if this is not available, unplug the power cord
from the socket.
•Lay all cables so that they do not pose a tripping hazard.
•Do not bend or crush the cable.
•Do not drop the product and do not expose it to any
major shocks.
•Dispose of packaging material immediately according to
locally applicable regulations.
•Do not modify the device in any way. Doing so voids the
warranty.
Warning
•Do not use the product if the AC adapter, adapter cable
or power cable is damaged.
•Do not attempt to service or repair the device yourself.
Leave any service work to qualied experts.
•Do not open the device or continue to operate it if it
becomes damaged.
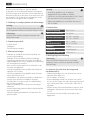
4. Specications
Supply voltage 230 V / 50 Hz
Rated power
consumption max. 50 mA
Frequency band(s)
UHF: 470 – 790 MHz
VHF: 174 – 230 MHz
Active antenna gain
UHF: 7 – 18 dBi
VHF: 9 – 15.5 dBi
Impedance 75 ohm
Connection Coax plug
Ambient temperature -20 to +40° C
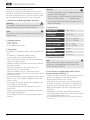
5. Startup and Operation
Note
Please note that the number and quality of stations
received may vary depending on the position of the
antenna and local conditions.
5.1 The antenna is supplied with power via the
integrated power cable (Fig. 1)
•Connect the coaxial cable that is attached to the antenna
with the set-top box (or to the digital television).
•Plug the power cable unit into a socket.
•After switching on the antenna, turn the dial clockwise
and adjust the position of the antenna. Depending on
horizontal or vertical polarisation in the UHF band, the
dipole can be rotated. Also adjust the position of the
telescopes.
•Depending on the station, the amplier performance
must be adjusted using the dial. If necessary, the antenna
can also be powered using DC 12 V.
•We recommend that you switch off the antenna when it
is not in use.

3
5.2 The antenna is supplied with power via the DC
12 V input (ideal for camping) (Fig. 2)
•Take the coaxial cable that attached on the antenna, and
connect it to the antenna input connector of your Set Top
Box (or Digital TV).
•Connect the DC 12 V input of the antenna to the 12 V
socket of your car or caravan.
•After switching on the antenna, turn the dial clockwise
and adjust the position of the antenna. Depending on
horizontal or vertical polarisation in the UHF band, the
dipole can be rotated. Also adjust the position of the
telescopes.
•Depending on the station, the amplier performance
must be adjusted using the dial.
•We recommend that you switch off the antenna when it
is not in use.
Note
Powering the antenna directly from the set-top box or
digital TV requires a supply voltage of 5 V. No USB cable
or power supply unit is necessary.
5.3 Setting up the antenna on a table, cabinet or
similar
Next, place the antenna on an even surface such as a table
or entertainment stand. Check the reception quality. If the
reception quality is not good, adjust the position or angle
of the antenna.
6. Care and Maintenance
Only clean this product with a slightly damp, lint-free cloth
and do not use aggressive cleaning agents.
7. Warranty Disclaimer
Hama GmbH & Co KG assumes no liability and provides no
warranty for damage resulting from improper installation/
mounting, improper use of the product or from failure to
observe the operating instructions and/or safety notes.
8. Declaration of Conformity
Hereby, Hama GmbH & Co KG declares that the
radio equipment type [00132183] is in compliance
with Directive 2014/53/EU. The full text of the EU
declaration of conformity is available at the following
internet address:
www.hama.com->00132183->Downloads.

4
FMode d‘emploi
Nous vous remercions d’avoir choisi un produit Thomson.
Veuillez prendre le temps de lire l‘ensemble des remarques
et consignes suivantes. Veuillez conserver ce mode d‘emploi
à portée de main an de pouvoir le consulter en cas de be-
soin. Transmettez-le au nouveau propriétaire avec l’appareil
le cas échéant.
1. Explication des symboles d‘avertissement et des
remarques
Avertissement
Ce symbole est utilisé pour indiquer des consignes de
sécurité ou pour attirer votre attention sur des dangers et
risques particuliers.
Remarque
Ce symbole est utilisé pour indiquer des informations
supplémentaires ou des remarques importantes.
2. Contenu de l‘emballage
•Antenne d’intérieur
•Bloc secteur
•Mode d‘emploi
3. Consignes de sécurité
•Ce produit est destiné à une installation domestique non
commerciale.
•Ce produit est destiné à une utilisation exclusivement à
l‘intérieur d‘un bâtiment.
•Utilisez le produit exclusivement conformément à sa
destination.
•Protégez le produit de toute saleté, humidité, surchauffe
et utilisez-le uniquement dans des locaux secs.
•Les enfants doivent être surveillés n de garantir qu‘ils ne
jouent pas avec le produit.
•N‘utilisez pas le produit dans les zones dans lesquelles
l‘utilisation d‘appareils électroniques est interdite.
•Branchez l‘appareil à une prise de courant appropriée. La prise
de courant doit être facilement accessible à tout moment.
•Coupez le produit du secteur à l‘aide de l‘interrupteur - dé-
branchez la prise de courant en cas d‘absence d‘interrupteur.
•Posez tous les câbles de telle sorte qu’ils ne présentent
aucun risque de chute.
•Faites attention à ne pas plier ni coincer le câble.
•Protégez le produit des secousses violentes et évitez tout
choc ou toute chute.
•Recyclez les matériaux d’emballage conformément aux
prescriptions locales en vigueur.
•N’apportez aucune modication à l’appareil. Des modi-
cations vous feraient perdre vos droits de garantie.
Avertissement
•Cessez d‘utiliser le produit si l‘adaptateur CA, le câble
adaptateur ou le câble d‘alimentation est endommagé.
•Ne tentez pas de réparer l’appareil vous-même ni d’ef-
fectuer des travaux d’entretien. Déléguez tous travaux
d‘entretien à des techniciens qualiés.
•Ne tentez pas d‘ouvrir le produit en cas de détériora-
tion et cessez de l’utiliser.
4. Caractéristiques techniques
Tension nominale 230 V / 50 Hz
Consommation
nominale max. 50 mA
Bandes de fréquences
UHF: 470 – 790 MHz
VHF: 174 – 230 MHz
Gain d‘antenne actif
UHF: 7 – 18 dBi
VHF: 9 – 15,5 dBi
Impédance 75 ohms
Connexion Fiche coaxiale mâle
Température ambiante
de -20 à +40 °C
5. Mise en service et fonctionnement
Remarque
Veuillez noter que le nombre d‘émetteurs reçus et leur
qualité de réception sont susceptibles de dépendre de la
position de l‘antenne et de la conguration des lieux.
5.1 Alimentation électrique de l’antenne via le câble
secteur intégré (g. 1)
•Raccordez le câble coaxial de l’antenne au décodeur (ou
au téléviseur numérique).
•Branchez le câble secteur dans une prise de courant.
•Après avoir mis l’antenne sous tension, tournez le bouton
de réglage dans le sens des aiguilles d’une montre et
orientez l’antenne. Le dipôle peut être pivoté en fonction
de la polarisation horizontale ou verticale en fréquence
UHF. Orientez également le télescope.
•La puissance d’amplication doit être ajustée à l’aide
du bouton de réglage en fonction de l’émetteur. Si
nécessaire, il est possible d’alimenter l’antenne avec une
tension de 12 V CC.
•En cas de non-utilisation, il est recommandé de mettre
l’antenne hors tension.

5
5.2
Alimentation électrique de l’antenne via l’entrée 12
V CC (idéale pour le camping) (g. 2)
•Branchez le câble coaxial de l’antenne au connecteur
d’entrée de votre décodeur numérique (set-top-box ou TV
numérique).
•Raccordez l’entrée 12 V CC de l’antenne à la prise 12 V
de votre voiture ou de votre caravane.
•Après avoir mis l’antenne sous tension, tournez le bouton
de réglage dans le sens des aiguilles d’une montre et
orientez l’antenne. Le dipôle peut être pivoté en fonction
de la polarisation horizontale ou verticale en fréquence
UHF. Orientez également le télescope.
•La puissance d’amplication doit être ajustée à l’aide du
bouton de réglage en fonction de l’émetteur.
En cas de non-utilisation, il est recommandé de mettre
l’antenne hors tension.
Remarque
Une tension d’alimentation de 5 V est nécessaire an
d’alimenter directement l’antenne en électricité via un dé-
codeur (set top box) ou un téléviseur numérique. Aucun
câble USB et aucun bloc secteur ne sont nécessaires.
5.3 Installation de l’antenne sur une table, une
armoire, etc.
Placez l’antenne sur une surface plane (table, étagère TV,
etc.). Vériez la qualité de réception. En cas de mauvaise
réception, modiez la position de l’antenne ou placez-la
dans un autre angle.
6. Soins et entretien
Nettoyez la balance uniquement à l’aide d’un chiffon non
breux légèrement humide ; évitez tout détergent agressif.
7. Exclusion de garantie
La société Hama GmbH & Co KG décline toute
responsabilité en cas de dommages provoqués par une
installation, un montage ou une utilisation non conformes
du produit ou encore provoqués par un non respect des
consignes du mode d‘emploi et/ou des consignes de
sécurité.
8. Déclaration de conformité
Le soussigné, Hama GmbH & Co KG, déclare que
l‘équipement radioélectrique du type [00132183]
est conforme à la directive 2014/53/UE. Le texte
complet de la déclaration UE de conformité est disponible à
l‘adresse internet suivante:
www.hama.com->00132183->Downloads.

6
DBedienungsanleitung
Vielen Dank, dass Sie sich für ein Thomson Produkt ent-
schieden haben!
Nehmen Sie sich Zeit und lesen Sie die folgenden Anwei-
sungen und Hinweise zunächst ganz durch. Bewahren Sie
diese Bedienungsanleitung anschließend an einem sicheren
Ort auf, um bei Bedarf darin nachschlagen zu können. Soll-
ten Sie das Gerät veräußern, geben Sie diese Bedienungs-
anleitung an den neuen Eigentümer weiter.
1. Erklärung von Warnsymbolen und Hinweisen
Warnung
Wird verwendet, um Sicherheitshinweise zu kennzeichnen
oder um Aufmerksamkeit auf besondere Gefahren und
Risiken zu lenken.
Hinweis
Wird verwendet, um zusätzlich Informationen oder
wichtige Hinweise zu kennzeichnen.
2. Packungsinhalt
•Zimmerantenne
•Netzteil
•Diese Bedienungsanleitung
3. Sicherheitshinweise
•Das Produkt ist für den privaten, nicht-gewerblichen
Haushaltsgebrauch vorgesehen.
•Das Produkt ist nur für den Gebrauch innerhalb von
Gebäuden vorgesehen.
•Verwenden Sie das Produkt ausschließlich für den dazu
vorgesehenen Zweck.
•Schützen Sie das Produkt vor Schmutz, Feuchtigkeit und
Überhitzung und verwenden Sie es nur in trockenen Räumen.
•Kinder sollten beaufsichtigt werden, um sicher zu stellen,
dass sie nicht mit dem Produkt spielen.
•Benutzen Sie das Produkt nicht in Bereichen, in denen
elektronische Geräte nicht erlaubt sind.
•Betreiben Sie das Produkt nur an einer dafür zugelasse-
nen Steckdose. Die Netzsteckdose muss jederzeit leicht
erreichbar sein.
•Trennen Sie das Produkt mittels des Ein-/Ausschalters vom
Netz – wenn dieser nicht vorhanden ist, ziehen Sie die
Netzleitung aus der Steckdose.
•Verlegen Sie alle Kabel so, dass sie keine Stolpergefahr
darstellen.
•Knicken und quetschen Sie das Kabel nicht.
•Lassen Sie das Produkt nicht fallen und setzen Sie es
keinen heftigen Erschütterungen aus.
•Entsorgen Sie das Verpackungsmaterial sofort gemäß den
örtlich gültigen Entsorgungsvorschriften.
•Nehmen Sie keine Veränderungen am Produkt vor. Da-
durch verlieren sie jegliche Gewährleistungsansprüche.
Warnung
•Verwenden Sie das Produkt nicht, wenn das Netzteil
oder die Netzleitung beschädigt sind
•Versuchen Sie nicht, das Gerät selbst zu warten oder zu
reparieren. Überlassen Sie jegliche Wartungsarbeit dem
zuständigen Fachpersonal
•Öffnen Sie das Produkt nicht und betreiben Sie es bei
Beschädigungen nicht weiter
4. Technische Daten
Nennspannung 230 V / 50 Hz
Nennstromaufnahme max. 50 mA
Frequenzband/
Frequenzbänder
UHF: 470 – 790 MHz
VHF: 174 – 230 MHz
Aktiver
Antennengewinn
UHF: 7 – 18 dBi
VHF: 9 – 15,5 dBi
Impedanz 75 Ohm
Anschluss Koax-Stecker
Umgebungstemperatur -20 bis +40 °C
5. Inbetriebnahme und Betrieb
Hinweis
Bitte beachten Sie dass die Anzahl und Qualität der
empfangenen Sender von der Position der Antenne und
örtlichen Gegebenheiten abhängen kann.
5.1 Stromversorgung der Antenne über das
integrierte Netzkabel (Pic 1)
•Verbinden Sie das an der Antenne angeschlossene Koaxi-
alkabel mit der Set-Top-Box (oder dem Digitalfernseher).
•Stecken Sie das Netzkabel in eine Steckdose.
•Nach dem Einschalten der Antenne den Drehregler im
Uhrzeigersinn drehen und Antenne ausrichten. Je nach
horizontaler bzw. vertikaler Polarisation im UHF-Bereich
kann der Dipol gedreht werden. Ebenfalls die Teleskope
ausrichten.
•Je nach Sender muss die Verstärkerleistung mit dem
Drehregler angepasst werden. Im Bedarfsfall kann die
Antenne auch mit 12 V DC versorgt werden.
•Wird die Antenne nicht benötigt, ist es ratsam, diese
auszuschalten.

7
5.2 Stromversorgung der Antenne über den 12V DC-
Eingang (ideal für Camping) (Pic 2)
•Stecken Sie das an der Antenne angeschlossene Koaxial-
kabel in den Antenneneingang der Set-Top-Box (oder des
Digitalfernsehers).
•Verbinden Sie den 12V DC-Eingang der Antenne mit der
12V-Anschlussbuchse Ihres Autos oder Campingwagens.
•Nach dem Einschalten der Antenne den Drehregler im
Uhrzeigersinn drehen und Antenne ausrichten. Je nach
horizontaler bzw. vertikaler Polarisation im UHF-Bereich
kann der Dipol vor dem Reektor um 90° gedreht wer-
den. Ebenfalls das Teleskop ausrichten.
•Je nach Sender muss die Verstärkerleistung mit dem Dreh-
regler angepasst werden.
•Wird die Antenne nicht benötigt, ist es ratsam, diese
auszuschalten.
Hinweis
Für die direkte Stromversorgung der Antenne über
die Set-Top-Box bzw. des Digitalfernsehers wird eine
Speisespannung von 5 V benötigt. Es wird kein USB-Kabel
oder Netzteil benötigt.
5.3 Aufstellen der Antenne auf einem Tisch, Schrank
o.ä.
Stellen Sie dann die Antenne auf eine ebene Oberäche wie
z.B. einem Tisch oder einem Fernsehregal. Prüfen Sie die
Empfangsqualität. Wenn Sie keine gute Empfangsqualität
bekommen, ändern Sie die Position der Antenne oder
platzieren Sie die Antenne in einem anderen Winkel.
6. Wartung und Pege
Reinigen Sie dieses Produkt nur mit einem fusselfreien,
leicht feuchten Tuch und verwenden Sie keine aggressiven
Reiniger.
7. Haftungsausschluss
Die Hama GmbH & Co KG übernimmt keinerlei Haftung
oder Gewährleistung für Schäden, die aus unsachgemäßer
Installation, Montage und unsachgemäßem Gebrauch des
Produktes oder einer Nichtbeachtung der Bedienungsanlei-
tung und/oder der Sicherheitshinweise resultieren.
8. Konformitätserklärung
Hiermit erklärt die Hama GmbH & Co KG, dass der
Funkanlagentyp [00132183] der Richtlinie
2014/53/EU entspricht. Der vollständige Text der
EU-Konformitätserklärung ist unter der folgenden
Internetadresse verfügbar:
www.hama.com->00132183->Downloads.

8
EInstrucciones de uso
Le agradecemos que se haya decidido por un producto de
Thomson.
Tómese tiempo y léase primero las siguientes instrucciones
e indicaciones. Después, guarde estas instrucciones de
manejo en un lugar seguro para poder consultarlas cuando
sea necesario. Si vende el aparato, entregue estas instruc-
ciones de manejo al nuevo propietario.
1. Explicación de los símbolos de aviso y de las
indicaciones
Aviso
Se utiliza para caracterizar las indicaciones de seguridad
o para llamar la atención sobre peligros y riesgos
especiales.
Nota
Se utiliza para caracterizar informaciones adicionales o
indicaciones importantes.
2. Contenido del paquete
•Antena interior
•Fuente de alimentación
•Estas instrucciones de manejo
3. Instrucciones de seguridad
•El producto es para el uso doméstico privado, no comercial.
•El producto está diseñado sólo para el uso dentro de edicios.
•Emplee el producto exclusivamente para la función para
la que fue diseñado.
•Proteja el producto de la suciedad, la humedad y el
sobrecalentamiento y utilícelo sólo en recintos secos.
•Se debe vigilar a los niños para asegurarse de que no
juegan con el aparato.
•No utilice el producto en áreas donde no se permitan
aparatos electrónicos.
•Utilice el producto sólo en una toma de corriente
autorizada. La toma de corriente debe estar fácilmente
accesible en todo momento.
•Desconecte el producto de la red eléctrica mediante el
interruptor on/off – de no existir éste, desenchufe el cable
eléctrico de la toma de corriente.
•Tienda todos los cables de modo que no constituyan un
peligro de tropezar.
•No doble ni aplaste el cable.
•No deje caer el producto ni lo someta a sacudidas fuertes.
•Deseche el material de embalaje en conformidad con las
disposiciones locales sobre el desecho vigentes.
•No realice cambios en el aparato. Esto conllevaría la
pérdida de todos los derechos de la garantía.
Aviso
•No utilice el producto si el adaptador de AC, el
adaptador del cable o el cable eléctrico están dañados.
•No intente mantener o reparar el aparato por
cuenta propia. Encomiende cualquier trabajo de
mantenimiento al personal especializado competente.
•No abra el producto y no lo siga operando de presentar
deterioros.
4. Datos técnicos
Tensión de red 230 V / 50 Hz
Consumo nominal de
corriente max. 50 mA
Banda o bandas de
frecuencia
UHF: 470 – 790 MHz
VHF: 174 – 230 MHz
Ganancia de antena
activa
UHF: 7 – 18 dBi
VHF: 9 – 15,5 dBi
Impedancia 75 ohmios
Conexión Conector coaxial
Temperatura de
funcionamiento -20 a +40 °C
5. Puesta en marcha y funcionamiento
Nota
Recuerde que el número y la calidad de las emisoras
recibidas puede depender de la posición de la antena y
de las condiciones locales.
5.1 Alimentación de corriente de la antena a través
del cable de red integrado (g. 1)
•Conecte el cable coaxial conectado a la antena con la
Set-Top-Box (o al televisor digital).
•Conecte el cable de red en un enchufe.
•Una vez encendida la antena, gire el regulador en sentido
horario y oriente la antena. Dependiendo de la polariza-
ción horizontal o vertical en UHF, la varilla de antena se
puede girar. Oriente también los telescopios.
•En función de la emisora se debe regular la potencia del
amplicador con el regulador giratorio. En caso necesa-
rio, la antena se puede alimentar también con 12 V CC.
•Si no va a utilizar la antena, se recomienda apagarla.

9
5.2 Alimentación de corriente de la antena a través
de la entrada de 12 V DC (ideal para el camping)
(g. 2)
•Tome el cable coaxial conectado a la antena y conéctelo
al conector de entrada de antena de su Set-Top-Box (o TV
digital).
•Conecte la entrada de 12 V DC de la antena con el
conector hembra de 12 V de su vehículo o de su caravana
de camping.
•Una vez encendida la antena, gire el regulador en sentido
horario y oriente la antena. Dependiendo de la polariza-
ción horizontal o vertical en UHF, la varilla de antena se
puede girar. Oriente también los telescopios.
•En función de la emisora se debe regular la potencia del
amplicador con el regulador giratorio.
•Si no va a utilizar la antena, se recomienda apagarla.
Nota
Para la alimentación de corriente de la antena directamen-
te mediante la Set-Top-Box o el televisor digital se requiere
una tensión de alimentación de 5 V. No se requiere ningún
cable USB ni ninguna fuente de alimentación.
5.3 Colocación de la antena sobre una mesa,
armario o similar
Seguidamente, coloque la antena sobre una supercie
plana como p. ej. una mesa o un mueble de TV. Compruebe
la calidad de la recepción. Si no recibe buena calidad,
modique la posición de la antena o coloque la antena en
otro ángulo.
6. Mantenimiento y cuidado
Limpie este producto sólo con un paño ligeramente
humedecido que no deje pelusas y no utilice detergentes
agresivos.
7. Exclusión de responsabilidad
Hama GmbH & Co KG no se responsabiliza ni concede
garantía por los daños que surjan por una instalación,
montaje o manejo incorrectos del producto o por la no
observación de las instrucciones de manejo y/o de las
instrucciones de seguridad.
8. Declaración de conformidad
Por la presente, Hama GmbH & Co KG, declara que
el tipo de equipo radioeléctrico [00132183] es
conforme con la Directiva 2014/53/UE. El texto
completo de la declaración UE de conformidad está
disponible en la dirección Internet siguiente:
www.hama.com->00132183->Downloads.

10
IIstruzioni per l‘uso
Grazie per avere acquistato un prodotto Thomson!
Prima della messa in esercizio, leggete attentamente le
seguenti istruzioni e avvertenze, quindi conservatele in un
luogo sicuro per una eventuale consultazione. In caso di
cessione dell‘apparecchio, consegnate anche le presenti
istruzioni al nuovo proprietario.
1. Spiegazione dei simboli di avvertimento e delle
indicazioni
Attenzione
Viene utilizzato per contrassegnare le indicazioni
di sicurezza oppure per rivolgere l‘attenzione verso
particolari rischi e pericoli.
Avvertenza
Viene utilizzato per contrassegnare informazioni
supplementari o indicazioni importanti.
2. Contenuto della confezione
•Antenna interna
•Alimentatore
•Queste istruzioni per l’uso
3. Indicazioni di sicurezza:
•Il prodotto è concepito per l’uso domestico privato, non
commerciale.
•Il prodotto è stato concepito solo per l‘utilizzo all‘interno
degli edici.
•Utilizzare il prodotto esclusivamente per lo scopo previsto.
•Proteggere il prodotto da sporcizia, umidità e surriscalda-
mento e utilizzarlo soltanto in ambienti asciutti.
•Sorvegliare i bambini per accertarsi che non giochino con
l‘apparecchio.
•Non utilizzare il prodotto in zone in cui non sono ammes-
se le apparecchiature elettroniche.
•Collegare il prodotto solo a una presa di rete apposi-
tamente omologata. La presa di rete deve poter essere
raggiungibile in qualsiasi momento.
•Scollegare il prodotto dalla rete mediante l‘interruttore
on/off; se questo non è presente, estrarre il cavo di rete
dalla presa.
•Disporre tutti i cavi in modo da non inciamparsi.
•Non piegare, né schiacciare il cavo.
•Non fare cadere il prodotto e non sottoporlo a forti scossoni!
•Smaltire immediatamente il materiale d‘imballaggio
attenendosi alle prescrizioni locali vigenti.
•Non apportare modiche all’apparecchio per evitare di
perdere i diritti di garanzia.
Attenzione
•Non utilizzare il prodotto se l‘adattatore AC, il cavo
adattatore o il cavo di rete sono danneggiati.
•Non tentare di aggiustare o riparare l’apparecchio da
soli. Fare eseguire qualsiasi lavoro di riparazione al
personale specializzato competente.
•Non aprire il prodotto e non utilizzarlo più se
danneggiato.
5. Dati tecnici
Tensione di rete 230 V / 50 Hz
Assorbimento
corrente nominale max. 50 mA
Bande di frequenza
UHF: 470 – 790 MHz
VHF: 174 – 230 MHz
Ricezione antenna
attiva
UHF: 7 – 18 dBi
VHF: 9 – 15,5 dBi
Impedenza 75 Ohm
Attacco Connettore coassiale
Temperatura ambiente da -20 a +40 °C
5. Messa in esercizio e funzionamento
Avvertenza
Il numero e la qualità delle emittenti ricevute possono
dipendere dalla posizione dell‘antenna e dalle condizioni
locali.
5.1 Alimentazione elettrica dell’antenna mediante
cavo di rete integrato (g. 1)
•Collegare il cavo coassiale dell’antenna al decoder (o al
televisore digitale).
•Inserire il cavo di rete in una presa.
•Dopo l’accensione dell’antenna, ruotare la manopola di
regolazione in senso orario e orientare l’antenna. Il dipolo si
può orientare a seconda della polarizzazione orizzontale o
verticale. Orientare anche il telescopio.
•La potenza dell’amplicatore deve essere regolata con la
manopola in funzione dell’emittente. In caso di necessità
l’antenna può essere alimentata a 12 V DC.
•Se non si utilizza l’antenna, si consiglia di spegnerla.

11
5.2
Alimentazione elettrica dell’antenna mediante
ingresso DC da 12 V (ideale per il campeggio) (g. 2)
•Svolgere il cavo coassiale dell’antenna e connetterlo
all’ingresso antenna del decoder (o TV digitale).
•Collegare l’ingresso 12V DC dell’antenna alla presa di
allacciamento 12V dell’automobile o del camper.
•Dopo l’accensione dell’antenna, ruotare la manopola di
regolazione in senso orario e orientare l’antenna. Il dipolo
si può orientare a seconda della polarizzazione orizzonta-
le o verticale. Orientare anche il telescopio.
•La potenza dell’amplicatore deve essere regolata con la
manopola in funzione dell’emittente.
•Se non si utilizza l’antenna, si consiglia di spegnerla.
Avvertenza
Per l’alimentazione elettrica diretta dell’antenna mediante
il decoder o il televisore digitale è necessaria una tensio-
ne di alimentazione di 5V. Non è necessario né un cavo
USB,né l’alimentatore.
5.3 Collocare l’antenna su un tavolo, un armadio o
simili.
Disporre l’antenna su una supercie piana, come ad es. un
tavolo o un mobiletto TV. Controllare la qualità della rice-
zione. Se la ricezione non è buona, modicare la posizione
dell’antenna o modicare l’angolazione.
5. Cura e manutenzione
Pulire questo prodotto solo con un panno umido e che non
lascia pelucchi e non utilizzare mai detergenti aggressivi.
7. Esclusione di garanzia
Hama GmbH & Co KG non si assume alcuna responsabilità
per i danni derivati dal montaggio o l‘utilizzo scorretto del
prodotto, nonché dalla mancata osservanza delle istruzioni
per l‘uso e/o delle indicazioni di sicurezza.
8. Dichiarazione di conformità
Il fabbricante, Hama GmbH & Co KG, dichiara che il
tipo di apparecchiatura radio [00132183] è
conforme alla direttiva 2014/53/UE. Il testo
completo della dichiarazione di conformità UE è disponibile
al seguente indirizzo Internet:
www.hama.com->00132183->Downloads.

12
OManual de instruções
Agradecemos que se tenha decidido por este produto Thomson!
Antes de utilizar o produto, leia completamente estas indi-
cações e informações. Guarde, depois, estas informações
num local seguro para consultas futuras. Se transmitir o
produto para um novo proprietário, entregue também as
instruções de utilização.
1. Descrição dos símbolos de aviso e das notas
Aviso
É utilizado para identicar informações de segurança ou
chamar a atenção para perigos e riscos especiais.
Nota
É utilizado para identicar informações adicionais ou
notas importantes.
2. Conteúdo da embalagem
•Antena interior
•Fonte de alimentação
•Este manual de instruções
3. Indicações de segurança
•O produto está previsto apenas para utilização doméstica
e não comercial.
•O produto é adequado apenas para instalação em interiores.
•Utilize o produto apenas para a nalidade prevista.
•Proteja o aparelho contra sujidade, humidade e sobrea-
quecimento e utilize-o apenas em recintos secos.
•Crianças deverão ser sempre monitorizadas para garantir
que não utilizem o aparelho como brinquedo.
•Não utilize o produto em áreas nas quais não são permi-
tidos aparelhos electrónicos.
•Ligue o produto apenas a uma tomada eléctrica ade-
quada. A tomada eléctrica deve estar sempre facilmente
acessível.
•Desligue o produto da rede eléctrica com o botão de
ligar/desligar – se o produto não possuir este botão,
retire a cha da tomada eléctrica.
•Instale todos os cabos de forma a que não se possa
tropeçar neles.
•Não dobre nem esmague o cabo.
•Não deixe cair o produto nem o submeta a choques fortes.
•Elimine imediatamente o material da embalagem em
conformidade com as normas locais aplicáveis.
•Não efectue modicações no aparelho. Perda dos direitos
de garantia.
Aviso
•Não utilize o produto se o adaptador AC, o cabo de
adaptação ou o cabo eléctrico estiverem danicados.
•Não tente fazer a manutenção ou reparar o aparelho.
Qualquer trabalho de manutenção deve ser executado
por técnicos especializados.
•Não abra o produto nem o utilize caso este esteja
danicado.
4. Especicações técnicas
Tensão nominal 230 V / 50 Hz
Consumo de energia
nominal max. 50 mA
Banda(s) de
frequências
UHF: 470 – 790 MHz
VHF: 174 – 230 MHz
Ganho de antena ativo
UHF: 7 – 18 dBi
VHF: 9 – 15,5 dBi
Impedância 75 Ohm
Ligação Ficha TV macho
Temperatura ambiente -20 a +40 °C
5. Colocação em funcionamento e operação
Nota
Tenha em atenção que o número e a qualidade dos
emissores recebidos podem depender da posição da
antena e das condições locais.
5.1 Alimentação da antena através do cabo eléctrico
integrado (g. 1)
•Ligue o cabo coaxial ligado à antena à Set-Top-Box (ou
ao televisor digital).
•Ligue o cabo eléctrico a uma tomada eléctrica.
•Após ligar a antena, gire o regulador rotativo no sentido
dos ponteiros do relógio e oriente a antena. Consoante a
polarização horizontal ou vertical na área UHF, o dipolo
pode ser girado. Oriente os telescópios do mesmo modo.
•Consoante o emissor, a potência de amplicação deve ser
ajustada com o regulador rotativo. Caso seja necessário,
a antena também pode ser alimentada com 12 V DC.
•Se a antena não for necessária, é aconselhável desligá-la.

13
5.2 Alimentação da antena através da entrada 12
DC (ideal para campismo) (g. 2)
•Ligue o cabo coax da antena à entrada para antena da
sua Set Top Box (or TV digital).
•Ligue a entrada 12V DC da antena à tomada de ligação
12V do automóvel ou da roulote.
•Após ligar a antena, gire o regulador rotativo no sentido
dos ponteiros do relógio e oriente a antena. Consoante a
polarização horizontal ou vertical na área UHF, o dipolo
pode ser girado. Oriente os telescópios do mesmo modo.
•Consoante o emissor, a potência de amplicação deve ser
ajustada com o regulador rotativo.
•Se a antena não for necessária, é aconselhável desligá-la.
Nota
Para a alimentação de corrente direta da antena através
da Set-Top-Box ou do televisor digital é necessária uma
tensão de alimentação de 5 V. Não é necessário um cabo
USB ou uma fonte de alimentação.
5.3 Posicionamento da antena numa mesa, armário,
etc.
Depois, coloque a antena sobre uma superfície plana
como, por ex., uma mesa ou uma estante de televisor.
Verique a qualidade de receção. Se não obtiver uma
boa qualidade de receção, altere a posição da antena ou
coloque a antena noutro ângulo.
6. Manutenção e conservação
limpe o produto apenas com um pano sem apos ligei-
ramente humedecido e não utilize produtos de limpeza
agressivos.
7. Exclusão de garantia
A Hama GmbH & Co KG não assume qualquer responsabi-
lidade ou garantia por danos provocados pela instalação,
montagem ou manuseamento incorrectos do produto e
não observação do das instruções de utilização e/ou das
informações de segurança.
8. Declaração de conformidade
O(a) abaixo assinado(a) Hama GmbH & Co KG
declara que o presente tipo de equipamento de
rádio [00132183] está em conformidade com a
Diretiva 2014/53/UE. O texto integral da declaração de
conformidade está disponível no seguinte endereço de
Internet: www.hama.com->00132183->Downloads.

14
RРуководство по эксплуатации
Благодарим за покупку изделия фирмы Thomson.
внимательно ознакомьтесь с настоящей инструкцией.
Храните инструкцию в надежном месте для справок
в будущем.В случае передачи изделия другому лицу
приложите и эту инструкцию.
1. Предупредительные пиктограммы и инструк-
ции
Внимание
Данным значком отмечены инструкции,
несоблюдение которых может привести к опасной
ситуации.
Примечание
Дополнительная или важная информация.
2. Комплект поставки
•Комнатная антенна
•Блок питания
•Настоящая инструкция
3. Техника безопасности
•Изделие предназначено только для домашнего
применения.
•Запрещается эксплуатировать вне помещений.
•Запрещается использовать не по назначению.
•Беречь от грязи,влаги и перегрева.Эксплуатировать
только в сухих помещениях.
•Не оставлять детей без присмотра во избежание их
доступа к устройству.
•Не применять в запретных зонах.
•Разрешается подключать только к соответствующей
розетке электросети.Розетка электросети должна
быть легко доступна.
•Отключать с помощью выключателя электросети,а
при его отсутствии вытащить провод из розетки.
•Кабели не должны создавать помехи перемещению
людей.
•Кабель не сгибать и не зажимать.
•Не ронять.Беречь от сильных ударов.
•Утилизировать упаковку в соответствии с местными
нормами.
•Запрещается вносить изменения в конструкцию.В про-
тивном случае гарантийные обязательства аннулируются.
Внимание
•Запрещается эксплуатация при неисправном блоке
питания или поврежденном кабеле питания.
•Запрещается самостоятельно ремонтировать
устройство.Ремонт разрешается производить
только квалифицированному персоналу.
•Изделие не открывать.Запрещается
эксплуатировать неисправное изделие.
4. Технические характеристики
Напряжение 230 В~ / 50 Гц
Номинальный ток
потребления max. 50 mA
Диапазон/диапазоны
частот
UHF: 470 – 790 МГц
VHF: 174 – 230 МГц
Активный коэффициент
усиления антенны
UHF: 7 – 18
дБи
VHF: 9 – 15,5
дБи
Сопротивление 75 Ом
Подключение Коаксиальный штекер
Температура
окружающей среды
от -20 до +40 °C
5. Ввод в эксплуатацию и работа
Примечание
Качество принимаемого сигнала зависит от условий
эксплуатации и расположения антенны.
5.1 Питание антенны через встроенный кабель
(рис. 1)
•Подключите кабель антенны к телевизионной при-
ставке или к цифровому телевизору.
•Подключите кабель питания к розетке электросети.
•После подключения,поворачивая ручку настройки по
часовой стрелке,настройте антенну.В зависимости
от горизонтальной или вертикальной поляризации
в диапазоне УВЧ диполь можно повернуть соответ-
ствующим образом.Настройте таким же образом
телескопический элемент антенны.
•В зависимости от принимаемого сигнала ручкой
настройки установите коэффициент усиления.При не-
обходимости антенну можно подключить к источнику
питания 12 В постоянного тока.
•Если антенна не используется,источник питания реко-
мендуется отключить.

15
5.2 Питание антенны через вход 12В- (удобно в
дороге) (рис. 2).
•Коаксиальный кабель антенны подключите к антенно-
му входу телевизионной цифровой приставки (или
цифрового телевизионного приемника).
•Соедините антенный вход (12 В-) с разъемом 12 В
автомобиля или туристического прицепа.
•После подключения,поворачивая ручку настройки по
часовой стрелке,настройте антенну.В зависимости
от горизонтальной или вертикальной поляризации
в диапазоне УВЧ диполь можно повернуть соответ-
ствующим образом.Настройте таким же образом
телескопический элемент антенны.
•В зависимости от принимаемого сигнала ручкой
настройки установите коэффициент усиления.
•Если антенна не используется,источник питания реко-
мендуется отключить.
Примечание
Для прямого питания антенны через телевизионную
приставку или цифровой телевизор требуется напря-
жение 5В.Кабель USB и блок питания не требуются.
5.3 Установка антенны на столе,шкафу и т.п.
Разместите антенну на ровной горизонтальной поверхности
(например,стол,подставка под телевизор). Проверьте
качество приема.Если качество приема неудовлетво-
рительное,измените местоположение антенны или ее угол.
6. Уход и техническое обслуживание
Чистку изделия производить только безворсовой
слегка влажной салфеткой.Запрещается применять
агрессивные чистящие средства.
7. Отказ от гарантийных обязательств
Компания Hama GmbH & Co KG не несет ответственность
за ущерб,возникший вследствие неправильного
монтажа,подключения и использования изделия не
по назначению,а также вследствие несоблюдения
инструкции по эксплуатации и техники безопасности.
8. Декларация производителя
Настоящим компания Hama GmbH & Co KG
заявляет,что радиооборудование типа
[00132183] отвечает требованиям директивы
2014/53/ЕС.С полным текстом декларации о
соответствии требованиям ЕС можно ознакомиться
здесь: www.hama.com->00132183->Downloads.

16
NGebruiksaanwijzing
Hartelk dank dat u voor een product van Thomson heeft
gekozen.
Neem de td om de volgende aanwzingen en instructies
volledig door te lezen. Berg deze gebruiksaanwzing ver-
volgens op een goede plek op zodat u hem als naslagwerk
kunt gebruiken. Op zodat u hem als naslagwerk kunt
gebruiken. Mocht u het toestel verkopen, geeft u dan ook
deze gebruiksaanwzing aan de nieuwe eigenaar.
1. Verklaring van waarschuwingssymbolen en
instructies
Waarschuwing
Wordt gebruikt voor veiligheidsinstructies of om de
aandacht te trekken op bijzondere gevaren en risico‘s.
Aanwijzing
Wordt gebruikt voor extra informatie of belangrijke
informatie.
2. Inhoud van de verpakking
•Kamerantenne
•Voedingsadapter
•Deze bedieningsinstructies
3. Veiligheidsinstructies
•Het product is bedoeld voor niet-commercieel privege-
bruik in huiselke kring.
•Het product is uitsluitend bedoeld voor gebruik binnen
gebouwen.
•Gebruik het product uitsluitend voor het doel waarvoor
het gemaakt is.
•Bescherm het product tegen vuil, vocht en oververhitting
en gebruik het alleen in droge ruimten.
•Kinderen dienen onder toezicht te staan, teneinde te
waarborgen dat zniet met het product spelen.
•Gebruik het product niet binnen omgevingen, waarin
elektronische apparatuur niet is toegestaan.
•Sluit het product alleen aan op een daarvoor geschikt en
intact stopcontact. Het stopcontact moet te allen tde
goed toegankelk zn.
•Het product met behulp van de aan/uit schakelaar van
het net scheiden – indien deze niet ter beschikking is,
trek dan de netstekker uit het stopcontact.
•Leg alle kabels zodanig dat zgeen struikelgevaar vormen.
•De kabel niet knikken of inklemmen.
•Laat het product niet vallen en stel het niet bloot aan
zware schokken of stoten.
•Het verpakkingsmateriaal direct en overeenkomstig de
lokaal geldende afvoervoorschriften afvoeren.
•Verander niets aan het toestel. Daardoor vervalt elke
aanspraak op garantie.
Waarschuwing
•Gebruik het product niet indien de AC-adapter, de
adapterkabel of de voedingskabel is beschadigd.
•Probeer niet het product zelf te onderhouden
of te repareren. Laat onderhouds- en
reparatiewerkzaamheden door vakpersoneel uitvoeren.
•Open het product niet en gebruik het niet meer als het
beschadigd is.
4. Technische specicaties
Nominale spanning 230 V / 50 Hz
Nomimnale
stroomopname max. 50 mA
Frequentieband(en)
UHF: 470 – 790 MHz
VHF: 174 – 230 MHz
Actieve
antenneversterking
UHF: 7 – 18 dBi
VHF: 9 – 15,5 dBi
Impedantie 75 ohm
Aansluiting Coaxstekker
Omgevingstemperatuur
-20 tot +40 °C
5. Ingebruikneming en werking
Aanwijzing
Houd er rekening mee dat het aantal en de kwaliteit van
de ontvangen zenders afhankelijk kan zijn van de positie
van de antenne en van de omstandigheden ter plaatse.
5.1 Stroomtoevoer van de antenne via de geïnte-
greerde voedingskabel (afb. 1)
•Verbind de coax-kabel die op de antenne is aangesloten
met de set-top-box (of de digitale tv).
•Sluit de voedingskabel aan op een contactdoos.
•Draai na het inschakelen van de antenne de draaiknop
met de wzers van de klok mee en zet de antenne in de
juiste richting. Afhankelk van de horizontale of verticale
polarisatie in de UHF-zone kan de dipoolantenne worden
gedraaid. Richt eveneens de telescopen uit.
•Afhankelk van de zender kan het versterkervermogen
met de draaiknop worden aangepast. Indien nodig, kan
de antenne ook met 12 V DC worden gevoed.
•Als de antenne niet gebruikt wordt, is het aan te bevelen
hem uit te schakelen.

17
5.2 Stroomtoevoer van de antenne via de 12V DC-in-
gang (ideaal tdens camperen) (afb. 2)
•Sluit de coax-kabel van de antenne op de antenne-in-
gang van de set-top-box (of digitale televisie) aan.
•Sluit de 12V DC-ingang van de antenne aan op de
12V-aansluitpoort van uw auto of camper.
•Draai na het inschakelen van de antenne de draaiknop
met de wzers van de klok mee en zet de antenne in de
juiste richting. Afhankelk van de horizontale of verticale
polarisatie in de UHF-zone kan de dipoolantenne worden
gedraaid. Richt eveneens de telescopen uit.
•Afhankelk van de zender kan het versterkervermogen
met de draaiknop worden aangepast.
•Als de antenne niet gebruikt wordt, is het aan te bevelen
hem uit te schakelen.
Aanwijzing
Voor de directe spanningsvoorziening van de antenne via
de set-top-box resp. het digitale televisietoestel is een
voedingsspanning van 5 V nodig. Er is geen USB-kabel of
voedingsadapter nodig.
5.3 Opstellen van de antenne op een tafel, kast e.d.
Plaats de antenne op een vlak oppervlak zoals een tafel
of televisiemeubel. Controleer de ontvangstkwaliteit. Als
u geen goede ontvangstkwaliteit heeft, wzigt u de plaats
van de antenne of plaatst de antenne in een andere hoek.
6. Onderhoud en verzorging
Reinig dit product uitsluitend met een pluisvrije, licht
vochtige doek en maak geen gebruik van agressieve
reinigingsmiddelen.
7. Uitsluiting van garantie en aansprakelijkheid
Hama GmbH & Co KG aanvaardt geen enkele
aansprakelijkheid of garantieclaims voor schade of
gevolgschade, welke door ondeskundige installatie,
montage en ondeskundig gebruik van het product ontstaan
of het resultaat zijn van het niet in acht nemen van de
bedieningsinstructies en/of veiligheidsinstructies.
8. Conformiteitsverklaring
Hierbij verklaar ik, Hama GmbH & Co KG, dat het
type radioapparatuur [00132183] conform is met
Richtlijn 2014/53/EU. De volledige tekst van de
EU-conformiteitsverklaring kan worden geraadpleegd op
het volgende internetadres:
www.hama.com->00132183->Downloads.

18
PInstrukcja obsługi
Dziękujemy za zakup naszego produktu!
Przed pierwszym użyciem należy dokładnie przeczytać
instrukcjęobsługi. Instrukcjęnależy przechować, gdyżmoże
byćjeszcze potrzebna.
1. Objaśnienie symboli ostrzegawczych i wskazówek
Ostrzeżenie
Używane w celu zwrócenia uwagi na szczególne
niebezpieczeństwo lub ryzyko.
Wskazówki
Używane w celu zwrócenia uwagi na szczególnie
przydatne informacje.
2. Zawartość opakowania
•Antena pokojowa
•zasilacz sieciowy
•niniejsza instrukcja obsługi
3. Wskazówki bezpieczeństwa
•Produkt jest przeznaczony do prywatnego, niekomercyjne-
go użytku domowego.
•Produkt jest przeznaczony wyłącznie do użytku wewnątrz
budynków.
•Stosowaćprodukt wyłącznie zgodnie z przewidzianym
przeznaczeniem.
•Chronićprodukt przed zanieczyszczeniem, wilgociąi
przegrzaniem, i stosowaćgo tylko w suchych pomiesz-
czeniach.
•Dzieci powinny byćnadzorowane, aby nie używały
urządzenia do zabawy.
•Nie używaćproduktu w miejscach, gdzie nie jest dozwo-
lone stosowanie urządzeńelektronicznych.
•Podłączaćprodukt tylko do odpowiedniego gniazda
wtykowego. Gniazdo wtykowe musi byćw każdej chwili
łatwo dostępne.
•Odłączaćprodukt od sieci za pomocąwyłącznika zasilania
– jeżeli nie jest on na wyposażeniu, wyciągnąć przewód
sieciowy z gniazda wtykowego.
•Wszystkie kable poprowadzićtak, aby nie stanowiły one
ryzyka potknięcia się.
•Nie zginaćani nie zakleszczaćkabla.
•Chronićprodukt przed upadkiem i silnymi wstrząsami.
•Materiały opakowaniowe należy natychmiast poddaćuty-
lizacji zgodnie z obowiązującymi przepisami miejscowymi.
•Nie modykowaćurządzenia. Prowadzi to do utraty
wszelkich roszczeńz tytułu gwarancji.
Ostrzeżenie
•Nie używaćproduktu, jeżeli zasilacz sieciowy, kabel
zasilacza bądźprzewód sieciowy sąuszkodzone.
•Nie próbowaćnaprawiaćsamodzielnie urządzenia.
Prace serwisowe zlecaćwykwalikowanemu
personelowi fachowemu.
•Nie otwieraćproduktu i nie używaćgo, gdy jest
uszkodzony.
4. Dane techniczne
Napięcie znamionowe 230 V / 50 Hz
Pobór prądu max. 50 mA
Częstotliwość
transmisji
UHF: 470 – 790 MHz
VHF: 174 – 230 MHz
Aktywny zysk
energetyczny anteny
UHF: 7 – 18 dBi
VHF: 9 – 15,5 dBi
Impedancja 75 omów
Wejście Wtyczka koncentryczna
Temp. otoczenia -20 do +40 °C
5. Uruchamianie i obsługa
Wskazówki
Należy pamiętać,że liczba i jakość odbieranych stacji
telewizyjnych może zależećod pozycji anteny i lokalnych
uwarunkowań.
5.1 Zasilanie anteny za pomocązintegrowanego
kabla sieciowego (rys. 1)
•Kabel antenowy podłączyćdo tunera Set-Box (lub telewi-
zora cyfrowego).
•Kabel sieciowy podłączyćdo gniada sieciowego.
•Po włączeniu anteny należy przekręcićregulator zgodnie
ze wskazówkami zegara i ukierunkowaćantenę. W
zależności od pionowej lub poziomej polaryzacji w za-
kresie UHF należy wyregulowaćdipol. Dodatkowo należy
ukierunkowaćrównieżanteny teleskopowe.
•W zależności od nadawcy należy ustawićwzmocnienie
sygnału. Do anteny można równieżpodłączyćzasilanie
12 V DC.
•Jeżeli antena nie jest używana, należy odłączyćjąod sieci.
Sayfa yükleniyor...
Sayfa yükleniyor...
Sayfa yükleniyor...
Sayfa yükleniyor...
Sayfa yükleniyor...
Sayfa yükleniyor...
Sayfa yükleniyor...
Sayfa yükleniyor...
Sayfa yükleniyor...
Sayfa yükleniyor...
Sayfa yükleniyor...
Sayfa yükleniyor...
Sayfa yükleniyor...
Sayfa yükleniyor...
Sayfa yükleniyor...
Sayfa yükleniyor...
Sayfa yükleniyor...
Sayfa yükleniyor...
Sayfa yükleniyor...
Sayfa yükleniyor...
-
 1
1
-
 2
2
-
 3
3
-
 4
4
-
 5
5
-
 6
6
-
 7
7
-
 8
8
-
 9
9
-
 10
10
-
 11
11
-
 12
12
-
 13
13
-
 14
14
-
 15
15
-
 16
16
-
 17
17
-
 18
18
-
 19
19
-
 20
20
-
 21
21
-
 22
22
-
 23
23
-
 24
24
-
 25
25
-
 26
26
-
 27
27
-
 28
28
-
 29
29
-
 30
30
-
 31
31
-
 32
32
-
 33
33
-
 34
34
-
 35
35
-
 36
36
-
 37
37
-
 38
38
-
 39
39
-
 40
40


diğer dillerde
- slovenčina: Thomson ANT1418BK Používateľská príručka
- français: Thomson ANT1418BK Manuel utilisateur
- italiano: Thomson ANT1418BK Manuale utente
- português: Thomson ANT1418BK Manual do usuário
- română: Thomson ANT1418BK Manual de utilizare