Creative Zen Portable Media Center Hızlı başlangıç Kılavuzu
- Kategori
- MP3 / MP4 oynatıcılar
- Tip
- Hızlı başlangıç Kılavuzu

i
English....................................................................1
简体中文
...............................................................17
繁體中文
...............................................................33
日本語
...................................................................49
한국어
...................................................................65
Türkçe...................................................................81
Contents.fm Page i Monday, January 31, 2005 12:
16 PM

ii
Contents.fm Page ii Monday
, January 31, 2005 12:16 PM

Getting Started 1
English
Getting Started
Congratulations on your purchase of Zen! Foll
ow the next few steps to set up the software
and your player to enjoy a new level
in portable digital entertainment.
Killer_new.fm Page 1 Wednesda
y, January 26, 2005 5:18 PM

2 Charge the battery
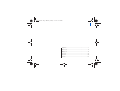
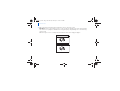
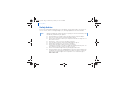
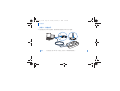
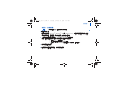
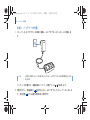
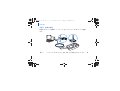
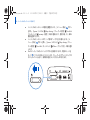
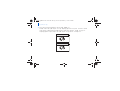
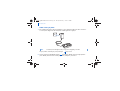
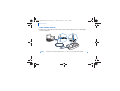
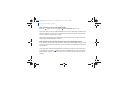
Step 1: Charge the battery
1 Connect the power adapter to your player, an
d then connect the power adapter to a power
outlet. If necessary, turn on the power outlet.
When the battery is charging, the batter
y charging icon flashes on the LCD.
2 Disconnect your player from the power adapte
r when the battery is fully charged and you
see on your player’s LCD. Fully charging your play
er takes approximately three hours.
NOTE
The power outlet shown may differ, depending on the c
ountry you are in.
Killer_new.fm Page 2 Wednesda
y, January 26, 2005 5:18 PM

Play music 3
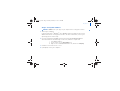
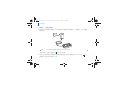
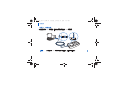
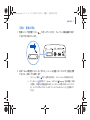
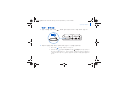
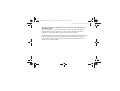
Step 2: Play music
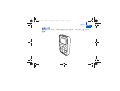
1 Slide the Power switch towards the power icon
and hold it there until the LCD lights
up.
2 When you turn on Zen for the first time, the
menu is in English. To change the language:
i. Press the Menu/Back button. The main menu appear
s.
ii. Use the Vertical Touch Pad to select
System
Language
, and then select the
language that you want. For tips on using the Vertic
al Touch Pad, see “Using the
Vertical Touch Pad” on page 9, or refer to the User’
s Guide on the Installation and
Applications CD.
USB
Killer_new.fm Page 3 Wednesda
y, January 26, 2005 5:18 PM

4 Play music
3 Congratulations! You can now use your player.
Zen is preloaded with some music to get yo
u started immediately. Connect the earphones
and press the Play/Pause button to start listening.
To start listening to your own music
on Zen, proceed to the next step.
TIP
During playback, move your thumb up and
down the Vertical Touch Pad to adjust the
volume.
Killer_new.fm Page 4 Wednesda
y, January 26, 2005 5:18 PM

Play music 5
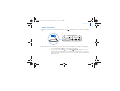
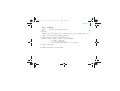
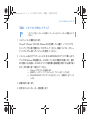
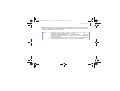
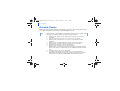
Step 3: Set up the software
1 Turn on your computer.
If you have Microsoft
®
Windows
®
XP or Windows 2000, remember to log on as an
administrator before setting up the softwa
re. For more information, refer to your
operating system’s online Help.
2 Insert the Installation and Applications
CD into your CD-ROM/DVD-ROM drive.
Your CD should start automatically. If
it does not, foll
ow the steps below:
i. Start Windows Explorer.
ii. On the left pane, click the
My Computer
icon.
iii. Right-click the CD-ROM/DVD-ROM drive ic
on, and then click
Autoplay
.
3 Follow the instructions on the screen.
4 If prompted, restart your computer.
WARNING
DO NOT
connect your player to your computer before setting up the softwar
e.
Killer_new.fm Page
5 Tuesday, February
1, 2005 3:58 PM

6 Transfer music
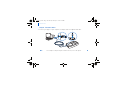
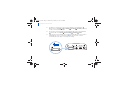
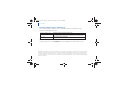
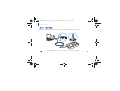
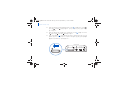
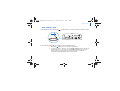
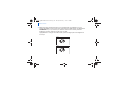
Step 4: Transfer music
1 Connect your player to your computer’s
USB port with the supplied USB cable.
TIP
Your computer’s USB port may be located on the fr
ont, rear or side panels.
Killer_new.fm Page 6 Wednesda
y, January 26, 2005 5:18 PM

Transfer music 7
2 When your computer detects your player,
Creative MediaSource™ or Windows Media
Player starts automatically. Transfer your
music tracks (MP3 or WM
A files) to Zen with
either one of these applications.
TIP
■
For tips on downloading music tracks from
the Internet, refer to the User’s Guide
on your Installation and Applications CD:
d:\manual\<language>\manual.pdf
(replace
d:\ with the drive letter of your
CD-ROM/DVD-ROM drive and <language> with the language that y
our document
is in)
■
You can find information on ripping and tr
ansferring music in Creative
MediaSource’s online Help.
Killer_new.fm Page 7 Wednesda
y, January 26, 2005 5:18 PM

8 Transfer music
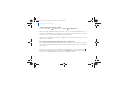
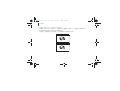
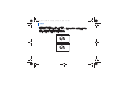
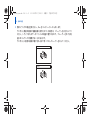
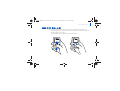
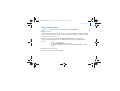
3 When you have finished transferri
ng music tracks, disconnect Zen.
DO NOT disconnect your player if you see the firs
t picture below on the LCD. Track or data
file transfer is in progress and disconnectin
g your player may damage the content being
transferred.
Wait until you see the second picture
below before disconnecting your player.
Docked
Docked
Killer_new.fm Page 8 Wednesda
y, January 26, 2005 5:18 PM

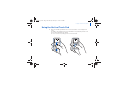
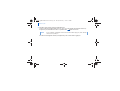
Using the Vertical Touch Pad 9
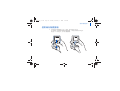
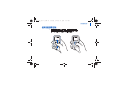
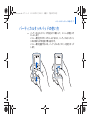
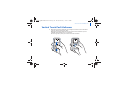
Using the Vertical Touch Pad
■
Move your thumb up and down the Vertical Touch P
ad to scroll through menu
items.
To rapidly scroll though menu items, hold down the t
op or bottom portion of the
Vertical Touch Pad with your thumb.
To select a menu item, firmly tap the Vertic
al Touch Pad.
Killer_new.fm Page 9 Wednesda
y, January 26, 2005 5:18 PM

10 Using the Vertical Touch Pad
■
To adjust the sensitivity of the Vertical Touch Pa
d, press the Menu/Back
button, and select
System
Player Settings Touch Pad
Sensitivity
. Sensitivity
can be set to low, medium or high.
■
To turn the Vertical Touch Pad's clicking
sound on and off, press the Menu/Back
button, and select
System
Player Settings
Touch Pad
Clicker
.
■
Slide the Power switch towards the Lock icon t
o disable Zen's Vertical Touch
Pad and buttons. This is useful when you do not want t
o activate controls
accidentally when your player is in your pocket or bag.
USB
Killer_new.fm Page
10 Wednesday, Januar
y 26, 2005 5:18 PM

Storing and Transferring Data Files 11
Storing and Transferring Data Files
Using Zen Media Explorer
Use Zen Media Explorer if you need to transfer
data files between Zen and your computer.
Zen Media Explorer offers you
the ease of managing your pl
ayer’s data files (as well as
music tracks), in a Windows Explorer enviro
nment. Zen Media Explorer is automatically
installed when you set up the Zen software on
your computer. For more information, refer
to Zen Media Explorer's online Help.
Using Removable Disk mode
If you are using a shared computer in school
or at the office, and installing Zen Media
Explorer is not possible, you can still transfer
data files. Just enable Zen's Removable
Disk mode. Read on for tips on using Remo
vable Disk mode. For detailed information,
refer to the User's Guide in the In
stallation and Applications CD.
I do not need to transfer data files using Re
movable Disk mode. Do I still need to select
hard disk space settings for Removable Disk mode?
No, you should only enable Removable Disk
mode and select its sett
ings if you need to
use it.
Killer_new.fm Page
11 Wednesday, Januar
y 26, 2005 5:18 PM

12 Storing and Transferring Data Files
How do I enable Removable Disk mode?
Press the Menu/Back button, and select
Extras
Removable Disk
.
When you enable Removable Disk mode for the
first time, you will be prompted to select
the amount of hard disk space you want to use for this mode. It may t
ake up to a couple of
minutes for Zen to set up the Removable Disk hard disk spac
e.
Make sure the Removable Disk mode icon appears on Zen's LCD before you connect your
player to your computer.
Can I change the Removable Disk
hard disk space settings later?
Yes, you may change the allocated hard disk
space at any time. However, do note that the
space allocated for Removable Disk mode cannot be small
er than the space used by your
existing files.
To delete all the data files in the Removabl
e Disk hard disk space, press the Options
button while in Removable Disk mode and select
Format
. Use Windows Explorer if you
want to delete individual data fi
les stored in Removable Disk mode.
Killer_new.fm Page
12 Wednesday, Januar
y 26, 2005 5:18 PM

Storing and Transferring Data Files 13
When Zen is in Removable Di
sk mode, can I use Zen Media Explorer to transfer files?
No, files transferred using Removable Disk
mode are stored separately from files
transferred using Zen Media Explorer. In fact
, when Zen is in Removable Disk mode, you
will not see your player in Zen Media Explorer.
To transfer files using Zen Media Explorer, exit
from Removable Disk mode by clicking the
root folder of Zen Media Explorer. To access
the files stored in Removable Disk mode
again, enable Removable Disk mode and
then reconnect Zen to your computer.
Killer_new.fm Page
13 Wednesday, Januar
y 26, 2005 5:18 PM

14 Safety Advice
Safety Advice
Refer to the following information to use your
player safely, and to reduce the chance of
electric shock, short-circuiting, damage,
fire, hearing impairment or other hazards.
■
Do not dismantle or attempt to repair your play
er, battery or power adapter.
■
Refer all servicing to Creative or authorized repair agents.
■
Do not expose your player or battery to temperatur
es outside the range of 0°C to
45°C (32°F to 113°F).
■
Do not pierce, crush or set fire to your player or batt
ery.
■
Keep your player or battery away from strongly
magnetic objects.
■
Do not subject your player to excessive force or impac
t.
■
Do not expose your player or battery to water or mois
ture.
If your player is moisture-resistant (see product packaging f
or details), take care
not to immerse your player in water or expose it t
o rain.
■
Do not listen to audio at high volume for prolonged periods of time.
■
Do not attempt to remove the embedded battery
. The player must be disposed of
according to local environmental regulations. To re
place the battery, return your
player to your regional support office. For product servic
e information, go to
www.creative.com
.
NOTE
Improper handling may void the warranty
for your player. For more information, read
the Warranty available with your product.
Killer_new.fm Page
14 Wednesday, Januar
y 26, 2005 5:18 PM

Safety Advice 15
More Information
Creative Knowledge Base
Resolve and troubleshoot technical queries
at Creative's 24-hour self-help Knowledge
Base. Go to
www.creative.com
and select your region.
Register your product!
Enjoy a host of benefits by registering
your product during installation, or at
www.creative.com
. Benefits include:
■
Service and product support from Creative
■
Exclusive updates on promotions and events.
Please note that your warranty rights
are not dependent on product registration.
Killer_new.fm Page
15 Wednesday, Januar
y 26, 2005 5:18 PM

16 Safety Advice
Customer Support Services and Warranty
You can find Customer Support Services,
Warranty and other information in the
Installation and Applications CD.
(replace
d:\ with the drive letter of
your CD-ROM/DVD-ROM drive,
<region>
with the
region that you are in, and
<language>
with the language that
your document is in)
Customer Support Services
d:\support\<region>\<l
anguage>\support.chm
Warranty
d:\warranty\<region>\<
language>\warranty.pdf
Please keep your Proof of Purchase fo
r the duration of the warranty period.
User’s Guide
d:\manual\<langu
age>\manual.pdf
Copyright © 2005 Creative Techno
logy Ltd. All rights reserved. The Creativ
e logo is a trademark of Creative Technology
Ltd. in the United States and/or
other countries. Microsoft,
Windows and the Windows logo
are registered trademarks of
Microsoft Corporation. All other products ar
e trademarks or
registered trademarks of their respectiv
e owners and are
hereby recognized as such. All specifications ar
e subject to chan
ge without prior notice. Actual
contents may differ slightly
from those pictured.
Killer_new.fm Page
16 Wednesday, Januar
y 26, 2005 5:18 PM

使用入门
17
简体中文
使用入门
感谢您购买 Zen
!请执行以下几个步骤安装软件,设
置播放机,享受移动数字娱乐的新境
界。
Killer_new.fm Page 17 Tuesda
y, February 1, 2005 2:48 PM

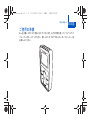
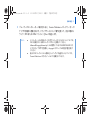
18 为电池充电
1 将电源变压器连接至播放机,然后将电源变压器连
接至电源插座。 如果需要,打开电源插
座的开关。
电池充电时,电池充电图标 在
LCD 上闪烁。
2 电池完全充电后断开播放机与电源变压器的连接,您将在播放机的
LCD 上看到 。 为
注意
所示电源插座依据您所在国家的不同可能存在差异。
Killer_new.fm Page 18 Tuesda
y, February 1, 2005 2:48 PM
播放机完全充电大约需要
3
小时。
步骤 1: 为电池充电
Sayfa yükleniyor ...
Sayfa yükleniyor ...
Sayfa yükleniyor ...
Sayfa yükleniyor ...
Sayfa yükleniyor ...
Sayfa yükleniyor ...
Sayfa yükleniyor ...
Sayfa yükleniyor ...
Sayfa yükleniyor ...
Sayfa yükleniyor ...
Sayfa yükleniyor ...
Sayfa yükleniyor ...
Sayfa yükleniyor ...
Sayfa yükleniyor ...
Sayfa yükleniyor ...
Sayfa yükleniyor ...
Sayfa yükleniyor ...
Sayfa yükleniyor ...
Sayfa yükleniyor ...
Sayfa yükleniyor ...
Sayfa yükleniyor ...
Sayfa yükleniyor ...
Sayfa yükleniyor ...
Sayfa yükleniyor ...
Sayfa yükleniyor ...
Sayfa yükleniyor ...
Sayfa yükleniyor ...
Sayfa yükleniyor ...
Sayfa yükleniyor ...
Sayfa yükleniyor ...
Sayfa yükleniyor ...
Sayfa yükleniyor ...
Sayfa yükleniyor ...
Sayfa yükleniyor ...
Sayfa yükleniyor ...
Sayfa yükleniyor ...
Sayfa yükleniyor ...
Sayfa yükleniyor ...
Sayfa yükleniyor ...
Sayfa yükleniyor ...
Sayfa yükleniyor ...
Sayfa yükleniyor ...
Sayfa yükleniyor ...
Sayfa yükleniyor ...
Sayfa yükleniyor ...
Sayfa yükleniyor ...
Sayfa yükleniyor ...
Sayfa yükleniyor ...
Sayfa yükleniyor ...
Sayfa yükleniyor ...
Sayfa yükleniyor ...
Sayfa yükleniyor ...
Sayfa yükleniyor ...
Sayfa yükleniyor ...
Sayfa yükleniyor ...
Sayfa yükleniyor ...
Sayfa yükleniyor ...
Sayfa yükleniyor ...
Sayfa yükleniyor ...
Sayfa yükleniyor ...
Sayfa yükleniyor ...
Sayfa yükleniyor ...
Sayfa yükleniyor ...
Sayfa yükleniyor ...
Sayfa yükleniyor ...
Sayfa yükleniyor ...
Sayfa yükleniyor ...
Sayfa yükleniyor ...
Sayfa yükleniyor ...
Sayfa yükleniyor ...
Sayfa yükleniyor ...
Sayfa yükleniyor ...
Sayfa yükleniyor ...
Sayfa yükleniyor ...
Sayfa yükleniyor ...
Sayfa yükleniyor ...
Sayfa yükleniyor ...
Sayfa yükleniyor ...
Sayfa yükleniyor ...
Sayfa yükleniyor ...
-
 1
1
-
 2
2
-
 3
3
-
 4
4
-
 5
5
-
 6
6
-
 7
7
-
 8
8
-
 9
9
-
 10
10
-
 11
11
-
 12
12
-
 13
13
-
 14
14
-
 15
15
-
 16
16
-
 17
17
-
 18
18
-
 19
19
-
 20
20
-
 21
21
-
 22
22
-
 23
23
-
 24
24
-
 25
25
-
 26
26
-
 27
27
-
 28
28
-
 29
29
-
 30
30
-
 31
31
-
 32
32
-
 33
33
-
 34
34
-
 35
35
-
 36
36
-
 37
37
-
 38
38
-
 39
39
-
 40
40
-
 41
41
-
 42
42
-
 43
43
-
 44
44
-
 45
45
-
 46
46
-
 47
47
-
 48
48
-
 49
49
-
 50
50
-
 51
51
-
 52
52
-
 53
53
-
 54
54
-
 55
55
-
 56
56
-
 57
57
-
 58
58
-
 59
59
-
 60
60
-
 61
61
-
 62
62
-
 63
63
-
 64
64
-
 65
65
-
 66
66
-
 67
67
-
 68
68
-
 69
69
-
 70
70
-
 71
71
-
 72
72
-
 73
73
-
 74
74
-
 75
75
-
 76
76
-
 77
77
-
 78
78
-
 79
79
-
 80
80
-
 81
81
-
 82
82
-
 83
83
-
 84
84
-
 85
85
-
 86
86
-
 87
87
-
 88
88
-
 89
89
-
 90
90
-
 91
91
-
 92
92
-
 93
93
-
 94
94
-
 95
95
-
 96
96
-
 97
97
-
 98
98
-
 99
99
-
 100
100


Creative Zen Portable Media Center Hızlı başlangıç Kılavuzu
- Kategori
- MP3 / MP4 oynatıcılar
- Tip
- Hızlı başlangıç Kılavuzu
Diğer dillerde
İlgili Makaleler
-
Creative ZEN MICROPHOTO Getting Started
-
-
-
Creative ZEN VISION-M - Kullanım kılavuzu
-
-
Creative Zen V Kullanım kılavuzu
-
-
Creative Labs MuVo V200 Kullanım kılavuzu
-
-