
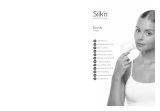
Bright
ND-FC04
DA
GR
TR
IT
NO
SV
EN
DE
FR
NL
ES
PT
EN
USER MANUAL
DE
BEDIENUNGSANLEITUNG
FR
MODE D’EMPLOI
NL
GEBRUIKSAANWIJZING
ES
MANUAL DEL USUARIO
PT
MANUAL DO UTILIZADOR
GR
ΟΔΗΓΊΕΣ ΧΡΉΣΗΣ
TR
KULLANIM KILAVUZU
IT
MANUALE D’USO
NO
BRUKERHÅNDBOK
SV
ANVÄNDARMANUAL
DA
BRUGERMANUAL
ID: #05007
m
y
h
a
n
s
e
c
o
n
t
r
o
l
.
c
o
m
M
A
N
U
A
L
D
E
V
E
L
O
P
E
D
I
N
G
E
R
M
A
N
Y
User-friendly
Manual

A
B
6
5
4
3
8
9
10
1 2
7
1. 2. 3. 4.
2
EN
DE
FR
NL
ES
PT
GR
TR
IT
NO
SV
DA


ENEN
3
Copyright 2019 © Home Skinovations Ltd. All rights reserved.
Legal notice
Home Skinovations Ltd. reserves the right to make changes
to its products or specifications to improve performance,
reliability, or manufacturability. Information furnished by Home
Skinovations Ltd. is believed to be accurate and reliable at the
time of publication. However, Home Skinovations Ltd. assumes
no responsibility for its use. No license is granted by its implication
or otherwise under any patent or patent rights of Home
Skinovations Ltd.
No part of this document may be reproduced or transmitted
in any form or by any means, electronic or mechanical, for any
purpose, without the express written permission of Home
Skinovations Ltd. Data is subject to change without notification.
Home Skinovations Ltd. has patents and pending patent
applications, trademarks, copyrights, or other intellectual
property rights covering subject matter in this document. The
furnishing of this document does not give you any license to these
patents, trademarks, copyrights, or other intellectual property
rights except as expressly provided in any written agreement
from Home Skinovations Ltd. Specifications are subject to change
without notice.
Silk’n and the Silk’n logo are registered trademarks of
Home Skinovations Ltd.
Invention Works B.V.
Donk 1B, 2991 LE Barendrecht, The Netherlands
www.silkn.eu – info@silkn.eu

4
EN
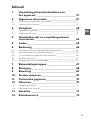
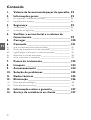
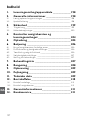
Contents
1. Package contents/device parts_____________5
2. General information ______________________5
2.1 Reading and storing the user manual ________________________ 5
2.2 Explanation of symbols ___________________________________ 5
3. Safety ___________________________________6
3.1 Proper use ____________________________________________ 6
3.2 Safety instructions ______________________________________ 7
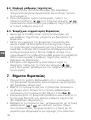
4. Checking the facial brush and
package contents _________________________ 11
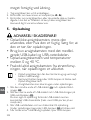
5. Charging _________________________________ 12
6. Operation ________________________________13
6.1 Using dierent areas of the facial brush ______________________ 13
6.2 Operation modes and speed settings _______________________ 13
6.3 Switching on/o and selecting an operation mode _____________ 13
6.4 Selecting a speed setting _________________________________ 14
6.5 Starting and ending the treatment __________________________ 14
7. Treatment steps __________________________14
8. Cleaning _________________________________15
9. Storage __________________________________16
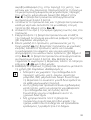
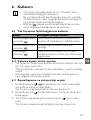
10. Troubleshooting __________________________16
11. Technical data ____________________________16
12. Disposal _________________________________17
12.1 Disposing of the packaging ________________________________ 17
12.2 Disposing of the facial brush _______________________________ 17
13. Warranty ________________________________18
14. Customer service ________________________18

EN
5
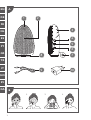
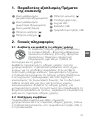
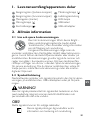
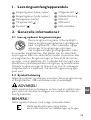
1. Package contents/device parts
1
Cleansing area (thicker studs)
6
Decrease button ( )
2
Cleansing area (thinner studs)
7
Charging port
3
Massaging area (ridges)
8
LED light
4
Increase button ( )
9
USB cable
5
Control button ( )
10
USB wall adapter
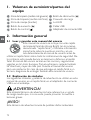
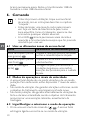
2. General information
2.1 Reading and storing the user manual
This user manual accompanies this Bright – silicone
facial cleansing brush (hereafter referred to as the
“facial brush”), and contains important information
on setup and handling.
Before using the facial brush, read the user manual
carefully. This particularly applies to the safety instructions.
Failure to do so may result in personal injury or damage to the
facial brush. The user manual is based on the standards and
rules in force in the European Union. When abroad, you must
also observe country-specific guidelines and laws. Store the user
manual for further use. Make sure to include this user manual
when passing the facial brush on to third parties.
2.2 Explanation of symbols
The following symbols and signal words are used in this user manual,
on the facial brush, USB wall adapter or packaging.
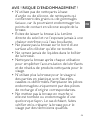
WARNING!
This signal symbol/word designates a hazard with moderate risk,
which may result in death or severe injury if not avoided.
NOTICE!
This signal word warns of possible damage to property.
This signal symbol provides you with useful
additional information on handling and use.

6
EN
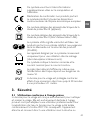
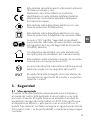
Declaration of Conformity: Products labelled with
this symbol meet all applicable provisions of the
European Economic Area.
This symbol identifies electrical devices that belong
to the protection class III (device).
This symbol identifies electrical devices that belong
to the protection class II (USB wall adapter).
The word “GS” stands for tested safety. Products
marked with this symbol meet the requirements of
the German Product Safety Act (ProdSG).
Devices marked with this symbol are only suitable
for household use (dry indoor rooms).
This symbol identifies voltage and the current rating
for direct current.
The international eciency mark indicates that the
power supply meets the level VI requirements.
IPX7
The facial brush is protected against water
immersion for up to 30 minutes at a depth of 1 m.
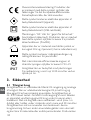
3. Safety
3.1 Proper use
The facial brush is exclusively designed for facial cleansing and
massaging. It is only intended for private use and not suitable for
commercial purposes. The facial brush has been tested for water
ingress to the extent covered by IPX7. This means the device is
waterproof and suitable for use in the shower or while taking a
bath, but do not leave it submerged in water (max. 1 m) or under
running water for more than 30minutes.
Only use the facial brush as described in this user manual. Any
other use is considered improper and may result in damage to
property or persons. The manufacturer or vendor cannot be
held liable for damages or injury incurred through improper or
incorrect use.

EN
7
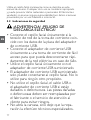
3.2 Safety instructions
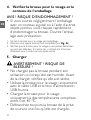
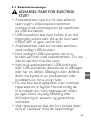
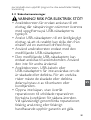
WARNING! RISK OF ELECTRIC SHOCK!
• Only connect the facial brush if the line
voltage of the socket corresponds to the data
on the rating plate of the USB wall adapter.
• Only connect the USB wall adapter to an
easily accessible socket so that you can
quickly disconnect it from the mains supply
in the event of a problem.
• Only use the facial brush with the supplied
USB wall adapter.
• The supplied USB wall adapter can only be
connected to the facial brush. Do not use
for other purposes.
• Do not use the facial brush, USB cable or
USB wall adapter if they are damaged or
defective. The manufacturer or customer
service must replace the damaged or
defective parts to avoid risks.
• Do not open the housing; instead, have
a qualified professional perform repairs.
Contact the customer service team for this.
Liability and warranty claims are waived
in the event of repairs performed by the
user, improper connection or incorrect
operation.
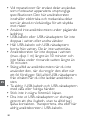
• Only parts that comply with the original
device data may be used for repairs. This

8
EN
facial brush contains electrical and mechan-
ical parts which are essential for providing
protection against sources of danger.
• Do not use the facial brush while charging.
• Do not immerse the USB cable or USB wall
adapter in water or other liquids.
• Keep the USB cable and USB wall adapter
away from water. They are not waterproof.
• Do not leave the facial brush submerged in
water (max. 1 m) or under running water
for more than 30 minutes.
• Always switch the facial brush o when you
are not using it, when you intend to clean
it, or in the event of a malfunction. Always
unplug the USB wall adapter when you are
not charging the facial brush.
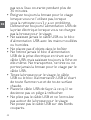
• Never touch the USB cable and USB wall
adapter with wet or damp hands.
• Never insert any objects into the housing.
• Do not pull the USB wall adapter out of the
socket by the USB cable; instead, always pull
it out by the adapter itself. Never move,
pull, or carry the facial brush by the USB
cable.
• Keep the facial brush, USB cable and USB
wall adapter away from open flames and
hot surfaces.
• Lay the USB cable so that it does not pose a
tripping hazard.

EN
9
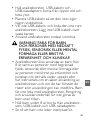
• Do not kink the USB cable or wrap it
around the facial brush. Do not lay the USB
cable over sharp edges.
• Only use the facial brush indoors.
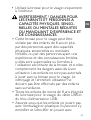
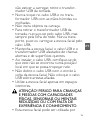
WARNING! DANGER FOR CHILDREN
AND PERSONS WITH IMPAIRED
PHYSICAL, SENSORY OR MENTAL
CAPACITIES, OR LACK OF
EXPERIENCE AND KNOWLEDGE.
• The facial brush can be used by children aged
from 8 years and above and persons with
reduced physical, sensory or mental capabilities
or lack of experience and knowledge if they
have been given supervision or instruction
concerning use of the facial brush in a safe way
and understand the hazards involved. Children
must not play with the facial brush. Cleaning
and user maintenance must not be performed
by unsupervised children.
• Keep children under the age of 8 away from
the facial brush, USB cable and USB wall
adapter.
• Make sure that children do not play with the
plastic wrapping. They may get caught in it
when playing and suocate.
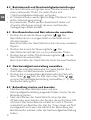
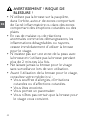
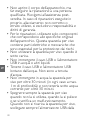
WARNING! RISK OF INJURY!
• Do not use the facial brush on the eye

10
EN
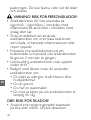
lid, inside the eye orbit, around areas that
contain inflammatory acne, or areas that
have rashes or wounds.
• Stop using the facial brush immediately
if you feel any discomfort or develop
any abnormal reactions such as itching,
uncomfortable inflammation, or scratches.
• Do not focus the facial brush on one spot
on your skin and do not use the facial brush
more than 2 minutes at a time.
• Never leave the facial brush unattended
while it is in operation.
• Consult your doctor before using the facial
brush if:
• you suer from allergies, skin irritation or
skin diseases.
• you are pregnant.
• you are using a pacemaker.
• you are not sure whether the facial brush
is suitable for you.
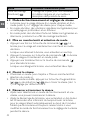
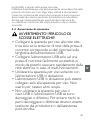
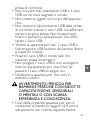
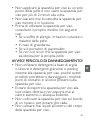
NOTICE! RISK OF DAMAGE!
• Do not use clay-based, silicone-based or
grainy cleansers, exfoliators or scrubs with
the facial brush as they may damage the soft
silicone touch-points of the facial brush.
• Avoid leaving the facial brush in direct
sunlight and never expose it to extreme
heat or boiling water.

EN
11
• Do not place the facial brush on the edge of
a surface to avoid dropping.
• Never fill the housing of the facial brush
with liquid.
• Clean the facial brush after each use to
avoid the accumulation of grease and
residues of face wash products.
• Stop using the facial brush if its plastic parts
exhibit cracks or breaks or are deformed.
Only replace damaged parts with corre-
sponding original spare parts.
• Do not operate the facial brush if it has
been dropped or is damaged in any way.
Have the facial brush checked and/or
repaired by qualified technicians if necessary.
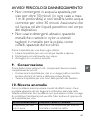
4. Checking the facial brush and package
contents
NOTICE! RISK OF DAMAGE!
• If you are not cautious when opening the
packaging with a sharp knife or other pointed
objects, you may quickly damage the facial
brush. Be very careful when opening it.
1. Take the facial brush out of the packaging.
2. Check to make sure that all parts are included (see Fig. A).
3. Check whether the facial brush or individual parts are damaged.
If this is the case, do not use the facial brush. Contact our
customer service.

12
EN
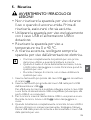
5. Charging
WARNING! RISK OF INJURY!
• Do not charge when the facial brush is in
use or if it is wet. Make sure it is dry before
charging.
• Only charge the facial brush with the
supplied USB cable and USB wall adapter.
• Only charge the facial brush at
temperatures between 0 and 40 °C.
• Always unplug the facial brush after charging
has been completed.
• Fully charge the facial brush before first use and when
the battery power is low.
• When the battery power is low, the LED light
becomes red and starts to blink. Recharge the facial
brush.
• The facial brush cannot be used during charging.
1. Plug the smaller end of the USB cable
9
into the charging
port
7
.
2. Plug the larger end of the USB cable into the USB port of the
USB wall adapter
10
.
You may also plug the USB cable to a compatible USB power
source (e.g. USB port of a computer) for charging.
3. Plug the USB wall adapter into a mains socket for charging.
During charging, the LED light
8
will become red and start
to blink.
4. The LED light will become solid white when it is fully charged.
Unplug the USB wall adapter from the mains socket and
disconnect the USB cable from the facial brush.

EN
13
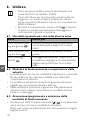
6. Operation
• Clean the facial brush before first use as described in
the chapter “Cleaning”.
• Before cleansing an area of the face for the first time,
perform a skin sensitivity test on a spot. Start your
treatment only if there is no adverse reaction.
• The LED light
8
is solid white during operation and
flashes once whenever a button is pressed.
6.1 Using dierent areas of the facial brush
Area Best for
Cleansing area
(thicker studs)
1
Precise cleansing and removal of dead skin
cells and horny layers.
Cleansing area
(thinner studs)
2
Gentle cleansing of large areas such as
cheeks.
Massaging area
(ridges)
3
Massaging the skin for improved blood
circulation and promoting the absorption of
skin care products.
6.2 Operation modes and speed settings
• The facial brush is equipped with a vibrating and a pulsating
mode. Each mode has 7 speed settings.
• The vibrating mode uses uniform vibrations for deep, gentle
cleansing.
• The pulsating mode uses alternating strong and weak
vibrations for a massage-like soothing eect.
6.3 Switching on/o and selecting an operation mode
1. Press the control button (
)
5
once. The facial brush is now
switched on and in the vibrating mode.
You will hear one beep sound when the facial brush is
switched on.
2. Press the control button (
) again. The facial brush is now in
the pulsating mode.
3. Press the control button ( ) a third time to switch o the
facial brush.
You will hear two beep sounds when the facial brush is
switched o.

14
EN
6.4 Selecting a speed setting
1. Select an operation mode (see chapter “Switching on/o and
selecting an operation mode”).
2. Press the increase button ( )
4
or decrease button ( )
6
in the selected operation mode to select a speed setting (1–7).
The default level is 4.
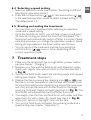
6.5 Starting and ending the treatment
• You may start your treatment after selecting an operation
mode and a speed setting.
• Once the facial brush starts, you will hear a beep sound every
30 seconds, hinting you about the time that has passed. The
facial brush will automatically switch o after 2minutes. Please
note that whenever you change the operation mode or speed
setting during treatment, the timer will be reset to zero.
• You can also end the treatment anytime by pressing the
control button (
)
5
once or twice, depending on the
current operation mode.
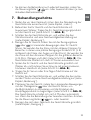
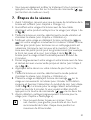
7. Treatment steps
1. Make sure the facial brush has enough battery power before
use (see chapter “Charging”).
2. Dampen your face and the facial brush with lukewarm water.
Apply your regular face wash product on the face (see step 1
in Fig. B).
3. Turn on the facial brush, select the vibrating mode and a speed
setting (see chapter “Operation”).
4. Cleanse the face by moving the cleansing area (
1
or
2
) over
the face in circular movements. Use the area with thicker studs
for areas that need precise cleansing (e.g. around the nose, eyes
and chin) and use the area with thinner studs for the larger
areas (e.g. forehead, cheeks and neck) (see step 2 in Fig. B). The
facial brush will automatically switch o after 2 minutes.
5. Thoroughly rinse the face and facial brush with water and then
wipe them dry with a clean, dry towel (see step 3 in Fig. B).
6. Apply your serum or day/night cream on the face.
7. Turn on the facial brush and select the pulsating mode and a
speed setting (see chapter “Operation”).

EN
15
8. Massage the face by moving the massaging area
3
over the
face in circular movementsto stimulate blood circulation and
promote the absorption of your skin care product (see step4
in Fig. B). The facial brush will automatically switch o after
2 minutes. If you want to end the treatment earlier, press the
control button ( )
5
once or twice.
9. Thoroughly clean the facial brush after use (see chapter
“Cleaning”).
• You can divide the skin into 6 areas: forehead,
nose, chin, left cheek, right cheek and neck. We
recommend you not to treat each area for more than
20 seconds.
• This facial brush is designed to cleanse your skin in just
2 minutes. We recommend you not to exceed this
time.
• Do not use this facial brush more than twice a day as
this can irritate the skin and cause redness.
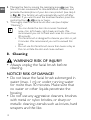
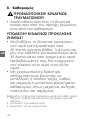
8. Cleaning
WARNING! RISK OF INJURY!
• Always unplug the facial brush before
cleaning.
NOTICE! RISK OF DAMAGE!
• Do not leave the facial brush submerged in
water (max. 1 m) or under running water
for more than 30 minutes. Make sure that
no water or other liquids penetrate the
housing.
• Do not use any aggressive cleaners, brushes
with metal or nylon bristles, or sharp or
metallic cleaning utensils such as knives, hard
scrapers and the like.

16
EN
Always clean the facial brush after each use.
1. Wash the facial brush with lukewarm water and soap.
2. Thoroughly rinse it with water.
3. Wipe it dry with a dry cloth.
9. Storage
All parts must be completely dry before being stored.
• Store the facial brush in a clean and dry place, avoiding heat
and direct sunlight.
• Keep the facial brush away from children.
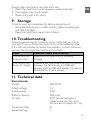
10. Troubleshooting
Some problems may be caused by minor faults that you can fix
yourself. To do so, follow the instructions in the following table.
If it is still not possible to resolve the problem, contact customer
service. Do not repair the facial brush yourself.
Fault Possible cause and solution
The facial brush
does not start.
Make sure the facial brush is properly
charged.
The facial brush
does not charge.
Make sure the USB cable is securely connected
between the facial brush and USB wall
adapter, and the USB wall adapter is properly
connected to a mains socket.
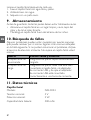
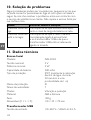
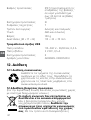
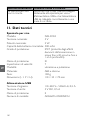
11. Technical data
Facial brush
Model: ND-FC04
Rated voltage: 5 V
Rated power: 3 W
Battery capacity: 500 mAh
IP code: IPX7 (protected against
water immersion for up to
30minutes at a depth of 1 m)
Protection class: III
Speed settings: 7

EN
17
Modes: Vibrating and pulsating
Material: ABS and silicone
Weight: 100 g
Dimensions (L × W × H): 110 × 35 × 70 mm
USB wall adapter
Power input: 110–240 V~ 50/60 Hz, 0.2 A
Power output: 5 V DC, 0.5 A
Protection class: II
Model number: AK06WG-0500050VU
12. Disposal
12.1 Disposing of the packaging
Sort the packaging before you dispose of it.
Dispose of paperboard and cardboard with the
recycled paper service and wrappings with the
appropriate collection service.
12.2 Disposing of the facial brush
(Applicable in the European Union and other European countries
with separate collection systems of recyclable materials)
Old appliances may not be disposed of in the
household waste!
Should the facial brush no longer be capable of being
used at some point in time, dispose of it in
accordance with the regulations in force in
your city or county. This ensures that old
appliances are recycled in a professional manner and
also rules out negative consequences for the environment. For this
reason, electrical equipment is marked with the symbol shown here.
Batteries and rechargeable batteries may not be
disposed of with household waste!
As the end user you are required by law to bring all
batteries and rechargeable batteries, regardless
whether they contain harmful substances* or not, to a
collection point run by the communal authority or to

18
EN
a retailer, so that they can be disposed of in an environmentally
friendly manner.
Bring the entire product (including the rechargeable battery) to
your collection point and make sure that it is in an uncharged
state!
* labelled with: Cd = cadmium, Hg = mercury, Pb = lead
13. Warranty
This product is covered by a 2-year warranty according to
European regulations and law. The extent of the warranty on this
product is limited to technical defects caused by faulty production
processes. In the event you want to claim warranty please be
sure to contact our customer service for instructions. They may
be able to solve your problem without needing to return the
product to the store or our service center. Our customer service
is always pleased to help you!
14. Customer service
For more information about the products of Silk’n visit your
regional Silk’n website: www.silkn.eu. If the device is damaged,
defective, in need of repair or you need our assistance, please
contact your nearest Silk’n service center. This manual is also
available as a PDF download from: www.silkn.eu.
Service number: 0906-2130009
Email: customercareuk@silkn.eu / info@silkn.eu

DE
19
Copyright 2019 © Home Skinovations Ltd. Alle Rechte vorbe-
halten.
Rechtlicher Hinweis
Home Skinovations Ltd. behält sich das Recht vor, Änderungen
an seinen Produkten oder Spezifikationen zur Verbesserung von
Leistung, Betriebssicherheit oder Herstellbarkeit vorzunehmen.
Durch Home Skinovations Ltd. bereitgestellte Informationen
werden zum Zeitpunkt der Veröentlichung als korrekt und
verlässlich angesehen. Die Home Skinovations Ltd. übernimmt
allerdings keine Verantwortung für deren Verwendung. Es
wird weder stillschweigend noch unter einem Patent oder
unter Patentrechten der Home Skinovations Ltd. eine Lizenz
eingeräumt.
Kein Teil dieses Dokuments darf in irgendeiner Form oder mit
elektronischen oder mechanischen Mitteln für irgendwelche
Zwecke ohne ausdrückliche schriftliche Genehmigung der
Home Skinovations Ltd. reproduziert oder übertragen
werden. Änderungen der Daten ohne Vorankündigung sind
vorbehalten.
Die Home Skinovations Ltd. verfügt über Patente sowie
anhängige Patentanmeldungen, Handelsmarken, Urheberrechte
oder sonstige Rechte geistigen Eigentums, welche Gegenstand
dieses Dokumentes sind. Die Bereitstellung dieses Dokumentes
gibt Ihnen keinerlei Lizenz für diese Patente, Handelsmarken,
Urheberrechte oder sonstigen Rechte geistigen Eigentums, sofern
dies nicht ausdrücklich in einer schriftlichen Vereinbarung von
Home Skinovations Ltd. geregelt ist. Änderung der technischen
Daten ohne Vorankündigung vorbehalten.
Silk’n und das Silk’n-Logo sind eingetragene Warenzeichen der
Home Skinovations Ltd.
Invention Works B.V.
Donk 1B, 2991 LE Barendrecht, Die Niederlande
www.silkn.eu – info@silkn.eu
Sayfa yükleniyor ...
Sayfa yükleniyor ...
Sayfa yükleniyor ...
Sayfa yükleniyor ...
Sayfa yükleniyor ...
Sayfa yükleniyor ...
Sayfa yükleniyor ...
Sayfa yükleniyor ...
Sayfa yükleniyor ...
Sayfa yükleniyor ...
Sayfa yükleniyor ...
Sayfa yükleniyor ...
Sayfa yükleniyor ...
Sayfa yükleniyor ...
Sayfa yükleniyor ...
Sayfa yükleniyor ...
Sayfa yükleniyor ...
Sayfa yükleniyor ...
Sayfa yükleniyor ...
Sayfa yükleniyor ...
Sayfa yükleniyor ...
Sayfa yükleniyor ...
Sayfa yükleniyor ...
Sayfa yükleniyor ...
Sayfa yükleniyor ...
Sayfa yükleniyor ...
Sayfa yükleniyor ...
Sayfa yükleniyor ...
Sayfa yükleniyor ...
Sayfa yükleniyor ...
Sayfa yükleniyor ...
Sayfa yükleniyor ...
Sayfa yükleniyor ...
Sayfa yükleniyor ...
Sayfa yükleniyor ...
Sayfa yükleniyor ...
Sayfa yükleniyor ...
Sayfa yükleniyor ...
Sayfa yükleniyor ...
Sayfa yükleniyor ...
Sayfa yükleniyor ...
Sayfa yükleniyor ...
Sayfa yükleniyor ...
Sayfa yükleniyor ...
Sayfa yükleniyor ...
Sayfa yükleniyor ...
Sayfa yükleniyor ...
Sayfa yükleniyor ...
Sayfa yükleniyor ...
Sayfa yükleniyor ...
Sayfa yükleniyor ...
Sayfa yükleniyor ...
Sayfa yükleniyor ...
Sayfa yükleniyor ...
Sayfa yükleniyor ...
Sayfa yükleniyor ...
Sayfa yükleniyor ...
Sayfa yükleniyor ...
Sayfa yükleniyor ...
Sayfa yükleniyor ...
Sayfa yükleniyor ...
Sayfa yükleniyor ...
Sayfa yükleniyor ...
Sayfa yükleniyor ...
Sayfa yükleniyor ...
Sayfa yükleniyor ...
Sayfa yükleniyor ...
Sayfa yükleniyor ...
Sayfa yükleniyor ...
Sayfa yükleniyor ...
Sayfa yükleniyor ...
Sayfa yükleniyor ...
Sayfa yükleniyor ...
Sayfa yükleniyor ...
Sayfa yükleniyor ...
Sayfa yükleniyor ...
Sayfa yükleniyor ...
Sayfa yükleniyor ...
Sayfa yükleniyor ...
Sayfa yükleniyor ...
Sayfa yükleniyor ...
Sayfa yükleniyor ...
Sayfa yükleniyor ...
Sayfa yükleniyor ...
Sayfa yükleniyor ...
Sayfa yükleniyor ...
Sayfa yükleniyor ...
Sayfa yükleniyor ...
Sayfa yükleniyor ...
Sayfa yükleniyor ...
Sayfa yükleniyor ...
Sayfa yükleniyor ...
Sayfa yükleniyor ...
Sayfa yükleniyor ...
Sayfa yükleniyor ...
Sayfa yükleniyor ...
Sayfa yükleniyor ...
Sayfa yükleniyor ...
Sayfa yükleniyor ...
Sayfa yükleniyor ...
Sayfa yükleniyor ...
Sayfa yükleniyor ...
Sayfa yükleniyor ...
Sayfa yükleniyor ...
Sayfa yükleniyor ...
Sayfa yükleniyor ...
Sayfa yükleniyor ...
Sayfa yükleniyor ...
Sayfa yükleniyor ...
Sayfa yükleniyor ...
Sayfa yükleniyor ...
Sayfa yükleniyor ...
Sayfa yükleniyor ...
Sayfa yükleniyor ...
Sayfa yükleniyor ...
Sayfa yükleniyor ...
Sayfa yükleniyor ...
Sayfa yükleniyor ...
Sayfa yükleniyor ...
Sayfa yükleniyor ...
Sayfa yükleniyor ...
Sayfa yükleniyor ...
Sayfa yükleniyor ...
Sayfa yükleniyor ...
Sayfa yükleniyor ...
Sayfa yükleniyor ...
Sayfa yükleniyor ...
Sayfa yükleniyor ...
Sayfa yükleniyor ...
Sayfa yükleniyor ...
Sayfa yükleniyor ...
Sayfa yükleniyor ...
Sayfa yükleniyor ...
Sayfa yükleniyor ...
Sayfa yükleniyor ...
Sayfa yükleniyor ...
Sayfa yükleniyor ...
Sayfa yükleniyor ...
Sayfa yükleniyor ...
Sayfa yükleniyor ...
Sayfa yükleniyor ...
Sayfa yükleniyor ...
Sayfa yükleniyor ...
Sayfa yükleniyor ...
Sayfa yükleniyor ...
Sayfa yükleniyor ...
Sayfa yükleniyor ...
Sayfa yükleniyor ...
Sayfa yükleniyor ...
Sayfa yükleniyor ...
Sayfa yükleniyor ...
Sayfa yükleniyor ...
Sayfa yükleniyor ...
Sayfa yükleniyor ...
Sayfa yükleniyor ...
Sayfa yükleniyor ...
Sayfa yükleniyor ...
Sayfa yükleniyor ...
Sayfa yükleniyor ...
Sayfa yükleniyor ...
Sayfa yükleniyor ...
Sayfa yükleniyor ...
Sayfa yükleniyor ...
Sayfa yükleniyor ...
Sayfa yükleniyor ...
Sayfa yükleniyor ...
Sayfa yükleniyor ...
Sayfa yükleniyor ...
Sayfa yükleniyor ...
Sayfa yükleniyor ...
Sayfa yükleniyor ...
Sayfa yükleniyor ...
Sayfa yükleniyor ...
Sayfa yükleniyor ...
Sayfa yükleniyor ...
Sayfa yükleniyor ...
Sayfa yükleniyor ...
Sayfa yükleniyor ...
Sayfa yükleniyor ...
Sayfa yükleniyor ...
Sayfa yükleniyor ...
Sayfa yükleniyor ...
Sayfa yükleniyor ...
Sayfa yükleniyor ...
Sayfa yükleniyor ...
Sayfa yükleniyor ...
Sayfa yükleniyor ...
Sayfa yükleniyor ...
Sayfa yükleniyor ...
Sayfa yükleniyor ...
Sayfa yükleniyor ...
Sayfa yükleniyor ...
Sayfa yükleniyor ...
Sayfa yükleniyor ...
-
 1
1
-
 2
2
-
 3
3
-
 4
4
-
 5
5
-
 6
6
-
 7
7
-
 8
8
-
 9
9
-
 10
10
-
 11
11
-
 12
12
-
 13
13
-
 14
14
-
 15
15
-
 16
16
-
 17
17
-
 18
18
-
 19
19
-
 20
20
-
 21
21
-
 22
22
-
 23
23
-
 24
24
-
 25
25
-
 26
26
-
 27
27
-
 28
28
-
 29
29
-
 30
30
-
 31
31
-
 32
32
-
 33
33
-
 34
34
-
 35
35
-
 36
36
-
 37
37
-
 38
38
-
 39
39
-
 40
40
-
 41
41
-
 42
42
-
 43
43
-
 44
44
-
 45
45
-
 46
46
-
 47
47
-
 48
48
-
 49
49
-
 50
50
-
 51
51
-
 52
52
-
 53
53
-
 54
54
-
 55
55
-
 56
56
-
 57
57
-
 58
58
-
 59
59
-
 60
60
-
 61
61
-
 62
62
-
 63
63
-
 64
64
-
 65
65
-
 66
66
-
 67
67
-
 68
68
-
 69
69
-
 70
70
-
 71
71
-
 72
72
-
 73
73
-
 74
74
-
 75
75
-
 76
76
-
 77
77
-
 78
78
-
 79
79
-
 80
80
-
 81
81
-
 82
82
-
 83
83
-
 84
84
-
 85
85
-
 86
86
-
 87
87
-
 88
88
-
 89
89
-
 90
90
-
 91
91
-
 92
92
-
 93
93
-
 94
94
-
 95
95
-
 96
96
-
 97
97
-
 98
98
-
 99
99
-
 100
100
-
 101
101
-
 102
102
-
 103
103
-
 104
104
-
 105
105
-
 106
106
-
 107
107
-
 108
108
-
 109
109
-
 110
110
-
 111
111
-
 112
112
-
 113
113
-
 114
114
-
 115
115
-
 116
116
-
 117
117
-
 118
118
-
 119
119
-
 120
120
-
 121
121
-
 122
122
-
 123
123
-
 124
124
-
 125
125
-
 126
126
-
 127
127
-
 128
128
-
 129
129
-
 130
130
-
 131
131
-
 132
132
-
 133
133
-
 134
134
-
 135
135
-
 136
136
-
 137
137
-
 138
138
-
 139
139
-
 140
140
-
 141
141
-
 142
142
-
 143
143
-
 144
144
-
 145
145
-
 146
146
-
 147
147
-
 148
148
-
 149
149
-
 150
150
-
 151
151
-
 152
152
-
 153
153
-
 154
154
-
 155
155
-
 156
156
-
 157
157
-
 158
158
-
 159
159
-
 160
160
-
 161
161
-
 162
162
-
 163
163
-
 164
164
-
 165
165
-
 166
166
-
 167
167
-
 168
168
-
 169
169
-
 170
170
-
 171
171
-
 172
172
-
 173
173
-
 174
174
-
 175
175
-
 176
176
-
 177
177
-
 178
178
-
 179
179
-
 180
180
-
 181
181
-
 182
182
-
 183
183
-
 184
184
-
 185
185
-
 186
186
-
 187
187
-
 188
188
-
 189
189
-
 190
190
-
 191
191
-
 192
192
-
 193
193
-
 194
194
-
 195
195
-
 196
196
-
 197
197
-
 198
198
-
 199
199
-
 200
200
-
 201
201
-
 202
202
-
 203
203
-
 204
204
-
 205
205
-
 206
206
-
 207
207
-
 208
208
-
 209
209
-
 210
210
-
 211
211
-
 212
212
-
 213
213
-
 214
214


Diğer dillerde
- español: Silk'n Bright ND-FC04 Manual de usuario
- français: Silk'n Bright ND-FC04 Manuel utilisateur
- italiano: Silk'n Bright ND-FC04 Manuale utente
- svenska: Silk'n Bright ND-FC04 Användarmanual
- Deutsch: Silk'n Bright ND-FC04 Benutzerhandbuch
- português: Silk'n Bright ND-FC04 Manual do usuário
- English: Silk'n Bright ND-FC04 User manual
- dansk: Silk'n Bright ND-FC04 Brugermanual
- Nederlands: Silk'n Bright ND-FC04 Handleiding
İlgili Makaleler
Diğer Belgeler
-
Silk n H2120 Kullanım kılavuzu
-
Silvercrest 275457 Operating Instructions Manual
-
Rowenta LV4010F0 Kullanım kılavuzu
-
Beurer FC 49 Kullanım kılavuzu
-
-
Beurer FC 65 El kitabı
-
Medisana FB 885 El kitabı
-
Remington FC1000 El kitabı
-
 Silk n H4001 Kullanım kılavuzu
-
Foreo ESPADA™ Kullanım kılavuzu
