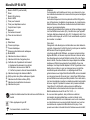
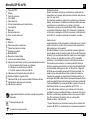
Microlife BP B3 AFIB Kullanım kılavuzu
- Kategori
- Kan basıncı birimleri
- Tip
- Kullanım kılavuzu
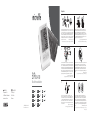
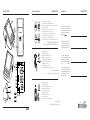
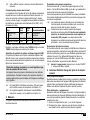
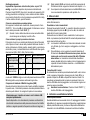
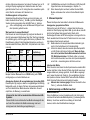
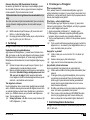
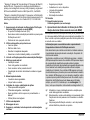
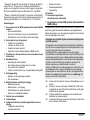
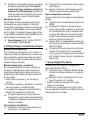
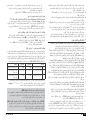
Aşağıda, BP B3 AFIB cihazı ile ilgili kısa bilgiler bulacaksınız. Bu cihaz, 12 yaş ve üzeri kişilerde invaziv olmayan kan basıncını ölçmek için tasarlanmıştır. Hipertansiyon, hipotansiyon, diyabet, hamilelik, preeklampsi, ateroskleroz, son dönem böbrek hastalığı, obezite ve yaşlı hastalar için klinik olarak doğrulanmıştır. Cihaz, Atriyal Fibrilasyon (AF) düşündüren düzensiz bir nabzı tespit edebilir. AF tanısının yalnızca EKG ile doğrulanabileceğini ve hastanın bir doktora görünmesi gerektiğini unutmayın. Cihaz aynı zamanda, atriyal fibrilasyonun ve arteriyel hipertansiyonun tespiti için dünyanın önde gelen dijital kan basıncı ölçüm teknolojisi olan Microlife AFIBsens'i kullanır. Cihaz, ölçüm sırasında nabız düzensizliğini de analiz edebilir. AFIB sembolü ölçümden sonra ekranda belirirse, bu atriyal fibrilasyonun varlığına işaret edebilir. Bu durumda doktorunuza danışmanız tavsiye edilir.
Aşağıda, BP B3 AFIB cihazı ile ilgili kısa bilgiler bulacaksınız. Bu cihaz, 12 yaş ve üzeri kişilerde invaziv olmayan kan basıncını ölçmek için tasarlanmıştır. Hipertansiyon, hipotansiyon, diyabet, hamilelik, preeklampsi, ateroskleroz, son dönem böbrek hastalığı, obezite ve yaşlı hastalar için klinik olarak doğrulanmıştır. Cihaz, Atriyal Fibrilasyon (AF) düşündüren düzensiz bir nabzı tespit edebilir. AF tanısının yalnızca EKG ile doğrulanabileceğini ve hastanın bir doktora görünmesi gerektiğini unutmayın. Cihaz aynı zamanda, atriyal fibrilasyonun ve arteriyel hipertansiyonun tespiti için dünyanın önde gelen dijital kan basıncı ölçüm teknolojisi olan Microlife AFIBsens'i kullanır. Cihaz, ölçüm sırasında nabız düzensizliğini de analiz edebilir. AFIB sembolü ölçümden sonra ekranda belirirse, bu atriyal fibrilasyonun varlığına işaret edebilir. Bu durumda doktorunuza danışmanız tavsiye edilir.


-
 1
1
-
 2
2
-
 3
3
-
 4
4
-
 5
5
-
 6
6
-
 7
7
-
 8
8
-
 9
9
-
 10
10
-
 11
11
-
 12
12
-
 13
13
-
 14
14
-
 15
15
-
 16
16
-
 17
17
-
 18
18
-
 19
19
-
 20
20
-
 21
21
-
 22
22
-
 23
23
-
 24
24
-
 25
25
-
 26
26
-
 27
27
-
 28
28
-
 29
29
-
 30
30
-
 31
31
-
 32
32
-
 33
33
-
 34
34
-
 35
35
-
 36
36
-
 37
37
-
 38
38
-
 39
39
-
 40
40
-
 41
41
-
 42
42
-
 43
43
-
 44
44
-
 45
45
-
 46
46
-
 47
47
-
 48
48
-
 49
49
-
 50
50
-
 51
51
-
 52
52
-
 53
53
-
 54
54
-
 55
55
-
 56
56
-
 57
57
-
 58
58
-
 59
59
-
 60
60
-
 61
61
-
 62
62
-
 63
63
-
 64
64
-
 65
65
-
 66
66
-
 67
67
-
 68
68
-
 69
69
-
 70
70
-
 71
71
-
 72
72
-
 73
73
-
 74
74
-
 75
75
-
 76
76
-
 77
77
-
 78
78
-
 79
79
-
 80
80
-
 81
81
-
 82
82
-
 83
83
-
 84
84
-
 85
85
-
 86
86
-
 87
87
-
 88
88
-
 89
89
-
 90
90
-
 91
91


Microlife BP B3 AFIB Kullanım kılavuzu
- Kategori
- Kan basıncı birimleri
- Tip
- Kullanım kılavuzu
Aşağıda, BP B3 AFIB cihazı ile ilgili kısa bilgiler bulacaksınız. Bu cihaz, 12 yaş ve üzeri kişilerde invaziv olmayan kan basıncını ölçmek için tasarlanmıştır. Hipertansiyon, hipotansiyon, diyabet, hamilelik, preeklampsi, ateroskleroz, son dönem böbrek hastalığı, obezite ve yaşlı hastalar için klinik olarak doğrulanmıştır. Cihaz, Atriyal Fibrilasyon (AF) düşündüren düzensiz bir nabzı tespit edebilir. AF tanısının yalnızca EKG ile doğrulanabileceğini ve hastanın bir doktora görünmesi gerektiğini unutmayın. Cihaz aynı zamanda, atriyal fibrilasyonun ve arteriyel hipertansiyonun tespiti için dünyanın önde gelen dijital kan basıncı ölçüm teknolojisi olan Microlife AFIBsens'i kullanır. Cihaz, ölçüm sırasında nabız düzensizliğini de analiz edebilir. AFIB sembolü ölçümden sonra ekranda belirirse, bu atriyal fibrilasyonun varlığına işaret edebilir. Bu durumda doktorunuza danışmanız tavsiye edilir.
diğer dillerde
- español: Microlife BP B3 AFIB Manual de usuario
- français: Microlife BP B3 AFIB Manuel utilisateur
- italiano: Microlife BP B3 AFIB Manuale utente
- Deutsch: Microlife BP B3 AFIB Benutzerhandbuch
- português: Microlife BP B3 AFIB Manual do usuário
- English: Microlife BP B3 AFIB User manual
- Nederlands: Microlife BP B3 AFIB Handleiding
İlgili makaleler
-
Microlife BP A6 BT Kullanım kılavuzu
-
Microlife Bluetooth® blood pressure monitor Kullanım kılavuzu
-
Microlife BP B6 Connect Kullanım kılavuzu
-
Microlife BP B2 Basic Blood Pressure Monitor Kullanım kılavuzu
-
-
-
Microlife BP A3 Plus Kullanım kılavuzu
-
-
Microlife BP A7 Touch Kullanım kılavuzu
-