Samsung SCCC4203AP Kullanım kılavuzu
- Kategori
- Güvenlik kameraları
- Tip
- Kullanım kılavuzu

E
TU
Part : AB68-00674A
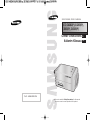
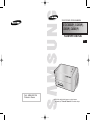
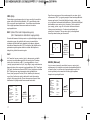
220X POWER ZOOM CAMERA
220x Power Zoom
LOW LIGHT
DIGITAL COLOR CAMERA
SCC-C4201(P), C4203(P),
C4301(P), C4303(P)
Owner’s Instructions
Kullanim Kilavuzu
✽ Be sure to read the "Safety Precautions" in this manual
to ensure correct use and operation of this product.

E
1
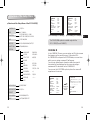
Safety Precautions
2
The purpose of safety precautions is to prevent
accidental injury or property damage. Always observe
all safety precautions.
✽
The precautions are divided into "Warnings" and
"Cautions" as distinguished below:
Warning
Ignoring this precaution
may result in death or
serious injury.
Caution
Ignoring this precaution
may result in injury or
damage to property.
4. Securely plug the power cord into the power
receptacle. (A loose connection may result in fire.)
5. When mounting the camera on a wall or ceiling,
fasten it safely and securely. (A falling camera may
cause personal injury.)
6. Do not place conductive objects (e.g.,
screwdrivers, coins, and metal things) or containers
filled with water on top of the camera. (Serious
injury may result from fire, electrical shock, or
falling objects.)
7. Do not install the unit in humid, dusty, or sooty
locations. (Doing so may cause fire or electrical
shock.)
8. If any unusual smells or smoke come from the unit,
stop using the product. In such case, immediately
disconnect the power source and contact the
service center. (Continued use in such a condition
may cause fire or electrical shock.)
9. If this product fails to operate normally, contact the
store of purchase or your nearest service center.
Never disassemble or modify this product in any
way. (Problems caused by unauthorized user
disassembly or repairs are not covered by your
warranty.)
10. When cleaning, do not spray water directly onto
parts of the product. (Doing so may cause fire or
electrical shock.) Gently wipe the surface with a dry
cloth. Never use detergents or chemical cleaners
on the product, as this may result in discoloration
of surface or cause damage to the finish.
Warnings
1. Be sure to use only the standard adapter which is
specified in the specification sheet. (page 28~31)
Using any other adapter could cause fire, electrical
shock, or damage to the product.
2. Check the external connection terminals first before
connecting the power source and signal wires.
Connect the alarm signal wires to the alarm
terminals. Connect the DC12V power adapter to
the SCC-C4201(P)/C4203(P) power input, making
sure that the currect polarity is observed.
Connect the DC12V or AC24V power adapter to
the SCC-C4301(P)/C4303(P) power input.
3. Do not connect multiple cameras to a single
adapter. (Exceeding the capacity may cause
abnormal heat generation or fire.)

E
3 4
Contents
Cautions
1. Do not drop objects on the product or apply strong
shock to it. Keep away from a location subject to
excessive vibration or magnetic interference.
2. Do not install in a location subject to high
temperature, low temperature, or high humidity.
(Doing so may cause fire or electrical shock.)
3. Avoid a location which is exposed to direct sunlight,
or near heat sources such as heaters or radiators.
(Neglecting to do so may result in a risk of fire.)
4. If you want to relocate the already installed product,
be sure to turn off the power before moving or
reinstalling it.
5. Install in a well-ventilated location.
6. Remove the power plug from the outlet when there
is a lightning storm. (Neglecting to do so may cause
fire or damage to the product.)
1. Overview.............................................................5
2. Part Names and Functions ...............................6
3. Installation........................................................ 8
Checking the Package Contents ....................... 8
Preparing the Cables ........................................ 9
Connecting the Cables .................................... 10
4. Navigating the Setup Menu........................... 12
Structure of the Setup Menu ........................... 12
- CAMERA ID................................................... 16
- IRIS................................................................ 17
- BLC................................................................ 17
- ALC ............................................................... 17
- MANU............................................................ 18
- SHUTTER...................................................... 19
- AGC (MOTION)............................................. 20
- WHITE BAL................................................... 21
- SPECIAL ....................................................... 22
- AUTO FOCUS............................................... 24
- MOTION DET................................................ 24
- PRESET........................................................ 25
- COLOR/ BW.................................................. 26
- EXIT............................................................... 28
5. Specifications ............................................... 29
6. Others ............................................................ 33

5
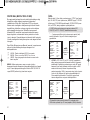
Overview
1
6
Part Names and Functions
2
E
This camera is a high performance surveillance camera that
provides a maximum of 220x zoom surveillance capability
with its 22x optical zoom lens and digital zoom IC.
It is a multifunction camera that is equipped with all of the
key features of the existing surveillance cameras :
●
Day & Night function (SCC-C4203(P), C4303(P)) that
ensures sharp and clear images even at night.
●
Low - Light Surveillance function that enables image
capture even under extremely low light conditions.
●
White Balance function that provides accurate color
rendition under any light conditions.
●
BLC function that enables effective back light
compensation even under a spotlight or a very bright
incident light.
●
Auto Focus function that automatically tracks and focuses
on the moving subject.
●
RS485/ Wired remote control function.
Broadcast System
●
SCC-C4201/ C4203/ C4301/ C4303 : NTSC System
●
SCC-C4201P/ C4203P/ C4301P/ C4303P : PAL System
Power System/Power Consumption
●
SCC-C4201(P), C4203(P) : DC 12V/5.0W
●
SCC-C4301(P), C4303(P) : AC 24V, DC 12V/5.5W
220x Power Zoom
LOW LIGHT
DIGITAL COLOR CAMERA
REMOTE RS-485 POWER
SET-UP button
The function of the SET-UP button varies depending on
whether you are currently in Normal Operation mode (i.e.,
the Setup Menu is not displayed) or Setup Menu mode.
☞
In Normal Operation Mode
- UP/ DOWN buttons : Use as the ZOOM Tele button
and the ZOOM Wide button respectively.
- LEFT/ RIGHT buttons : Use as the FOCUS Near
button and the FOCUS Far button respectively.
- SET- UP button: Use to enter the Setup Menu.
Hold the SET- UP button for longer than 3 seconds to
enter the Setup Menu.
SET-UP button
Instead of “POWER”, “DC IN”
is writtern in
SCC-C4201(P)/4203(P).
Instead of “POWER”, “PWR
IN” and instead of “GND”,
“DC12&AC24V” is writtern in
SCC-C4301(P)/4303(P).
* The followings may occur in a camera with built-in zoom.
- When the zoom rate becomes closer to the TELE side,
the edges of the screen may become dim.
- When connected to a DVR or an LCD monitor, the screen
corners may be obstructed.

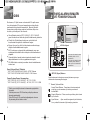
8
E
7
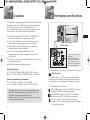
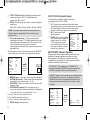
Installation
3
Checking the Package Contents
Make sure that the following accessories are included in
the package.
220x Power Zoom
LOW LIGHT
D
IG
ITA
L
C
O
LO
R
C
A
M
E
R
A
SCC-C4201(P),C4203(P),
C4301(P),C4303(P)
User's Guide
Before Installation
Mount Adapter
Screw (2)
Terminal Block
☞
In Setup Menu Mode
- UP/ DOWN buttons: Use to move the cursor up or down.
- LEFT/ RIGHT buttons: Use to move the cursor left or
right, or to sequentially view the values that can be
assigned to a parameter.
- ENTER button: Use to select a Sub Menu item, and to
accept the current value.
ZOOM/ FOCUS REMOTE terminals
Use to control ZOOM/ FOCUS from an external controller.
Depending on the input conditions, the terminals can be
set to 4 different modes.
(Operating Voltage Range : +3V ~+13V, -3V~-13V)
ALARM OUT terminal
An alarm signal is output from this terminal when the
MOTION DET mode is activated or BW mode is activated.
(Open Collector
:
DC24V 40mA Max)
VIDEO OUT terminal
Connect the monitor's VIDEO IN. The video signal from
the camera is transmitted to the monitor via this terminal.
RS485 terminal
RS485 remote control terminal.
Power LED
Lights when power is on.
POWER IN terminal
Plug in the power adapter here.
Code
Item
A
B
C
D
Tele
-6V
-6V
+6V
+6V
Wide
+6V
+6V
-6V
-6V
Far
+6V
-6V
+6V
-6V
Near
-6V
+6V
-6V
+6V
Caution : In the event of a simultaneous input of RS485 and
wired remote control signal, whichever was input first
will be activated.
(For a camera with the ROM version 1.2 or above,
please refer to page 33.)

9 10
E
1. Connect one end of the BNC cable to the VIDEO OUT.
2. Connect the other end of the BNC cable to the VIDEO IN
of the monitor.
3.
Plug in the power adapter. Use a "minus" screwdriver to
connect one part of the power adapter, which consists of two
lines, to the POWER terminal of the camera as follows :
REMOTE RS-485 POWER
REMOTE RS-485 POWER
Connecting the Cables
Video terminals on the back
of the monitor
BNC cable
POWER SELECTION switch
underneath the power adapte
POWER SELECTION
switch underneath the
power adapte
Preparing the Cables
To install and use the camera, first prepare the following
cables.
The requirements for the power adapter, which connects to
the camera's POWER IN terminal, are as follows:
●
SCC-C4201(P), SCC-C4203(P) : DC12V 600mA
●
SCC-C4301(P), SCC-C4303(P) : AC24V 300mA
DC12V 600mA
Video Cable
Use a BNC cable, such as the one shown below, to connect
the camera's VIDEO OUT to the monitor.

11 12
E
Navigating the Setup Menu
4
In this chapter, we will take a look at the menu system of the
SCC-C4201(P), C4203(P), C4301(P), and C4303(P). First,
we will take a look at the structure of the Setup Menu and
then describe the functions of each menu item in the menu.
●
Structure of the Setup Menu of the SCC-C4201(P)
Structure of the Setup Menu
CAMERA ID
IRIS
SHUTTER
AGC
WHITE BAL
SPECIAL
AUTO FOCUS
MOTION DET
PRESET
EXIT
OFF/ON...
ALC.../MANU...
OFF/1/100(1/120) ~ 1/10K
/AUTO X2~X128/FIX X2~X128
OFF/LOW/HIGH
MOTION S.S/SLOW/NORMAL/FAST/F.F
ATW/AWC/MANU...
...
CTRL TYPE A/B/C/D
LANGUAGE ENGLISH
RS-485 ...
PIP OFF/ON...
MIRROR OFF/ON
D-ZOOM OFF/X2 ~ X10
POSI/NEGA +/-
ZOOM SPEED 1/2/3/4
DETAIL(0) ----I----
RET
AF/MF/ONEAF
OFF/ON...
...
QUIT/SAVE/PRESET
6. The requirements for RS485 control is as follows :
●
Signaling Speed: 9600 bps
●
Data Bit : 8 bits
●
Stop Bit : 1 bit
●
Parity Bit : none
SAMSUNG PROTOCOL
ADDR : 0
TYPE : RS-485, HALF
BAUD : 9600
LENS CHECK : OK!
4. Determine the type of power supply and set the POWER
SELECTION switch accordingly. Next, plug the power
adapter into a wall outlet.
The requirements for the power adapter for each model are
as follows:
●
SCC-C4201(P), SCC-C4203(P) : DC12V 600mA
●
SCC-C4301(P), SCC-C4303(P) : AC24V 300mA
DC12V 600mA
5. If the camera operates normally, the following screen will
be displayed for 5 seconds and then disappears.

13 14
E
Structure of the Setup Menu
●
Structure of the Setup Menu of the SCC-C4301(P)
CAMERA ID
IRIS
SHUTTER
AGC
WHITE BAL
SPECIAL
AUTO FOCUS
MOTION DET
PRESET
OFF/ON...
ALC.../MANU...
OFF/1/100(1/120) ~ 1/10K
/AUTO X2~X128/FIX X2~X128
OFF/LOW/HIGH
ATW/AWC/MANU...
...
V-SYNC INT/LINE...
LANGUAGE ENGLISH
CTRL TYPE A/B/C/D
RS-485 ...
PIP OFF/ON...
MIRROR OFF/ON
D-ZOOM OFF/X2 ~ X10
POSI/NEGA +/-
ZOOM SPEED 1/2/3/4
DETAIL(0) ----I----
RET
AF/MF/ONEAF
OFF/ON...
...
EXIT QUIT/SAVE/PRESET
MOTION S.S/SLOW/NORMAL/FAST/F.F
●
Structure of the Setup Menu of the SCC-C4203(P)
CAMERA ID
IRIS
SHUTTER
AGC
WHITE BAL
SPECIAL
AUTO FOCUS
MOTION DET
PRESET
COLOR/BW
OFF/ON...
ALC.../MANU...
OFF/1/100(1/120) ~ 1/10K
/AUTO X2~X128/FIX X2~X128
OFF/LOW/HIGH
ATW/AWC/MANU...
...
CTRL TYPE A/B/C/D
LANGUAGE ENGLISH
RS-485 ...
PIP OFF/ON...
MIRROR OFF/ON
D-ZOOM OFF/X2 ~ X10
POSI/NEGA +/-
ZOOM SPEED 1/2/3/4
DETAIL(0) ----I----
RET
AF/MF/ONEAF
OFF/ON...
...
COLOR/BW/AUTO...
EXIT QUIT/SAVE/PRESET
MOTION S.S/SLOW/NORMAL/FAST/F.F

15 16
E
[SCC-C4201(P),SCC-C4301(P)] [SCC-C4203(P),SCC-C4303(P)]
The COLOR/BW option is available only with the
SCC-C4203(P) and C4303(P).
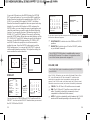
CAMERA ID
In the CAMERA ID menu, you can assign an ID to the camera
that appears on the monitor screen. If you select ON...
for CAMERA ID and press the ENTER button, a screen from
which you can assign a camera ID will appear.
You can use alphanumeric characters and a few special
characters that are displayed on the screen to assign a
maximum of 20 characters for the CAMERA ID.
You can use the LOCATION option to place the camera ID
anywhere on the screen.
(SET UP)
CAMERA ID OFF
IRIS ALC...
SHUTTER OFF
AGC LOW
WHITE BAL ATW
SPECIAL ...
AUTO FOCUS ONEAF
MOTION DET OFF
PRESET ...
EXIT QUIT
(SET UP)
CAMERA ID OFF
IRIS ALC...
SHUTTER OFF
AGC LOW
WHITE BAL ATW
SPECIAL ...
AUTO FOCUS ONEAF
MOTION DET OFF
PRESET ...
COLOR/BW COLOR
EXIT QUIT
(SET UP)
CAMERA ID ON...
IRIS ALC...
SHUTTER OFF
AGC LOW
WHITE BAL ATW
SPECIAL ...
AUTO FOCUS ONEAF
MOTION DET OFF
PRESET ...
COLOR/BW COLOR
EXIT QUIT
(CAMERA ID)
ABCDEFGH I JKL
MNOPQRSTUVWX
YZ0123456789
:!-+*()/
SP SP
LOCATION...
RET
ZOOM.CAMERA.........
Press the
ENTER
button.
●
Structure of the Setup Menu of the SCC-C4303(P)
CAMERA ID
IRIS
SHUTTER
AGC
WHITE BAL
SPECIAL
AUTO FOCUS
MOTION DET
PRESET
OFF/ON...
ALC.../MANU...
OFF/1/100(1/120) ~ 1/10K
/AUTO X2~X128/FIX X2~X128
OFF/LOW/HIGH
ATW/AWC/MANU...
...
V-SYNC INT/LINE...
LANGUAGE ENGLISH
CTRL TYPE A/B/C/D
RS-485 ...
PIP OFF/ON...
MIRROR OFF/ON
D-ZOOM OFF/X2 ~ X10
POSI/NEGA +/-
ZOOM SPEED 1/2/3/4
DETAIL(0) ----I----
RET
AF/MF/ONEAF
OFF/ON...
...
COLOR/BW COLOR/BW/AUTO...
EXIT QUIT/SAVE/PRESET
MOTION S.S/SLOW/NORMAL/FAST/F.F
Structure of the Setup Menu

17 18
E
If you set the AREA option to USER and press the ENTER
button, you can customize the area to which the BLC function
will be applied. You can specify the size of the area by using
the UP, DOWN, LEFT, and RIGHT buttons. After setting the
size of the area, press the ENTER button. The specified area
will start flashing. Then, you can use the UP, DOWN, LEFT
and RIGHT buttons to specify the location of the area.
Use the ENTER button and the UP, DOWN, LEFT and
RIGHT buttons to specify the size of the area and to position
the area. Press the ENTER button again to exit the AREA
setting menu.
MANU
If you select MANU for IRIS and press the ENTER button, a
screen from which you can manually adjust the iris to a
desired level will appear. In the LEVEL option, you can use
the LEFT/ RIGHT buttons to set the manual opening and
closing of the iris.
Press the
ENTER
button.
Use the UP,
DOWN,
LEFT, and
RIGHT
buttons.
(MANUAL)
LEVEL ( 00) ----I----
RET
(SET UP)
CAMERA ID OFF
IRIS MANU...
SHUTTER OFF
AGC LOW
WHITE BAL ATW
SPECIAL ...
AUTO FOCUS ONEAF
MOTION DET OFF
PRESET ...
COLOR/BW COLOR
EXIT QUIT
SIZE
POSITION
SIZE
POSITION
➞
➞
➞
➞
IRIS
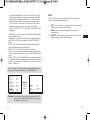
The level of video output to the monitor can be controlled by
the iris lens according to the intensity of the incoming light.
This product is equipped with an iris lens. In the ALC (Auto
Light Compensation) menu, you can set the video output
level. In the MANU menu, you can manually set the opening
and closing of the iris.
BLC (Option in the ALC Menu)
If you use an ordinary camera when a strong light source,
such as a spot light, is shining from behind the subject, the
subject will appear dark on the monitor because of the back
light. For the SCC-C4201(P), C4203(P), C4301(P), and
C4303(P), appropriately set the BLC in the ALC menu to
solve the back -light problem and have a clear picture even
under a spotlight or a very bright incident light.
ALC
If you select ALC for IRIS and press the ENTER button, a
screen from which you can set the video output level and BLC
will appear. In the LEVEL option, you can use the LEFT/
RIGHT buttons to set the video output level. If you set the
BLC to ON, the BLC function will be applied to the screen
area specified in the AREA option. The AREA option can be
set to either PRESET or USER to specify the screen area to
which the BLC function will be applied. If you set the AREA
option to PRESET, the BLC function will be applied to the
area specified at the time of factory shipment.
(SET UP)
CAMERA ID OFF
IRIS ALC...
SHUTTER OFF
AGC LOW
WHITE BAL ATW
SPECIAL ...
AUTO FOCUS ONEAF
MOTION DET OFF
PRESET ...
COLOR/BW COLOR
EXIT QUIT
Press the
ENTER
button.
(ALC)
AREA PRESET...
BLC OFF
LEVEL ( 0) ----I----
RET

19 20
E
AGC (MOTION)
In the AGC (Automatic Gain Control) option, you can specify
whether to automatically control the GAIN when the obtained
video is below a certain level of brightness because it was
recorded under insufficient lighting. To automatically control
the GAIN, set the AGC option to LOW or HIGH. Otherwise,
set it to OFF. If the you set the AGC option to LOW, the
maximum GAIN of the AGC will be set to low, and if set to
HIGH, the maximum GAIN will be set to high.
If the SHUTTER option is set to an auto low-speed, the AGC
option will change to the MOTION option. In the MOTION
option, use the LEFT and RIGHT buttons to select from S.S,
SLOW, NORMAL, FAST, and F.F.
S.S : Select to maximally enhance the resolution of a still
image by increasing the lowest value of AGC GAIN and
the scale of low speed shutter to their maximum.
(This is used mainly to monitor almost still objects in dark
places.)
SLOW : Select to enhance the resolution of a still image
as much as possible by increasing a low value of AGC
GAIN and the scale of low speed shutter. (This is used
mainly to monitor objects that make a small movement in
dark places.)
NORMAL : Select to display the normal picture with a
medium value of AGC GAIN and the scale of normal
speed shutter. (This is used mainly to monitor moving
objects in dark places.)
FAST : Select to focus on the moving objects by
decreasing a high value of AGC GAIN and the scale of
normal speed shutter. (This is used mainly to monitor
objects showing active movements in dark places.)
F.F : Select to focus on the moving objects by
decreasing the highest value of AGC GAIN and the scale
of low speed shutter to their minimum. (This is used
mainly to monitor fast moving objects in dark places.)
(SET UP)
CAMERA ID OFF
IRIS ALC...
SHUTTER AUTOX4
MOTION NORMAL
WHITE BAL ATW
SPECIAL ...
AUTO FOCUS ONEAF
MOTION DET OFF
PRESET ...
COLOR/BW COLOR
EXIT QUIT
☞
☞
☞
☞
☞
SHUTTER
In the SHUTTER option, you can specify the speeds of the
high-speed electronic shutter, auto low-speed shutter, and fix
low-speed shutter. The high - speed electronic shutter
supports 7 shutter speeds from 1/100 seconds to 1/10K
seconds, and the auto low-speed shutter and fix low-speed
shutter support 12 shutter speeds from 2x to 128x
respectively. The low-speed shutter allows you to set the
shutter speed to a slow setting to obtain a clearer video
when shooting in dark lighting conditions. Select an auto
low -speed shutter in order to have the camera detect the
amount of light and automatically set the shutter speed to a
slow setting according to the degree of darkness. Select an
item that starts with "FIX" to specify the shutter speed
yourself. The numbers that immediately follow the "AUTO"
and "FIX" indicate the number of accumulated fields.
The higher the field number, the slower the shutter speed.
Accordingly, a still picture will be sharper. In the case of
video, an image captured of an object will be blurry.
(SET UP)
CAMERA ID OFF
IRIS ALC...
SHUTTER OFF
AGC LOW
WHITE BAL ATW
SPECIAL ...
AUTO FOCUS ONEAF
MOTION DET OFF
PRESET ...
COLOR/BW COLOR
EXIT QUIT
SHUTTER
OFF ➞ 1/100(1/120) ➞ 1/250 ➞ 1/500 ➞ 1/1000 ➞ 1/2000 ➞
1/4000 ➞ 1/10K ➞ OFF ➞ AUTOX2 ➞ AUTOX4 ➞ AUTOX6 ➞
AUTOX8 ➞ AUTOX12 ➞ AUTOX16 ➞ AUTOX24 ➞ AUTOX32
➞ AUTOX48 ➞ AUTOX64 ➞ AUTOX96 ➞ AUTOX128 ➞ OFF
➞ FIXX2 ➞ FIXX4 ➞ FIXX6 ➞ FIXX8 ➞ FIXX12 ➞ FIXX16 ➞
FIXX24 ➞ FIXX32 ➞ FIXX48 ➞ FIXX64 ➞ FIXX96 ➞ FIXX128
➞

21 22
E
(SET UP)
CAMERA ID OFF
IRIS ALC...
SHUTTER OFF
AGC LOW
WHITE BAL ATW
SPECIAL ...
AUTO FOCUS ONEAF
MOTION DET OFF
PRESET ...
COLOR/BW COLOR
EXIT QUIT
Press the
ENTER
button.
(SPECIAL)
LANGUAGE ENGLISH
V-SYNC INT
CTRL TYPE A
RS-485 ...
PIP OFF
MIRROR OFF
D-ZOOM OFF
POSI/NEGA +
ZOOM SPEED 3
DETAIL (0) ----I--
RET
Press the
ENTER
button.
(SPECIAL)
LANGUAGE ENGLISH
V-SYNC LINE...
CTRL TYPE A
RS-485 ...
PIP OFF
MIRROR OFF
D-ZOOM OFF
POSI/NEGA +
ZOOM SPEED 3
DETAIL (0) ----I--
RET
If you are using DC power supply, it will work only in INT mode.
For LINE mode operation, use the AC power adapter (50Hz).
SPECIAL
You can manually adjust the LANGUAGE, V-SYNC, CTRL TYPE,
RS485, PIP, MIRROR, D-ZOOM, POSI/ NEGA, ZOOM SPEED,
and DETAIL.
The V-SYNC option is available only with the SCC-C4301(P)
and C4303(P).
If you press the ENTER button while in "---" is shown, the
SPECIAL screen from which you can set the special functions
will appear. When activating each function, use the LEFT and
RIGHT buttons to set the desired item.
V - SYNC : Specify the vertical synchronization method that
will be used by the SCC-C4301(P) and C4303(P).
There are 2 types of vertical synchronization signal that the
camera supports : INT mode in which the signal is generated
by the camera's internal clock and LINE mode which sets the
vertical synchronization by the external power frequency. If
you select LINE and press ENTER button, the LL-PHASE
screen from which you can adjust the phase of LINE LOCK
will appear. You can specify the desired phase level in the
PHASE option.
☞
(LL-PHASE)
PHASE (0) ----|----
RET
WHITE BAL
In the WHITE BAL option, you can set the White Balance
function, which enables you to see the white color correctly
under illumination of any color temperature. If you set the
WHITE BAL option to ATW, the camera will continuously
monitor changes in the ambient color temperature and
automatically set the White Balance according to the color
temperature. If you set the WHITE BAL option to AWC, place
a piece of white paper in front of the camera, and press the
ENTER button, the Auto White Balance Control will be
activated just once to set the color temperature and this
value will be maintained.
If you set the WHITE BAL option to MANUAL, you can
customize the white balance to take into account the current
lighting condition.
3200°K : Select to set the color temperature to 3200°K.
5600°K : Select to set the color temperature to 5600°K.
USER : Select to set the color temperature by selecting
appropriate values from the RED and BLUE
graphs.
MANU : If you select the MANU option and press the
ENTER button, a screen from which you can manually select
the white balance will appear. In the PRESET option, use the
LEFT and RIGHT buttons to select 3200°K, 5600°K, or
USER.
(SET UP)
CAMERA ID OFF
IRIS ALC...
SHUTTER OFF
AGC LOW
WHITE BAL MANU...
SPECIAL ...
AUTO FOCUS ONEAF
MOTION DET OFF
PRESET ...
COLOR/BW COLOR
EXIT QUIT
Press the
ENTER
button.
(AWB/MANU)
PRESET OFF(USER)..
RED (-2C) ---I----
BLUE (-5B) -I------
RET
☞
☞
☞

23 24
E
AUTO FOCUS
In the AUTO FOCUS option, you can specify the Focus
method to AF, MF, or ONEAF.
MOTION DET
In the MOTION DET option, you can set the Motion
Detection function, motion detection sensitivity, and the
motion detection area. If you set the Motion Detection
function, you can detect an intruder's movement and check it
through the monitor and the ALARM OUT terminal.
Press the
ENTER
button.
(SET UP)
CAMERA ID OFF
IRIS ALC...
SHUTTER OFF
AGC LOW
WHITE BAL ATW
SPECIAL ...
AUTO FOCUS ONEAF
MOTION DET ON...
PRESET ...
COLOR/BW COLOR
EXIT QUIT
(MOTION DET)
AREA PRESET...
SENSITIVITY MEDIUM
RET
If you set ALARM which is located under COLOR/BW
AUTO menu to ON while MOTION DET remains ON, the
ALARM output port can not send any motion.
AF : Focuses automatically by continuously monitoring the
screen in AUTO FOCUS mode. It does not process the
FOCUS button input because it focuses automatically
during ZOOM.
MF : You can manually adjust
the focus.
ONEAF : Focuses about 5
seconds only when ZOOM is
moved Wide to Tele. It is same
as MF mode while in STOP
mode, and same as AF mode
after ZOOM Tele.
☞
☞
☞
(SET UP)
CAMERA ID OFF
IRIS ALC...
SHUTTER OFF
AGC LOW
WHITE BAL ATW
SPECIAL ...
AUTO FOCUS AF
MOTION DET OFF
PRESET ...
COLOR/BW COLOR
EXIT QUIT
Press the
ENTER
button.
(SPECIAL)
EANGUAGE ENGLISH
V-SYNC LINE...
CTRL TYPE A
RS-485 ...
PIP ON
MIRROR OFF
D-ZOOM OFF
POSI/NEGA +
ZOOM SPEED 3
DETAIL (0) ----I--
RET
Caution : A communication error may occur if you connect
more than one camera set with an identical address.
PIP
CTRL TYPE : You can select the A, B, C, or D mode
depending on the input of the wired remote control terminal.
(See page 7.)
RS-485 : It sets up ADDRESS, PROTOCOL, and BAUD
RATE of RS-485 communication.
(BAUD RATE: 2400bps, 4800bps, 9600bps, 19200bps, 38400bps)
☞
PIP :
This is the Picture in Picture feature. It will show a
screen reduced by 1/16 of the main screen only when
operating the Digital Zoom. If you set the PIP option to ON
and press the ENTER button, you can use the UP, DOWN,
LEFT, and RIGHT buttons to set the PIP position.
* The PIP feature does not work in a low speed shutter mode.
The MIRROR feature does not work on the PIP window
.
☞
MIRROR : Horizontally flips the video output signal.
D-ZOOM : Sets the magnification of the Digital Zoom.
The magnification level can be set to up to 10x.
POSI/ NEGA : Outputs the video output signal normally or
inversely.
ZOOM SPEED : In the ZOOM SPEED option, use the
LEFT and RIGHT buttons to set the speed as follows:
1 : Takes about 17 seconds from 1 x to 22 x magnification (slowest speed).
2 : Takes about 10 seconds from 1 x to 22 x magnification (slow speed).
3 : Takes about 6 seconds from 1 x to 22 x magnification (fast speed).
4 : Takes about 3 seconds from 1 x to 22 x magnification (fastest speed).
☞
☞
☞
☞
DETAIL: Adjusts the sharpness.
☞
☞
* MOTION detection function operates based on the
brightness change within the setup region. Therefore,
erroneous operation may occur depending on the brightness
difference between the background and the object that is
being taken, or the status of the area setup, etc.

25 26
E
Press the
ENTER
button.
If you select a preset number and press the ENTER button, a screen
that looks as above will appear.
PRESET NO. 0
POSITION SET ...
PRESET ID ON...
EXIT QUIT
POSITION SET : Select to store the ZOOM and FOCUS
positions.
PRESET ID : Select to set an ID for the PRESET position,
as you did with Camera ID.
☞
☞
(PRESET MAP)
0 H 1 2 3 4
56789
10 11 12 13 14
15 16 17 18 19
20 21 22 23 24
25 26 27 28 29
30 31 RET
HOME RETURN OFF
ID: PRESET 0
PRESET
If you select ON and press the ENTER button, the MOTION
DET screen will come up. You can set the AREA to which the
Motion Detection function will be applied to either PRESET or
USER. If you set the AREA option to PRESET, the Motion
Detection function will be applied to the areas preset as factory
defaults. If you set the AREA option to USER and press the
ENTER button, you can change the area size and position and
select the area where you want to apply the Motion Detection
function. You can specify the size of the area by using the UP,
DOWN, LEFT, and RIGHT buttons. If the area is not flashing,
press the ENTER button. When the area starts flashing, use the
UP, DOWN, LEFT and RIGHT buttons to specify the location of
the area. Use the ENTER button and the UP, DOWN, LEFT,
and RIGHT buttons to specify the size of the area and to
position the area. Press the ENTER button again to exit the
AREA setting menu. You can use the SENSITIVITY option to
set the motion detection sensitivity. The higher the setting, the
more sensitive the motion detection.
Press the
ENTER
button.
(SET UP)
CAMERA ID OFF
IRIS ALC...
SHUTTER OFF
AGC LOW
WHITE BAL ATW
SPECIAL ...
AUTO FOCUS ONEAF
MOTION DET OFF
PRESET ...
COLOR/BW COLOR
EXIT QUIT
SIZE
POSITION
SIZE
POSITION
Use the UP,
DOWN,
LEFT, and
RIGHT
buttons.
➞
➞
➞
➞
(PRESET MAP)
0 H 1 2 3 4
56789
10 11 12 13 14
15 16 17 18 19
20 21 22 23 24
25 26 27 28 29
30 31 RET
HOME RETURN OFF
ID: PRESET 0
You can store up to 128 ZOOM and FOCUS positions with the
PRESET. You can use the PRESET function when you connect
the SSC-1000 to the RS-485.
The HOME RETURN function is available with a camera
with the ROM version 1.2 or above. For instruction on the
use of this function, please refer to page 33.
In the COLOR / BW option, you can set the IR (infrared) Filter to ON or
OFF. In the BW mode, the IR Filter is turned OFF and the level of
sensitivity is increased to a level comparable to a black and white
camera. In the COLOR mode, on the other hand, the IR Filter is turned
ON and the screen turns normal, as the level of sensitivity is decreased.
COLOR / BW
COLOR : The IR Filter is ON and the screen is normal.
BW : The IR Filter is OFF and the screen is black and
white. (Sensitivity to low light is increased to a level
comparable to a black and white camera.)
AUTO : Select to automatically switch between the COLOR
mode and BW mode depending on the amount of light.
☞
☞
☞
The COLOR / BW option is available only with the SCC-C4203(P)
and C4303(P).

27 28
E
EXIT
The EXIT option is used to quit the Setup Menu mode and
return to the Normal Operation mode.
QUIT : Select to ignore any changes you have made and
restore the previously saved settings.
SAVE : Select to save the settings that have been
changed so far.
PRESET : Select to ignore any changes you have made
and restore the factory default settings.
☞
☞
☞
Caution : If you use an infrared light source while in AUTO
mode, AUTO switching malfunction and camera
AF malfunction may occur.
Press the
ENTER
button.
(SET UP)
CAMERA ID OFF
IRIS ALC...
SHUTTER OFF
AGC ---
WHITE BAL ATW
SPECIAL ...
AUTO FOCUS ONEAF
MOTION DET OFF
PRESET ...
COLOR/BW AUTO...
EXIT QUIT
(BW SETUP)
ALARM OFF
BURST ON
LEVEL MEDIUM
DWELL TIME S--|----L
RET
In AUTO mode, AGC will operates in high speed mode, and
you cannot change it manually, as it is indicated by "---".
- ALARM ON : It sends out signals through the ALARM output
port in the BW mode.
- ALARM OFF : The ALARM output port is synchronized with
the MOTION DET finction regardiess of the COLOR/BW
mode.
- BURST ON : The color burst signal is output together with
black and white composite video signal.
BURST OFF : The color burst signal is not output.
- LEVEL : You can set the brightness level that changes from
COLOR mode to BW mode in 3 steps : LOW, MEDIUM, and
HIGH.
- DWELL TIME : Set the HOLDING time for switching between
COLOR and BW mode depending the changes in the amount
of light. You can set the HOLDING time to 10sec (S), 30sec,
60sec, or 300sec( L).
In low light conditions, the IR Filter is turned OFF and the
sensitivity to low light is increased by switching to the BW
mode, but in bright light conditions, the IR Filter is turned
ON and the sensitivity is decreased by switching to the
COLOR mode. If you select AUTO and press the ENTER
button, a screen from which you can set the ALARM
ON/OFF, BURST ON / OFF, BW LEVEL and DWELL TIME
will appear.

29 30
E
SCC-C4201P/C4203P
Item Description
Remark
- 22x Zoom Camera
- DC 12V ± 10%
- 5.0 W
- PAL Standard Color System
- 1/4 inch IT CCD
- 752 (H) X 582 (V)
- 625 Line, 2:1 Interlace
- Horizontal : 15,625 Hz(INT)
- Vertical : 50 Hz(INT)
- INT Only
- 480 TV Lines
- 52dB(AGC OFF)
- color 0.3Lux(SENS-UP X4 )
0.01 Lux(SENS-UP X128)
- B/W(SCC-C4203P):0.4Lux(SENS-UP X4)
0.003Lux(SENS-UP X128)
- ATW/ AWC/ Manual Mode
(3200°K, 5600°K, R/B Gain Control)
- Composite Video Out : 1.0 Vp-p
75ohms/BNC
- 22x Zoom Lens in a single unit
- Focal length : 3.6 to 79.2 mm
- Aperture : F1.6(Wide), F3.8(Tele)
- IR Filter On/Off (SCC-C4203P Only)
- Off, 1/120, 1/250, 1/500, 1/1K, 1/2K,
1/4K, /10K sec
- Off / On (Area Setting)
- Off/Auto 2x~128x/Fix 2x~128x
- Off / On (x10), PIP
- Off / On (Area / Sensitivity Setting)
- 14°F ~122°F, ~90 %
- 59.5 x 60.5 x 109.5mm
- 375g
Product Type
Power Supply Voltage
Power Consumption
Broadcast System
Imaging Device
Effective Pixe
Scanning Method
Line Frequency
Synchronization Method
Resolution
S/N Ratio
Minimum Scene Illumination
White Balance
Signal Output
Lens
Electronic Shutter
Back Light Compensation
Sense Up
Digital Zoom
Motion Detection
Operating Temperature
and Humidity
Dimensions
Weight
5
Specifications
SCC-C4201/C4203
Item Description
Remark
- 22x Zoom Camera
- DC 12V ± 10%
- 5.0 W
- NTSC Standard Color System
- 1/4 inch IT CCD
- 768(H) x 494 (V)
- 525 Line, 2:1 Interlace
- Horizontal : 15,734 Hz (INT)
- Vertical : 59.94 Hz (INT)
- INT Only
- 480 TV Lines
- 52dB(AGC OFF)
- color 0.3Lux(SENS-UP X4 )
0.01 Lux(SENS-UP X128)
- B/W(SCC-C4203):0.4Lux(SENS-UP X4)
0.003Lux(SENS-UP X128)
- ATW/ AWC/ Manual Mode
(3200°K, 5600°K, R/B Gain Control)
- Composite Video Out : 1.0 Vp-p
75ohms/BNC
- 22x Zoom Lens in a single unit
- Focal length : 3.6 to 79.2 mm
- Aperture : F1.6(Wide), F3.8(Tele)
- IR Filter On/Off (SCC-C4203 Only)
- Off, 1/100, 1/250, 1/500, 1/1K, 1/2K,
1/4K, /10K sec
- Off / On (Area Setting)
- Off/Auto 2x~128x/Fix 2x~128x
- Off / On (x10), PIP
- Off / On (Area / Sensitivity Setting)
- 14°F ~ +122°F, ~90 %
- 59.5 x 60.5 x 109.5mm
- 375g
Product Type
Power Supply Voltage
Power Consumption
Broadcast System
Imaging Device
Effective Pixe
Scanning Method
Line Frequency
Synchronization Method
Resolution
S/N Ratio
Minimum Scene Illumination
White Balance
Signal Output
Lens
Electronic Shutter
Back Light Compensation
Sense Up
Digital Zoom
Motion Detection
Operating Temperature
and Humidity
Dimensions
Weight

31
Specifications
32
E
SCC-C4301P/C4303P
Item Description
Remark
- 22x Zoom Camera
- AC 24V (50Hz) or DC 12V ± 10%
- 5.5W
- PAL Standard Color System
- 1/4 inch IT CCD
- 752(H) X 582(V)
- 625 Line, 2:1 Interlace
-
Horizontal : 15,625 Hz(INT), 15,625 Hz(L/L)
- Vertical : 50 Hz(INT), 50 Hz(L/L)
- INT / Line Lock
- 480 TV Lines
- 52dB(AGC OFF)
- color 0.3Lux(SENS-UP X4 )
0.01 Lux(SENS-UP X128)
- B/W(SCC-C4303P):0.4Lux(SENS-UP X4)
0.003Lux(SENS-UP X128)
- ATW/ AWC/ Manual Mode
(3200°K, 5600°K, R/B Gain Control)
- Composite Video Out : 1.0 Vp-p
75ohms/BNC
- 22x Zoom Lens in a single unit
- Focal length : 3.6 to 79.2 mm
- Aperture : F1.6(Wide),F3.8(Tele)
- IR Filter On/ Off (SCC-C4303P Only)
- Off, 1/120, 1/250, 1/500, 1/1K, 1/2K,
1/4K, /10K sec
- Off / On (Area Setting)
- Off/Auto 2x~128x/Fix 2x~128x
- Off / On (x10), PIP
- Off / On (Area / Sensitivity Setting)
- 14°F ~122°F, ~90 %
- 59.5 x 60.5 x 143mm
- 500g
Product Type
Power Supply Voltage
Power Consumption
Broadcast System
Imaging Device
Effective Pixe
Scanning Method
Line Frequency
Synchronization Method
Resolution
S/N Ratio
Minimum Scene Illumination
White Balance
Signal Output
Lens
Electronic Shutter
Back Light Compensation
Sense Up
Digital Zoom
Motion Detection
Operating Temperature
and Humidity
Dimensions
Weight
SCC-C4301/C4303
Item Description
Remark
- 22x Zoom Camera
- AC 24V (60Hz) or DC 12V ± 10%
- 5.5W
- NTSC Standard Color System
- 1/4 inch IT CCD
- 768(H) X 494(V)
- 525 Line, 2:1 Interlace
-
Horizontal : 15,734 Hz(INT), 15,750 Hz(L/L)
- Vertical : 59.94 Hz(INT), 60 Hz(L/L)
- INT / Line Lock
- 480 TV Lines
- 52dB(AGC OFF)
- color 0.3Lux(SENS-UP X4 )
0.01 Lux(SENS-UP X128)
- B/W(SCC-C4303):0.4Lux(SENS-UP X4)
0.003Lux(SENS-UP X128)
- ATW/ AWC/ Manual Mode
(3200°K, 5600°K, R/B Gain Control)
- Composite Video Out : 1.0 Vp-p
75ohms/BNC
- 22x Zoom Lens in a single unit
- Focal length : 3.6 to 79.2 mm
- Aperture : F1.6(Wide), F3.8(Tele)
- IR Filter On / Off (SCC-C4303 Only)
- Off, 1/100, 1/250, 1/500, 1/1K, 1/2K,
1/4K, /10K sec
- Off / On (Area Setting)
- Off/Auto 2x~128x/Fix 2x~128x
- Off / On (x10), PIP
- Off / On (Area / Sensitivity Setting)
- 14°F ~122°F, ~90 %
- 59.5 x 60.5 x 143mm
- 500g
Product Type
Power Supply Voltage
Power Consumption
Broadcast System
Imaging Device
Effective Pixe
Scanning Method
Line Frequency
Synchronization Method
Resolution
S/N Ratio
Minimum Scene Illumination
White Balance
Signal Output
Lens
Electronic Shutter
Back Light Compensation
Sense Up
Digital Zoom
Motion Detection
Operating Temperature
and Humidity
Dimensions
Weight

34
E
33
Others
6
ZOOM/FOCUS Remote Terminals
These terminals are to activate the ZOOM/FOCUS,
MENU CONTROL, HOME RETURN, and AF functions
by using an external controller. They could be set to one
of four modes depending on the input condition: A, B, C,
and D. (SPECIAL - CTRL TYPE)
(Operating Voltage Range : +3V~+13V, -3V~-13V)
1) If voltage is applied to either the ZOOM or FOCUS
terminal, but not both
2) If voltage is applied to the ZOOM and FOCUS
terminals at the same time
1: In MENU OFF, these are used to control the
ZOOM/FOCUS function, and in MENU ON, these
are used as the UP, DOWN, LEFT, and RIGHT
keys
+6V
-6V
+6V
-6V
-6V
+6V
-6V
+6V
+6V
+6V
-6V
-6V
-6V
-6V
+6V
+6V
A
B
C
D
Code
Function
*1
TELE (Up)
ZOOM Terminal
FOCUS Terminal
WIDE (Down) NEAR (Left) FAR (Right)
+6V
-6V
+6V
-6V
+6V
+6V
-6V
-6V
-6V
+6V
-6V
+6V
-6V
-6V
+6V
+6V
A
B
C
D
Code
Function
ZOOM Terminal
FOCUS Terminal
ZOOM Terminal
FOCUS Terminal
ENTER/AF
*1
HOME RETURN
*2
1 : With the menu "off", if voltage is applied for shorter than 2
seconds, the AF function will be activated, and if voltage is
applied for longer than 2 seconds, the menu will be "on".
With the menu "on", if voltage is applied, the ENTER
function will be activated.
2 : If voltage is applied for longer than 2 seconds, the
camera will return to the specified home position
(PRESET 0).
Setting the Home Return Time
HOME RETURN
If no keys are pressed for a period of time, the camera will
automatically return to the specified home position.
The home position is set to PRESET 0. If the position of
PRESET 0 has not been saved, the HOME RETURN
function will not work.
OFF ➞ 1 MIN ➞ 2 MIN ➞ 3 MIN~60 MIN ➞ 2HOUR ➞
3HOUR ~12HOUR
➞

Memo
Memo

Part : AB68-00674A
Printed in Korea
220X POWER ZOOM KAMERA
220x Power Zoom
LOW LIGHT
D
IG
ITA
L C
O
LO
R
C
A
M
E
R
A
SCC-C4201(P), C4203(P),
C4301(P), C4303(P)
Kullanim Kilavuzu
✽ Bu ürünün do¤ru kullan›lmas›n› ve çal›flt›r›lmas›n›
sa¤lamak için "Güvenlik Önlemleri"ni mutlaka okuyun.
TU
Sayfa yükleniyor...
Sayfa yükleniyor...
Sayfa yükleniyor...
Sayfa yükleniyor...
Sayfa yükleniyor...
Sayfa yükleniyor...
Sayfa yükleniyor...
Sayfa yükleniyor...
Sayfa yükleniyor...
Sayfa yükleniyor...
Sayfa yükleniyor...
Sayfa yükleniyor...
Sayfa yükleniyor...
Sayfa yükleniyor...
Sayfa yükleniyor...
Sayfa yükleniyor...
Sayfa yükleniyor...
Sayfa yükleniyor...
-
 1
1
-
 2
2
-
 3
3
-
 4
4
-
 5
5
-
 6
6
-
 7
7
-
 8
8
-
 9
9
-
 10
10
-
 11
11
-
 12
12
-
 13
13
-
 14
14
-
 15
15
-
 16
16
-
 17
17
-
 18
18
-
 19
19
-
 20
20
-
 21
21
-
 22
22
-
 23
23
-
 24
24
-
 25
25
-
 26
26
-
 27
27
-
 28
28
-
 29
29
-
 30
30
-
 31
31
-
 32
32
-
 33
33
-
 34
34
-
 35
35
-
 36
36
-
 37
37
-
 38
38


Samsung SCCC4203AP Kullanım kılavuzu
- Kategori
- Güvenlik kameraları
- Tip
- Kullanım kılavuzu
diğer dillerde
- English: Samsung SCCC4203AP User manual
İlgili makaleler
-
Samsung SCC-C4201P Kullanım kılavuzu
-
-
-
-
-
Samsung SCC-C7435P Kullanım kılavuzu
-
-
-
-