
AM-3743
EN
Cordless Lawn Mower INSTRUCTION MANUAL 6
FR
Tondeuse Sans Fil MANUEL D’INSTRUCTIONS 14
DE
Akku Rasenmäher BETRIEBSANLEITUNG 23
IT
Tosaerba a batteria ISTRUZIONI PER L’USO 32
NL
Accugrasmaaier GEBRUIKSAANWIJZING 41
ES
Cortadora de Cesped
MANUAL DE
INSTRUCCIONES
50
PT
Cortadora de Grama a Bateria MANUAL DE INSTRUÇÕES 59
DA
Akku-plæneklipper BRUGSANVISNING 68
EL
Μηχανή γκαζόν με μπαταρία ΕΓΧΕΙΡΙΔΙΟ ΟΔΗΓΙΩΝ 76
TR
Akülü Çim Biçme Makinesi KULLANMA KILAVUZU 86

1
2
Fig.1
1
Fig.2
1
Fig.3
2
1
Fig.4
1
2
Fig.5
21
Fig.6
1
2
Fig.7
1
Fig.8
2

1
Fig.9
3
1
2
Fig.10
Fig.11
1
2
Fig.12
1
2
Fig.13
2
2
1
Fig.14
1
Fig.15
1
2
3
Fig.16
3

1
2
3
4
5
Fig.17
Fig.18
1
2
3
Fig.19
Fig.20
1
2
Fig.21
1
2
Fig.22
1
2
Fig.23
1
2
Fig.24
4

1
Fig.25
5

6 ENGLISH
ENGLISH (Original instructions)
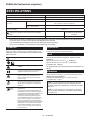
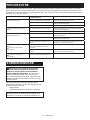
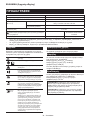
SPECIFICATIONS
Model: AM-3743
Mowing width (blade diameter) 430 mm
No load speed 3,600 min
-1
Dimensions
(L x W x H)
during operation Max. 1,490 mm x 460 mm x 1,020 mm
Min. 1,450 mm x 460 mm x 950 mm
when stored
(without grass basket)
490 mm x 460 mm x 910 mm
Rated voltage D.C. 36 V
Standard battery cartridge(s)
Warning: Use only the battery cartridge(s) described.
BL1815N/BL1820/BL1820B BL1830/BL1830B/BL1840/
BL1840B/BL1850/BL1850B/
BL1860B
Net weight 17.8 kg 18.3 kg
• Duetoourcontinuingprogramofresearchanddevelopment,thespecicationshereinaresubjecttochange
without notice.
• Specicationsandbatterycartridgemaydifferfromcountrytocountry.
• Weight,withbatterycartridge,accordingtoEPTA-Procedure01/2003
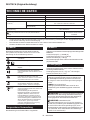
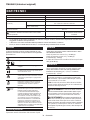
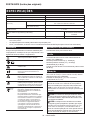
Symbols
Thefollowingshowthesymbolsusedfortheequip-
ment.Besurethatyouunderstandtheirmeaningbefore
use.
Takeparticularcareandattention.
Read instruction manual.
Danger;beawareofthrownobjects.
Thedistancebetweenthetooland
bystanders must be at least 15 m.
Neverputyourhandsandfeetnearthe
blade under the mower. Blades continue to
rotateafterthemotorisswitchedoff.
Removethelockkeybeforeinspecting,
adjusting,cleaning,servicing,leavingand
storing the mower.
Cd
Ni-MH
Li-ion
OnlyforEUcountries
Donotdisposeofelectricequipmentor
battery pack together with household waste
material!
InobservanceoftheEuropeanDirectives,
onWasteElectricandElectronic
EquipmentandBatteriesandAccumulators
andWasteBatteriesandAccumulators
and their implementation in accordance
withnationallaws,electricequipmentand
batteries and battery pack(s) that have
reachedtheendoftheirlifemustbecol-
lected separately and returned to an envi-
ronmentallycompatiblerecyclingfacility.
Intended use
Thetoolisintendedforlawnmowing.
Noise
ThetypicalA-weightednoiseleveldeterminedaccord-
ingtoEN60335:
Sound pressure level (L
pA
):80dB(A)
Sound power level (L
WA
):93dB(A)
Uncertainty(K):3dB(A)
Thenoiselevelunderworkingmayexceed80dB(A).
Vibration
Thevibrationtotalvalue(tri-axialvectorsum)deter-
minedaccordingtoEN60335:
Vibration emission (a
h
) : 2.5 m/s
2
or less
Uncertainty (K) : 1.5 m/s
2
NOTE:Thedeclaredvibrationemissionvaluehas
been measured in accordance with the standard test
methodandmaybeusedforcomparingonetoolwith
another.
NOTE:Thedeclaredvibrationemissionvalue
mayalsobeusedinapreliminaryassessmentof
exposure.
WARNING:Thevibrationemissionduringactual
useofthepowertoolcandifferfromthedeclared
emission value depending on the ways in which the
tool is used.
WARNING:Besuretoidentifysafetymeasures
to protect the operator that are based on an estima-
tionofexposureintheactualconditionsofuse(taking
accountofallpartsoftheoperatingcyclesuchas
thetimeswhenthetoolisswitchedoffandwhenitis
running idle in addition to the trigger time).

7 ENGLISH
EC Declaration of Conformity
For European countries only
MakitadeclaresthatthefollowingMachine(s):
DesignationofMachine:CordlessLawnMower
ModelNo./Type:AM-3743
ConformstothefollowingEuropeanDirectives:
2000/14/EC,2006/42/EC
Theyaremanufacturedinaccordancewiththefollowing
standardorstandardizeddocuments:EN60335
Thetechnicalleinaccordancewith2006/42/ECis
availablefrom:
Makita, Jan-Baptist Vinkstraat 2, 3070, Belgium
Theconformityassessmentprocedurerequiredby
Directive2000/14/ECwasinAccordancewithannexVI.
NotiedBody:TÜVRheinlandLGAProductsGmbH
AmGrauenStein2951105KölnGermany
Identicationnumber0197
MeasuredSoundPowerLevel:93dB(A)
GuaranteedSoundPowerLevel:94dB(A)
1.12.2015
Yasushi Fukaya
Director
Makita, Jan-Baptist Vinkstraat 2, 3070, Belgium
IMPORTANT SAFETY
INSTRUCTIONS
WARNING: Read all safety warnings and
all instructions. Failuretofollowthewarningsand
instructionsmayresultinelectricshock,reand/or
seriousinjury.
Save all warnings and instruc-
tions for future reference.
1. Do not insert the key into mower until it is
ready to be used.
2. Children should be supervised to ensure that
they do not play with the mower.
3. Never allow children or people unfamiliar with
these instructions to use the mower. Local
regulations can restrict the age of the operator.
4. Never operate the mower while people, espe-
cially children, or pets are nearby.
5. Keep in mind that the operator or user is
responsible for accidents or hazards occurring
to other people or their property.
6. While operating the mower, always wear sub-
stantial footwear and long trousers. Do not
operate the mower when barefoot or wearing
open sandals. Avoid wearing clothing or jew-
elry that is loose tting or that has hanging
cords or ties. They can be caught in moving
parts.
7. Operate the mower only in daylight or in good
articial light.
8. Avoid operating the mower in wet grass.
9. Never operate the mower in the rain.
10. Battery tool use and care
- Recharge only with the charger specied by
the manufacturer. Achargerthatissuitablefor
onetypeofbatterycartridgemaycreateariskof
rewhenusedwithanotherbatterycartridge.
- Use power tools only with specically desig-
nated battery cartridges.Useofanyotherbat-
terycartridgesmaycreateariskofinjuryandre.
- When battery cartridge is not in use, keep
it away from other metal objects, like paper
clips, coins, keys, nails, screws or other small
metal objects, that can make a connection
from one terminal to another. Shorting the bat-
teryterminalstogethermaycauseburnsorare.
- Under abusive conditions, liquid may be
ejected from the battery; avoid contact. If con-
tact accidentally occurs, ush with water. If
liquid contacts eyes, additionally seek medical
help.Liquidejectedfromthebatterymaycause
irritation or burns.
11. Always keep a rm hold on the handle.
12. Always be sure of your footing on slopes.
13. Walk, never run.
14.
Don't grasp the exposed cutting blades or cutting
edges when picking up or holding the mower.
15. Physical condition - Do not operate mower
while under the inuence of drugs, alcohol, or
any medication.
16. Keep hands and feet away from rotating
blades. Caution - Blades coast after the mower
is switched off.
17. Use only the manufacturer genuine blades
specied in this manual.
18. Check the blades carefully for cracks or dam-
age before operation. Replace cracked or
damaged blades immediately.
19. Be sure the area is clear of other people before
mowing. Stop mower if anyone enters the area.
20. Remove foreign matters such as rocks, wire,
bottles, bones and large sticks from the work
area before mowing to prevent personal injury
or damage to the mower.
21. Stop operation immediately if you notice
anything unusual. Switch off the mower and
remove the key. Then inspect the mower.
22. Never attempt to make wheel height adjust-
ments while mower is running.
23. Release switch lever and wait for blade rota-
tion to stop before crossing driveways, walks,
roads, and any gravel-covered areas. Also
remove the key if you leave the mower, reach
to pick up or remove something out of your
way, or for any other reason that may distract
you from what you are doing.
24. Objects struck by the mower blade can cause
severe injuries to persons. The lawn should
always be carefully examined and cleared of
all objects prior to each mowing.
25. If the mower strikes a foreign object, follow
these steps:
- Stop the mower, release the switch lever and
wait until the blade comes to a complete stop.
- Remove the key and the battery cartridge.
- Thoroughly inspect the mower for any
damage.

8 ENGLISH
- Replace the blade if it is damaged in any way.
Repair any damage before restarting and con-
tinuing to operate the mower.
26. Check the grass basket frequently for wear or
deterioration. For storage, always make sure
the grass basket is empty. Replace a worn
grass basket with a new factory replacement
for safety.
27. Use extreme caution when reversing or pulling
the mower towards you.
28. Stop the blade(s) if the mower has to be tilted
for transportation when crossing surfaces
other than grass, and when transporting the
mower to and from the area to be used.
29. Never operate the mower with defective
guards or shields, or without safety devices,
for example deectors and/or grass basket, in
place.
30. Switch on the mower carefully according to
instructions and with feet well away from the
blade(s).
31. Do not tilt the mower when switching on the
motor, except if the mower has to be tilted for
starting. In this case, do not tilt it more than
absolutely necessary and lift only the part,
which is away from the operator.
32. Do not start the mower when standing in front
of the discharge opening.
33. Do not put hands or feet near or under rotating
parts. Keep clear of the discharge opening at
all times.
34. Do not transport the mower while the mower is
turned on.
35. Stop the mower, and remove the disabling
device. Make sure that all moving parts have
come to a complete stop
- whenever you leave the mower,
- before clearing blockages or unclogging
chute,
- before checking, cleaning or working on the
mower,
- after striking a foreign object. Inspect the
mower for damage and make repairs before
restarting and operating the mower.
36. If the mower starts to vibrate abnormally
(check immediately)
- inspect for damage,
- replace or repair any damaged parts,
- check for and tighten any loose parts.
37. Be careful during adjustment of the mower
to prevent entrapment of the ngers between
moving blades and xed parts of the mower.
38. Mow across the face of slopes, never up and
down. Exercise extreme caution when chang-
ing direction on slopes. Do not mow exces-
sively steep slopes.
39. Do not wash with a hose; avoid getting water
in motor and electrical connections.
40. Check the blade mounting bolt at frequent
intervals for proper tightness.
41.
Keep all nuts, bolts, and screws tight to be sure
the equipment is in safe working condition.
42. Always allow the mower to cool down before
storing.
43. When servicing the blades be aware that, even
though the power source is switched off, the
blades can still be moved.
44. Replace worn or damaged parts for safety.
Use only genuine replacement parts and
accessories.
SAVE THESE INSTRUCTIONS.
WARNING: DO NOT let comfort or familiarity
with product (gained from repeated use) replace
strict adherence to safety rules for the subject
product.
MISUSE or failure to follow the safety rules stated
in this instruction manual may cause serious
personal injury.
Important safety instructions for
battery cartridge
1.
Before using battery cartridge, read all instruc-
tions and cautionary markings on (1) battery char-
ger, (2) battery, and (3) product using battery.
2. Do not disassemble battery cartridge.
3. If operating time has become excessively
shorter, stop operating immediately. It may
result in a risk of overheating, possible burns
and even an explosion.
4. If electrolyte gets into your eyes, rinse them
out with clear water and seek medical atten-
tion right away. It may result in loss of your
eyesight.
5. Do not short the battery cartridge:
(1) Do not touch the terminals with any con-
ductive material.
(2) Avoid storing battery cartridge in a con-
tainer with other metal objects such as
nails, coins, etc.
(3) Do not expose battery cartridge to water
or rain.
A battery short can cause a large current
ow, overheating, possible burns and even a
breakdown.
6. Do not store the tool and battery cartridge in
locations where the temperature may reach or
exceed 50 °C (122 °F).
7. Do not incinerate the battery cartridge even if
it is severely damaged or is completely worn
out. The battery cartridge can explode in a re.
8. Be careful not to drop or strike battery.
9. Do not use a damaged battery.
10. The contained lithium-ion batteries are subject
to the Dangerous Goods Legislation require-
ments.
For commercial transports e.g. by third parties,
forwardingagents,specialrequirementonpack-
aging and labeling must be observed.
Forpreparationoftheitembeingshipped,consult-
inganexpertforhazardousmaterialisrequired.
Pleasealsoobservepossiblymoredetailed
national regulations.
Tapeormaskoffopencontactsandpackupthe
battery in such a manner that it cannot move
around in the packaging.

9 ENGLISH
11. Follow your local regulations relating to dis-
posal of battery.
SAVE THESE INSTRUCTIONS.
CAUTION: Only use genuine Makita/Dolmar
batteries.Useofnon-genuineMakita/Dolmarbatter-
ies, or batteries that have been altered, may result in
thebattery burstingcausingres,personalinjuryand
damage. It will also void the Makita/Dolmar warranty
fortheMakita/Dolmartoolandcharger.
Tips for maintaining maximum
battery life
1. Charge the battery cartridge before completely
discharged. Always stop tool operation and
charge the battery cartridge when you notice
less tool power.
2. Never recharge a fully charged battery car-
tridge. Overcharging shortens the battery
service life.
3. Charge the battery cartridge with room tem-
perature at 10 °C - 40 °C (50 °F - 104 °F). Let
a hot battery cartridge cool down before
charging it.
4. Charge the battery cartridge if you do not use
it for a long period (more than six months).
FUNCTIONAL
DESCRIPTION
Installing or removing battery
cartridge
CAUTION: Always switch off the tool before
installing or removing of the battery cartridge.
CAUTION: Make sure that you lock the battery
cover before use. Otherwise, mud, dirt, or water may
cause damage to the product or the battery cartridge.
CAUTION: Always install the battery cartridge
fully until the red indicator cannot be seen.Ifnot,
itmayaccidentallyfalloutofthetool,causinginjuryto
you or someone around you.
CAUTION: Do not install the battery cartridge
forcibly.Ifthecartridgedoesnotslideineasily,itis
not being inserted correctly.
NOTE:Thetooldoesnotworkwithonlyonebattery
cartridge.
To install the battery cartridge;
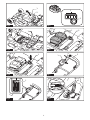
1. Slide the battery cover locking lever and open the
battery cover.
►Fig.1: 1. Battery cover 2. Battery cover locking lever
2. Alignthetongueonthebatterycartridgewiththe
slot on the mower then slide the cartridge until it locks in
placewithalittleclick.Ifyoucanseetheredindicator
ontheuppersideofthebutton,batterycartridgeisnot
locked completely.
►Fig.2: 1. Battery cartridge
3. Insertthelockkeyintheplaceshowninthegure
asfarasitwillgo.
►Fig.3: 1. Lock key
4. Close the battery cover and push it until it is
latched with the locking lever.
To remove the battery cartridge from the mower;
1. Slide the battery cover locking lever and open the
battery cover.
2. Pulloutthebatterycartridgefromthemowerwhile
slidingthebuttononthefrontofthecartridge.
3. Pulloutthelockkey.
4. Close the battery cover.
Tool / battery protection system
Thetoolisequippedwithatool/batteryprotectionsys-
tem.Thissystemautomaticallycutsoffpowertothe
motortoextendtoolandbatterylife.Thetoolwillauto-
maticallystopduringoperationifthetoolorbatteryis
placedunderoneofthefollowingconditions.
Overload protection
When the tool is operated in a manner that causes it to
draw an abnormally high current, the tool automatically
stops without any indication. In this situation, turn the
tooloffandstoptheapplicationthatcausedthetoolto
becomeoverloaded.Thenturnthetoolontorestart.
Overheat protection
When the tool is overheated, the tool stops automati-
cally.Letthetoolcooldownbeforeturningthetoolon
again.
Overdischarge protection
When the battery capacity becomes low, the tool stops
automatically.Iftheproductdoesnotoperateeven
when the switches are operated, remove the batteries
fromthetoolandchargethebatteries.
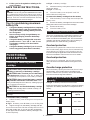
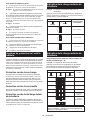
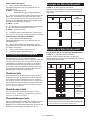
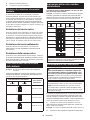
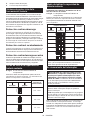
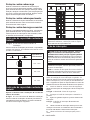
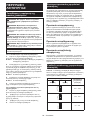
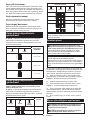
Indicating the remaining battery
capacity
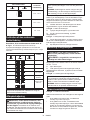
►Fig.4: 1. Battery indicator 2. Check button
Pressthecheckbuttontoindicatetheremainingbattery
capacities.Thebatteryindicatorscorrespondtoeach
battery.
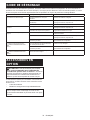
Battery indicator status
Remaining battery
capacity
On
Off
50% - 100%
20% - 50%

10 ENGLISH
Battery indicator status
Remaining battery
capacity
On
Off
0% - 20%
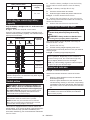
Indicating the remaining battery
capacity
Only for battery cartridges with "B" at the end of the
model number
►Fig.5: 1. Indicator lamps 2. Check button
Pressthecheckbuttononthebatterycartridgetoindi-
catetheremainingbatterycapacity.Theindicatorlamps
lightupforfewseconds.
Indicator lamps Remaining
capacity
Lighted Off Blinking
75% to 100%
50% to 75%
25% to 50%
0% to 25%
Charge the
battery.
Thebattery
may have
malfunctioned.
NOTE:Dependingontheconditionsofuseandthe
ambienttemperature,theindicationmaydifferslightly
fromtheactualcapacity.
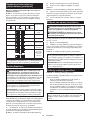
Switch action
WARNING: Before installing the battery car-
tridge, always check to see that the switch lever
actuates properly and returns to the original posi-
tion when released. Operating a tool with a switch
thatdoesnotactuateproperlycanleadtolossof
controlandseriouspersonalinjury.
NOTE:Themowerdoesnotstartwithoutpressingthe
switch button even the switch lever is pulled.
NOTE: Mower may not start due to the overload
when you try to mow long or dense grass at a time.
Increase the mowing height in this case.
Thismowerisequippedwiththeinterlockswitchand
handleswitch.Ifyounoticeanythingunusualwitheither
oftheseswitches,stopoperationimmediatelyand
havethemcheckedbyyournearestDolmarAuthorized
Service Center.
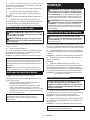
1. Install the battery cartridges. Insert the lock key
into the interlock switch and then close the battery
cover.
►Fig.6: 1. Battery cartridge 2. Lock key
2. Presstheswitchbuttonandholdit.
3. Grabtheupperhandleandpulltheswitchlever.
►Fig.7: 1. Switch button 2. Switch lever
4. Release the switch button as soon as the motor
startsrunning.Themowerwillcontinuetorununtilyou
release the switch lever.
5. Release the switch lever to stop the motor.
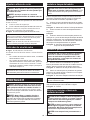
Adjusting the mowing height
WARNING: Never put your hand or leg under
the mower body when adjusting the mowing
height.
WARNING: Always make sure that the lever
ts in the groove properly before operation.
Themowingheightcanbeadjustedintherangeof
between 20 mm - 75 mm.
1. Remove the lock key.
2. Pullthemowingheightadjustinglevertothe
outwardofthemowerbodyandmoveittoyourdesired
mowing height.
►Fig.8: 1.Mowingheightadjustinglever
NOTE:Themowingheightguresshouldbeused
justasaguideline.Dependingontheconditionsof
the lawn or the ground, the actual lawn height may
becomeslightlydifferentfromthesetheight.
NOTE:Tryatestmowingofgrassinalessconspicu-
ous place to get your desired height.
Grass level indicator
►Fig.9: 1.Grasslevelindicator
Grasslevelindicatorshowsthevolumeofmowed
grass.
• Whenthegrassbasketisnotfull,theindicator
oatsduringmowing.
• Whenthegrassbasketisfull,theindicatordoes
notoatduringmowing.Inthiscase,stopmowing
immediatelyandemptythebasket.Afteremptying
the basket, clean it so that its meshwork vents the
air.
NOTE:Thisindicatorisaroughguide.Dependingon
theconditionsofinsideofthebasket,thisindicator
may not work properly.

11 ENGLISH
ASSEMBLY
WARNING: Always be sure that the lock key
and battery cartridge are removed before carrying
out any work on the mower. Failure to remove the
lock key and the battery cartridge may result in seri-
ouspersonalinjuryfromaccidentalstart-up.
WARNING: Never start the mower unless it is
completely assembled.Operationofthetoolsina
partially assembled state may result in serious per-
sonalinjuryfromaccidentalstart-up.
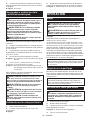
Installing the battery cover
WARNING: Do not insert the lock key and bat-
tery cartridge before installing the battery cover.
Failuretodosomaycauseaseriousinjury.
Installthebatterycovercompletelybeforetheopera-
tion.Thebatterycoverprotectsthemowerandbattery
cartridgefrommud,dirt,andwater.
1. Placethebatterycoverwiththeprotrusionsonthe
mower aligned to the holes on the battery cover.
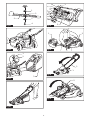
►Fig.10: 1.Protrusion2. Hole 3. Battery cover
2. Placeyourhandsinthemiddleofthebattery
cover and push it.
►Fig.11
3. Beforetherstoperation,checkthatthepivot
pointofthebatterycoverisattachedproperly.Ifthe
battery cover is installed correctly, it will not open until
the battery cover locking lever is pulled.
►Fig.12: 1.Pivotpoint2. Battery cover locking lever
Installing the handle
NOTICE: When installing handles, position the
cords so that they are not caught by anything
between the handles. If the cord is damaged, the
mower switch may not work.
1. Slidethebothendsoflowerhandleintothe
groovesofthemowerthenfullytightentheclamping
screws.
►Fig.13: 1. Clamping screw 2. Lower handle
2. Alignthescrewholesofupperhandleandlower
handle. Secure them with the clamping screws and
nuts.
►Fig.14: 1. Clamping nut 2. Clamping screw
NOTE:Holdtheupperhandlermlysothatitdoes
notdropoffyourhand.
3. Attachtheholderstothehandle.Positionthe
powersupplycordasshowninthegure.
►Fig.15: 1. Holder
Removing or installing the mower
blade
WARNING: Always remove the lock key and
battery cartridge when removing or installing the
blade. Failure to remove the lock key and battery
cartridge may cause a serious injury.
WARNING: The blade coasts for a few sec-
onds after releasing the switch. Do not start any
operation until the blade comes to a complete
stop.
WARNING: Always wear gloves when han-
dling the blade.
Toremovethemowerblade,takethefollowingsteps.
1. Putthemoweronitssidesothatthemowing
heightadjustinglevercomestotheupperside.
2. Tolockthebladerotation,insertascrewdriverora
similartoolintoaholeonthebaseoftheblade.
3. Turntheboltcounterclockwisewiththewrench.
►Fig.16: 1. Mower blade 2. Screwdriver 3. Wrench
4. Removethebolt,outerange,mowerblade,and
innerangeinorder.
►Fig.17: 1.Innerange2. Rotational direction arrow
3.Outerange4. Bolt 5. Mower blade
Toinstallthemowerblade,taketheremovalprocedure
in reverse.
WARNING: Install the blade carefully. It has
a top/bottom facing. Place the blade so that the
rotational direction arrow faces outward.
WARNING: Tighten the bolt clockwise rmly
to secure the blade.
WARNING: Make sure that the blade and all
the xing parts are installed correctly and tight-
ened securely.
WARNING: When you replace the blades,
always follow the instructions provided in this
manual.
Installing the grass basket
1. Remove the lock key.
2. Lifttherearguardofthemowerbody.
►Fig.18
3. Hookthegrassbasketonthegrooveofthemower
bodyasshowninthegure.
►Fig.19: 1. Hook 2.Groove3.Grassbasket

12 ENGLISH
OPERATION
Mowing
WARNING: Before mowing, clear away sticks
and stones from mowing area. Furthermore, clear
away any weeds from mowing area in advance.
WARNING: Always wear the safety goggles or
safety glasses with side shields when operating
the mower.
►Fig.20
Firmly hold the lawn mower handle with both hands
when mowing.
Theoutsideedgesofthefrontwheelsistheguideline
formowingwidth.Usingthetwofrontwheeloutside
edges as a guideline, mow in strips, overlapping by
onehalftoonethirdthepreviousstrip,tomowthelawn
evenly.
Periodicallycheckthegrassbasketformowedgrass.
Emptythegrassbeforeitbecomesfull.Beforeevery
periodical check, be sure to stop the mower then
remove the lock key and the battery cartridge.
NOTE:Usingthemowerwiththegrassbasketfull
prevents smooth blade rotation and places an extra
load on the motor, which may cause breakdown.
Mowing a long-grass lawn
Do not try to cut long grass all in one go. Instead, mow
the lawn in some steps. Leave a day or two between
mows until the lawn becomes evenly short.
NOTE: Mowing long grass to a short length all in one
gomaycausethegrasstodie.Thecutgrassmay
alsoblockupinsideofthemowerbody.
Emptying the grass basket
WARNING: To reduce a risk of accident, reg-
ularly check the grass basket for any damage or
weakened strength. Replace the grass basket if
necessary.
1. Release the switch lever.
2. Remove the lock key.
3. Lifttherearguardandtakeoutthegrassbasket
by holding the handle.
►Fig.21: 1. Rear guard 2. Handle
4. Emptythegrassbasket.
MAINTENANCE &
STORAGE
WARNING: Always be sure that the lock
key and battery cartridge are removed from the
mower before storage or attempting to perform
inspection or maintenance.
WARNING: Always remove the lock key when
the mower is not in use. Store the lock key in a
safe place out of reach of children.
WARNING: Wear gloves when performing
inspection or maintenance.
NOTICE: Never use gasoline, benzine, thinner,
alcohol or the like. Discoloration, deformation or
cracks may result.
Maintenance
1. Removethelockkey.Storeitinasafeplaceoutof
thereachofchildren.
2. Clean the mower using only a wet cloth. Do not
spray or pour water on the mower when cleaning.
3. Putthemoweronitssideandcleangrassclip-
pingsaccumulatedontheundersideofmowerdeck.
4. Checkallnuts,bolts,knobs,screws,fastenersetc.
fortightness.
5. Inspectmovingpartsfordamage,breakage,and
wear. Damaged or missing parts should be repaired or
replaced.
Storage
WARNING: When carrying or storing the
mower, do not hold the folded handles but the
front grip of the mower. Holdingthefoldedhandles
maycauseaseriousinjuryordamagetothemower.
Beforestoringthemower,removethebatterycartridge
fromit.
Store mower indoors in a cool, dry and locked place.
Don't store the mower and charger in locations where
the temperature may reach or exceed 40 °C (104 °F).
►Fig.22: 1. Front grip 2. Rear grip
1. Loosen the clamping screws and expand the
lowerhandletobothsides.Movedownthehandlefor-
ward.Atthistime,keeparmgriponthelowerhandle
sothatthehandledoesnotfalldowntothefarsidefrom
the mower body.
►Fig.23: 1. Clamping screw 2. Lower handle
2. Loosen the clamping nuts and pivot the upper
handle back while expanding the both sides.
►Fig.24: 1. Clamping nut 2. Upper handle
3. Store the grass basket between the handle and
the mower body.
►Fig.25: 1.Grassbasket

13 ENGLISH
NOTE: When putting the mower in the upright posi-
tion,donotholdthehandlebutusethefrontgripof
the mower.
TomaintainproductSAFETYandRELIABILITY,
repairs,anyothermaintenanceoradjustmentshould
beperformedbyDolmarAuthorizedorFactoryService
Centers, always using Dolmar replacement parts.
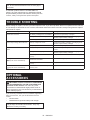
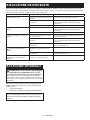
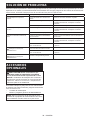
TROUBLE SHOOTING
Beforeaskingforrepairs,conductyourowninspectionrst.Ifyoundaproblemthatisnotexplainedinthemanual,
donotattempttodismantlethetool.Instead,askDolmarAuthorizedServiceCenters,alwaysusingDolmarreplace-
mentpartsforrepairs.
State of abnormality Probable cause (malfunction) Remedy
Mower does not start. Twobatterycartridgesarenotinstalled. Install the charged battery cartridges.
Battery problem (under voltage) Rechargethebatterycartridge.Ifrechargingisnot
effective,replacebatterycartridge.
Thelockkeyisnotinserted. Insert the lock key.
Motorstopsrunningafteralittleuse. Battery's charge level is low. Rechargethebatterycartridge.Ifrechargingisnot
effective,replacebatterycartridge.
Cutting height is too low. Raise the cutting height.
Motor does not reach maximum
RPM.
Battery cartridge is installed improperly. Install the battery cartridge as described in this
manual.
Battery power is dropping. Rechargethebatterycartridge.Ifrechargingisnot
effective,replacebatterycartridge.
Thedrivesystemdoesnotwork
correctly.
Askyourlocalauthorizedservicecenterforrepair.
Cutting tool does not rotate:
stop the mower immediately!
Foreignobjectsuchasabranchis
jammedneartheblade.
Removetheforeignobject.
Thedrivesystemdoesnotwork
correctly.
Askyourlocalauthorizedservicecenterforrepair.
Abnormalvibration:
stop the mower immediately!
Blade is imbalanced, excessively or
unevenly worn.
Replace the blade.
OPTIONAL
ACCESSORIES
CAUTION: These accessories or attachments
are recommended for use with your Dolmar tool
specied in this manual.Theuseofanyother
accessoriesorattachmentsmightpresentariskof
injurytopersons.Onlyuseaccessoryorattachment
foritsstatedpurpose.
Ifyouneedanyassistanceformoredetailsregarding
these accessories, ask your local Dolmar Service
Center.
• Mowerblade
• Makita/Dolmargenuinebatteryandcharger
NOTE: Some items in the list may be included in the
toolpackageasstandardaccessories.Theymay
differfromcountrytocountry.

14 FRANÇAIS
FRANÇAIS (Instructions originales)
SPÉCIFICATIONS
Modèle : AM-3743
Largeur de tonte (diamètre de la lame) 430 mm
Vitesse à vide 3 600 min
-1
Dimensions
(L x l x H)
pendant l’utilisation Max. 1 490 mm x 460 mm x 1 020 mm
Min. 1 450 mm x 460 mm x 950 mm
pendant le rangement
(sans le bac à herbe)
490 mm x 460 mm x 910 mm
Tensionnominale 36 V CC
Batterie(s) standard
Avertissement:Utilisezexclusivementlaoulesbatteries
spéciées.
BL1815N/BL1820/BL1820B BL1830/BL1830B/BL1840/
BL1840B/BL1850/BL1850B/
BL1860B
Poidsnet 17,8 kg 18,3 kg
• Étantdonnél’évolutionconstantedenotreprogrammederechercheetdedéveloppement,lesspécications
contenuesdanscemanuelsontsujettesàmodicationsanspréavis.
• Lesspécicationsetlabatteriepeuventêtredifférentessuivantlespays.
• Poids,aveclabatterie,conformémentàlaprocédureEPTA-01/2003
Symboles
Vous trouverez ci-dessous les symboles utilisés pour
l’appareil.Veillezàcomprendreleursignicationavant
toute utilisation.
Veuillezêtreprudentetresterattentif.
Lire le mode d’emploi.
Danger;prendregardeauxprojections
d’objets.
La distance entre l’outil et les personnes
présentesdoitêtred’aumoins15m.
Nemettezjamaislesmainsoulespieds
près de la lame sous la tondeuse. Les
lamescontinuentdetournerunefoisle
moteur coupé.
Retirez la clé de sécurité avant d’inspec-
ter, de régler, de nettoyer, de réparer, de
laisser sans surveillance ou de ranger la
tondeuse.
Cd
Ni-MH
Li-ion
Pourlespaysdel’Unioneuropéenne
uniquement
Nejetezpaslesappareilsélectriquesou
les batteries avec vos ordures ménagères !
Conformémentauxdirectiveseuropéennes
relativesauxdéchetsd’équipements
électriquesetélectroniquesetauxpiles
etaccumulateursainsiqu’auxdéchetsde
piles et d’accumulateurs et leur mise en
œuvreconformémentauxloisnationales,
leséquipementsélectriques,lespilesetles
batteriesenndeviedoiventfairel’objet
d’unecollectesélectiveetêtreconésà
une usine de recyclage respectueuse de
l’environnement.
Utilisations
L’outil est conçu pour tondre la pelouse.
Bruit
NiveaudebruitpondéréAtypique,déterminéselon
EN60335:
Niveau de pression sonore (L
pA
):80dB(A)
Niveau de puissance sonore (L
WA
):93dB(A)
Incertitude(K):3dB(A)
Leniveaudebruitenfonctionnementpeutdépasser80
dB(A).
Vibrations
Valeur totale de vibrations (somme de vecteur triaxial)
déterminéeselonEN60335:
Émissiondevibrations(a
h
) : 2,5 m/s
2
ou moins
Incertitude (K) : 1,5 m/s
2
NOTE : La valeur d’émission de vibrations déclarée
aétémesuréeconformémentàlaméthodedetest
standardetpeutêtreutiliséepourcomparerlesoutils
entre eux.
NOTE : La valeur d’émission de vibrations déclarée
peutaussiêtreutiliséepourl’évaluationpréliminaire
de l’exposition.

15 FRANÇAIS
AVERTISSEMENT : L’émission de vibrations
lorsdel’usageréeldel’outilélectriquepeutêtre
différentedelavaleurd’émissiondéclarée,suivantla
façondontl’outilestutilisé.
AVERTISSEMENT : Les mesures de sécurité à
prendrepourprotégerl’utilisateurdoiventêtrebasées
sur une estimation de l’exposition dans des condi-
tions réelles d’utilisation (en tenant compte de toutes
les composantes du cycle d’utilisation, comme par
exemplelemomentdesamisehorstension,lorsqu’il
tourne à vide et le moment de son déclenchement).
Déclaration de conformité CE
Pour les pays européens uniquement
Makitadéclarequelaoulesmachinessuivantes:
Désignationdelamachine:TondeuseSansFil
N°demodèle/Type:AM-3743
sontconformesauxDirectiveseuropéennessuivantes:
2000/14/EC,2006/42/EC
etsontfabriquéesconformémentauxnormesouaux
documentsnormaliséssuivants:EN60335
Ladocumentationtechniqueconformeàlanorme
2006/42/CEestdisponibleauprèsde:
Makita,Jan-BaptistVinkstraat2,3070,Belgique
Laprocédured’évaluationdelaconformitérequisepar
laDirective2000/14/CEaétéréaliséeconformémentà
l’annexe VI.
Organismenotié:TÜVRheinlandLGAProductsGmbH
AmGrauenStein29,51105Köln,Allemagne
Numérod’identication0197
Niveaudepuissancesonoremesuré:93dB(A)
Niveaudepuissancesonoregaranti:94dB(A)
1.12.2015
Yasushi Fukaya
Directeur
Makita,Jan-BaptistVinkstraat2,3070,Belgique
CONSIGNES DE SÉCURITÉ
IMPORTANTES
AVERTISSEMENT : Lisez toutes les
consignes de sécurité et toutes les instructions. Il
yarisqued’électrocution,d’incendieet/oudegraves
blessures si les mises en garde et les instructions ne
sont pas respectées.
Conservez toutes les mises en
garde et instructions pour réfé-
rence ultérieure.
1. N’insérez la clé dans la tondeuse qu’une fois
celle-ci prête pour l’utilisation.
2. Les enfants doivent être sous la surveillance
d’un adulte an de s’assurer qu’ils ne jouent
pas avec la tondeuse.
3.
Ne laissez jamais les enfants ou les personnes qui
ne sont pas familiarisées avec ces instructions
utiliser la tondeuse. Les réglementations locales
peuvent spécier un âge minimum pour l’utilisation.
4. N’utilisez jamais la tondeuse alors que des
personnes — et tout particulièrement des
enfants — ou des animaux domestiques se
trouvent à proximité.
5. Gardez à l’esprit que l’opérateur ou l’utilisa-
teur est responsable des accidents ou risques
encourus par les personnes ou leur propriété.
6. Pendant l’utilisation de la tondeuse, portez
toujours des chaussures résistantes et un
pantalon long. N’utilisez pas la tondeuse
pieds nus ou avec des sandales qui laissent
les pieds partiellement découverts. Évitez
de porter des vêtements et bijoux amples ou
dotés de cordons ou attaches qui pendent. Les
pièces mobiles risqueraient de les happer.
7. N’utilisez la tondeuse qu’à la lumière du jour
ou sous un bon éclairage articiel.
8. Évitez d’utiliser la tondeuse sur de l’herbe
mouillée.
9. N’utilisez jamais la tondeuse sous la pluie.
10. Utilisation et entretien des outils fonctionnant
sur batterie
- Rechargez la batterie uniquement avec le
chargeur spécié par le fabricant. Un chargeur
conçu pour un type de batterie donné peut pré-
senterunrisqued’incendies’ilestutiliséavecune
batterie d’un autre type.
- Utilisez les outils électriques uniquement
avec les batteries spéciquement désignées.
L’utilisation de tout autre type de batterie peut
présenterunrisquedeblessureoud’incendie.
- Lorsque vous n’utilisez pas la batterie,
tenez-la à l’écart des objets métalliques, tels
que trombones, pièces de monnaie, clés,
clous, vis ou autres petits objets métalliques
susceptibles de créer une connexion entre
deux bornes. Le court-circuitage des bornes de
la batterie peut causer des brûlures ou entraîner
un incendie.
- Dans des conditions d’utilisation inadéquate,
il peut y avoir une fuite de l’électrolyte de la
batterie. Le cas échéant, évitez tout contact
avec ce liquide. En cas de contact accidentel,
rincez à l’eau. Si le liquide entre en contact
avec les yeux, consultez un médecin.Leliquide
s’échappantdelabatteriepeutprovoquerune
irritation ou des brûlures.
11. Tenez toujours la poignée fermement.
12. Assurez-vous toujours d’être en position
stable dans les pentes.
13. Ne courez jamais ; marchez.
14. Ne saisissez pas les lames de coupe exposées
ou les bords tranchants pour soulever ou tenir
la tondeuse.
15. Condition physique - N’utilisez pas la ton-
deuse après avoir consommé une drogue, de
l’alcool ou un médicament.
16. Gardez mains et pieds à l’écart des lames en
rotation. Attention - Les lames continuent de
tourner une fois la tondeuse éteinte.
17. Utilisez exclusivement les lames authen-
tiques du fabricant spéciées dans ce mode
d’emploi.

16 FRANÇAIS
18. Vériez soigneusement l’absence de ssures
ou de dommages sur les lames avant l’utili-
sation. Remplacez immédiatement les lames
ssurées ou abîmées.
19. Assurez-vous qu’il n’y a personne à proximité
avant de commencer à tondre. Arrêtez la ton-
deuse si quelqu’un s’approche.
20. Pour éviter de vous blesser ou d’abîmer la
tondeuse, enlevez les corps étrangers tels que
pierres, câbles, bouteilles, os et gros bouts de
bois de la zone de travail avant de commencer
à tondre.
21. Cessez immédiatement l’utilisation si vous
remarquez quoi que ce soit d’inhabituel.
Coupez le contact de la tondeuse et retirez la
clé. Inspectez ensuite la tondeuse.
22. N’essayez jamais de régler la hauteur des
roues pendant que la tondeuse tourne.
23. Libérez le levier d’interrupteur et attendez que
la lame ait cessé de tourner avant de traverser
une allée, un trottoir, une route ou une zone
recouverte de gravier. Pensez également à
retirer la clé si vous laissez la tondeuse sans
surveillance, si vous vous penchez pour
ramasser ou enlever un objet qui fait obstacle,
ou pour toute autre raison pouvant vous dis-
traire de votre travail.
24. Les objets heurtés par la lame de tondeuse
peuvent provoquer de graves blessures.
Pensez toujours à inspecter soigneusement
le gazon et à retirer tous les objets avant de
tondre.
25. Si la tondeuse heurte un corps étranger, pro-
cédez comme suit :
- Arrêtez la tondeuse, libérez le levier d’inter-
rupteur et attendez que la lame ait complète-
ment cessé de tourner.
- Retirez la clé et la batterie.
- Inspectez minutieusement la tondeuse pour
vous assurer qu’elle n’a subi aucun dommage.
- Si la lame est abîmée, remplacez-la. Réparez
tout dégât avant de redémarrer et de continuer
à utiliser la tondeuse.
26. Inspectez régulièrement le bac à herbe pour
vérier l’absence d’usure ou de détérioration.
Avant le rangement, assurez-vous toujours
que le bac à herbe est vide. Si le bac à herbe
est usé, remplacez-le par un bac de rechange
neuf pour votre sécurité.
27. Soyez très prudent lorsque vous faites reculer
la tondeuse ou la tirez vers vous.
28. Immobilisez la ou les lames si vous devez
incliner la tondeuse pour la transporter en
traversant une surface autre que du gazon, et
lorsque vous transportez la tondeuse vers ou
hors de la zone d’utilisation.
29. N’utilisez jamais la tondeuse si ses carters
ou écrans de protection ne fonctionnent pas,
ou si ses dispositifs de sécurité (tels que les
déecteurs et/ou le bac à herbe) ne sont pas
posés.
30. Démarrez la tondeuse prudemment, en suivant
les instructions et en gardant les pieds bien à
l’écart de la ou des lames.
31. N’inclinez pas la tondeuse en allumant le
moteur, sauf si la tondeuse doit être inclinée
pour le démarrage. Le cas échéant, ne l’incli-
nez pas plus que nécessaire et ne soulevez
que la partie opposée à vous.
32. Ne vous tenez pas devant l’ouverture de
décharge pour démarrer la tondeuse.
33. Ne mettez pas les mains ou les pieds près des
pièces en rotation, ou sous celles-ci. Restez
en tout temps à l’écart de l’ouverture de
décharge.
34. Ne transportez pas la tondeuse pendant
qu’elle tourne.
35. Arrêtez la tondeuse et retirez l’objet bloqué.
Assurez-vous que toutes les pièces mobiles
sont parfaitement arrêtées
- chaque fois que vous laissez la tondeuse
sans surveillance,
- avant de retirer un objet bloqué ou de débou-
cher la goulotte,
- avant d’effectuer la vérication, le nettoyage
ou l’entretien de la tondeuse,
- après avoir heurté un corps étranger. Avant
de redémarrer et d’utiliser la tondeuse, vériez
l’absence de dommages et effectuez les répa-
rations nécessaires.
36. Si la tondeuse se met à vibrer anormalement
(vériez immédiatement)
- inspectez les dommages,
- remplacez ou réparez les pièces
endommagées,
- vériez et resserrez les pièces mal serrées.
37. Lorsque vous réglez la tondeuse, évitez de
vous coincer les doigts entre les lames en
mouvement et les pièces xes de la tondeuse.
38. Tondez toujours les pentes latéralement,
jamais de haut en bas ou vice-versa. Soyez
très prudent lorsque vous changez de direc-
tion dans les pentes. Ne tondez pas dans les
pentes trop abruptes.
39. Ne nettoyez pas la tondeuse avec un tuyau
d’arrosage ; évitez de mouiller le moteur et les
connexions électriques.
40. Vériez régulièrement le boulon de montage
de la lame pour vous assurer qu’il est bien
serré.
41. Gardez tous les écrous, boulons et vis bien
serrés pour garantir le fonctionnement sûr de
l’équipement.
42. Laissez toujours refroidir la tondeuse avant de
la ranger.
43. Lors de l’entretien des lames, gardez à l’esprit
qu’elles peuvent tourner même si la source
d’alimentation est coupée.
44. Pour votre propre sécurité, remplacez les
pièces usées ou endommagées. Utilisez exclu-
sivement des pièces de rechange et acces-
soires authentiques.
CONSERVEZ CES
INSTRUCTIONS.

17 FRANÇAIS
AVERTISSEMENT : NE vous laissez PAS
tromper (au l d’une utilisation répétée) par un
sentiment d’aisance et de familiarité avec le
produit, en négligeant le respect rigoureux des
consignes de sécurité qui accompagnent le pro-
duit en question.
La MAUVAISE UTILISATION de l’outil ou l’igno-
rance des consignes de sécurité indiquées
dans ce mode d’emploi peut entraîner de graves
blessures.
Consignes de sécurité importantes
pour la batterie
1. Avant d’utiliser la batterie, lisez toutes les
instructions et précautions relatives (1) au
chargeur de batterie, (2) à la batterie, et (3) au
produit utilisant la batterie.
2. Ne démontez pas la batterie.
3. Cessez immédiatement l’utilisation si le temps
de fonctionnement devient excessivement
court. Il y a risque de surchauffe, de brûlures,
voire d’explosion.
4. Si l’électrolyte pénètre dans vos yeux, rin-
cez-les à l’eau claire et consultez immédiate-
ment un médecin. Il y a risque de perte de la
vue.
5. Ne court-circuitez pas la batterie :
(1) Ne touchez les bornes avec aucun maté-
riau conducteur.
(2) Évitez de ranger la batterie dans un
conteneur avec d’autres objets métal-
liques, par exemple des clous, des pièces
de monnaie, etc.
(3) N’exposez pas la batterie à l’eau ou à la
pluie.
Un court-circuit de la batterie peut provoquer
une intensité de courant élevée, une sur-
chauffe, parfois des brûlures et même une
panne.
6. Ne rangez pas l’outil et la batterie dans un
endroit où la température risque d’atteindre ou
de dépasser 50 °C.
7. Ne jetez pas la batterie au feu même si elle est
sérieusement endommagée ou complètement
épuisée. La batterie peut exploser au contact
du feu.
8. Évitez de laisser tomber ou de cogner la
batterie.
9. N’utilisez pas la batterie si elle est
endommagée.
10. Les batteries au lithium-ion contenues sont
soumises aux exigences de la législation sur
les marchandises dangereuses.
Lors du transport commercial par des tierces
parties ou des transitaires par exemple, des exi-
gencesspéciquesenmatièred’étiquetageet
d’emballagedoiventêtrerespectées.
Pourlapréparationdel’articleexpédié,ilest
nécessaire de consulter un expert en matériau
dangereux. Veuillez également respecter les
réglementationsnationalessusceptiblesd’être
plus détaillées.
Recouvrez les contacts exposés avec du ruban
adhésifoudurubandemasquageetemballezla
batteriedetellesortequ’ellenepuissepasbouger
dans l’emballage.
11. Suivez les réglementations locales en matière
de mise au rebut des batteries.
CONSERVEZ CES
INSTRUCTIONS.
ATTENTION : N’utilisez que des batteries
Makita/Dolmar d’origine. L’utilisation de batteries
nonfabriquéesparMakita/Dolmaroudebatteries
modiéespeutprovoquerl’explosiondesbatteries,
cequiprésenteunrisqued’incendie,dedommages
matériels et corporels. Cela annulera également la
garantie Makita/Dolmar pour l’outil et le chargeur
Makita/Dolmar.
Conseils pour assurer la durée
de vie optimale de la batterie
1. Chargez la batterie avant qu’elle ne soit com-
plètement déchargée. Arrêtez toujours l’outil
et rechargez la batterie quand vous remarquez
que la puissance de l’outil diminue.
2. Ne rechargez jamais une batterie complète-
ment chargée. La surcharge réduit la durée de
service de la batterie.
3. Chargez la batterie à une température
ambiante comprise entre 10 °C et 40 °C. Avant
de charger une batterie chaude, laissez-la
refroidir.
4. Rechargez la batterie si elle est restée inutili-
sée pendant une période prolongée (plus de
six mois).
DESCRIPTION DU
FONCTIONNEMENT
Insertion ou retrait de la batterie
ATTENTION : Éteignez toujours l’outil avant
de mettre en place ou de retirer la batterie.
ATTENTION : Veillez à verrouiller le couvercle
de batterie avant toute utilisation. Autrement,la
boue,lessaletésoul’eaurisquentd’endommagerle
produit ou la batterie.
ATTENTION : Insérez toujours la batterie à
fond, jusqu’à ce que le voyant rouge ne soit plus
visible. Sinon, elle pourrait tomber accidentellement
del’outil,aurisquedevousblesseroudeblesser
quelqu’unsetrouvantàproximité.
ATTENTION : Ne forcez pas pour insérer la
batterie.Sielleneglissepasfacilement,c’estque
vous ne l’insérez pas correctement.
NOTE :L’outilnepeutpasfonctionneravecune
seule batterie.

18 FRANÇAIS
Pour mettre la batterie en place ;
1. Faites glisser le levier de verrouillage du couvercle
de batterie et ouvrez le couvercle de batterie.
►Fig.1: 1. Couvercle de batterie 2. Levier de verrouil-
lage du couvercle de batterie
2. Alignezlalanguettedelabatteriesurlafentede
latondeuseetfaitesglisserlabatteriejusqu’àcequ’elle
se verrouille en place (vous devez entendre un léger
déclic). Si vous pouvez voir le voyant rouge du côté
supérieur du bouton, la batterie n’est pas complètement
verrouillée.
►Fig.2: 1. Batterie
3. Insérezàfondlaclédesécuritéàl’emplacement
indiquésurlagure.
►Fig.3: 1. Clé de sécurité
4. Fermez le couvercle de batterie et appuyez
dessusjusqu’àcequ’ilsoitverrouilléparlelevierde
verrouillage.
Pour retirer la batterie de la tondeuse ;
1. Faites glisser le levier de verrouillage du couvercle
de batterie et ouvrez le couvercle de batterie.
2. Retirezlabatteriedelatondeuseenfaisantglis-
ser le bouton à l’avant de la batterie.
3. Tirezsurlaclédesécuritépourlaretirer.
4. Fermez le couvercle de batterie.
Système de protection de l’outil/la
batterie
L’outilestéquipéd’unsystèmedeprotectiondel’outil/la
batterie.Cesystèmecoupeautomatiquementl’alimen-
tation vers le moteur pour prolonger la durée de vie de
l’outil et de la batterie. Si l’outil ou la batterie se trouve
dans l’une des situations suivantes, l’outil cessera auto-
matiquementdefonctionner.Danscertainessituations,
les témoins s’allument.
Protection contre la surcharge
Lorsquel’outilestutiliséd’unemanièreprovoquant
un appel de courant anormalement élevé, l’outil s’ar-
rêteautomatiquementsansindication.Danscecas,
éteignezl’outiletarrêtezlatâcheayantprovoquéla
surchargedel’outil.Puisrallumezl’outilpourreprendre
latâche.
Protection contre la surchauffe
Encasdesurchauffedel’outil,celui-cis’arrêteautoma-
tiquement.Laissezl’outilrefroidiravantdelerallumer.
Protection contre la décharge totale
de la batterie
Lorsquelachargerestantedelabatteriedevienttrès
faible,l’outils’arrêteautomatiquement.Sileproduitne
fonctionnepasmêmeenactionnantlesboutons,retirez
les batteries de l’outil et chargez-les.
Indication de la charge restante de
la batterie
►Fig.4: 1.Témoindelabatterie2. Bouton de
vérication
Appuyezsurleboutondevéricationpourindiquerla
charge restante de la batterie. Les témoins de batterie
correspondentàchaquebatterie.
Statut du témoin de la batterie
Capacité restante
de la batterie
Allumé
Éteint
50 % à 100 %
20 % à 50 %
0 % à 20 %
Indication de la charge restante de
la batterie
Uniquement pour les batteries dont le numéro de
modèle se termine par « B »
►Fig.5: 1.Témoins2.Boutondevérication
Appuyezsurleboutondevéricationsurlabatterie
pourindiquerlachargerestantedelabatterie.Les
témoinss’allumentpendantquelquessecondes.
Témoins Charge
restante
Allumé Éteint Clignotant
75 % à 100 %
50 % à 75 %
25 % à 50 %
0 % à 25 %
Chargez la
batterie.
Anomalie
possible
de la batterie.
NOTE : Selon les conditions d’utilisation et la tem-
pératureambiante,l’indicationpeutêtrelégèrement
différentedelacapacitéréelle.

19 FRANÇAIS
Fonctionnement de la gâchette
AVERTISSEMENT : Avant de mettre la
batterie en place, vériez toujours que le levier
d’interrupteur fonctionne correctement et revient
en position initiale une fois libéré. L’utilisation d’un
outildontl’interrupteurestdéfectueuxcomporteun
risquedepertedecontrôleetdegravesblessures.
NOTE :Mêmesivoustirezsurlelevierd’interrupteur,
la tondeuse ne démarre pas si vous n’appuyez pas
sur le bouton d’interrupteur.
NOTE : La tondeuse peut ne pas démarrer en raison
d’une surcharge si vous essayez de tondre de l’herbe
hauteoudenseenunefois.Augmentezlahauteurde
tonte dans ce cas.
Cettetondeuseestéquipéed’uninterrupteurd’inter-
verrouillage et d’un interrupteur de poignée. Si vous
constatez une anomalie sur l’un ou l’autre de ces inter-
rupteurs,cessezimmédiatementl’utilisationetfaites-le
vérierparlecentredeserviceaprès-venteDolmar
agréé le plus proche.
1. Mettez les batteries en place. Insérez la clé de
sécurité dans l’interrupteur d’interverrouillage puis
fermezlecouvercledebatterie.
►Fig.6: 1. Batterie 2. Clé de sécurité
2. Maintenezenfoncéleboutond’interrupteur.
3. Saisissez la poignée supérieure et tirez sur le
levier d’interrupteur.
►Fig.7: 1. Bouton d’interrupteur 2. Levier
d’interrupteur
4. Libérezleboutond’interrupteurdèsquelemoteur
se met à tourner. La tondeuse continue de tourner
jusqu’àcequevouslibériezlelevierd’interrupteur.
5. Pourcouperlemoteur,libérezlelevier
d’interrupteur.
Réglage de la hauteur de tonte
AVERTISSEMENT : Ne mettez jamais une
main ou une jambe sous la tondeuse pendant que
vous réglez la hauteur de tonte.
AVERTISSEMENT : Avant l’utilisation, assu-
rez-vous toujours que le levier se loge bien dans
la rainure.
La hauteur de tonte est réglable dans une plage de 20
mm à 75 mm.
1. Retirez la clé de sécurité.
2. Poussezlelevierderéglagedelahauteurde
tonte vers l’extérieur de la tondeuse et déplacez-le sur
la hauteur de tonte souhaitée.
►Fig.8: 1. Levier de réglage de la hauteur de tonte
NOTE :Leschiffresdelahauteurdetontedoivent
êtreutilisésàtitreindicatif.Selonl’étatdelapelouse
oudusol,lahauteurréelledugazonpeutêtrelégère-
mentdifférentedelahauteurdénie.
NOTE : Faites un essai de tonte en un point peu
visiblepourvériersivousobtenezlahauteurde
tonte désirée.
Témoin de niveau d’herbe
►Fig.9: 1.Témoindeniveaud’herbe
Letémoindeniveaud’herbeindiquelevolumed’herbe
tondue.
• Lorsquelebacàherben’estpasplein,l’indicateur
ottependantlatonte.
• Lorsquelebacàherbeestplein,l’indicateurne
ottepaspendantlatonte.Ilfautalorsimmédia-
tementarrêterdetondreetviderlebac.Après
avoirvidélebac,nettoyez-leanquesesmailles
laissent passer l’air.
NOTE : Le témoin donne une indication approxima-
tive. Suivant les conditions à l’intérieur du bac, il se
peutqueletémoinnefonctionnepascorrectement.
ASSEMBLAGE
AVERTISSEMENT : Avant toute intervention
sur la tondeuse, assurez-vous toujours que la clé
de sécurité et la batterie sont retirées.Ennereti-
rantpaslaclédesécuritéetlabatterie,vousrisque-
riez de vous blesser grièvement en cas de démarrage
accidentel.
AVERTISSEMENT : Ne démarrez la tondeuse
que si ses pièces sont toutes montées.Enutilisant
unoutilalorsquesespiècesnesontpastoutesmon-
tées,vousrisqueriezdevousblessergrièvementen
cas de démarrage accidentel.
Installation du couvercle de batterie
AVERTISSEMENT : N’insérez pas la clé de
sécurité et la batterie avant d’avoir installé le cou-
vercle de batterie. Le non-respect de cette consigne
peut entraîner des blessures graves.
Installez complètement le couvercle de batterie avant
utilisation. Le couvercle de batterie protège la tondeuse
et la batterie de la boue, des saletés et de l’eau.
1. Placezlecouvercledebatterieenalignantlespar-
ties saillantes de la tondeuse sur les trous du couvercle.
►Fig.10: 1.Partiesaillante2.Trou3. Couvercle de
batterie
2. Posezvosmainsaumilieuducouvercledebatte-
rieetenfoncez-le.
►Fig.11
3. Avantlapremièreutilisation,vériezqueles
points d’articulation du couvercle de batterie sont
assemblés correctement. Si le couvercle de batterie
estcorrectementinstallé,ilnes’ouvrirapastantquele
levier de verrouillage du couvercle de batterie n’est pas
actionné.
►Fig.12: 1.Pointd’articulation2. Levier de verrouil-
lage du couvercle de batterie

20 FRANÇAIS
Installation de la poignée
REMARQUE : Lorsque vous installez les poi-
gnées, placez les cordons de sorte qu’ils courent
librement entre les poignées. Si un cordon est
endommagé, l’interrupteur de la tondeuse peut ne
pas fonctionner.
1. Faites glisser les deux extrémités de la poignée
inférieuredanslesrainuresdelatondeuse,puisserrez
complètement les vis de serrage.
►Fig.13: 1. Vis de serrage 2.Poignéeinférieure
2. Alignezlestrousdevisdelapoignéesupérieure
etdelapoignéeinférieure.Fixez-lesàl’aidedesviset
des écrous de serrage.
►Fig.14: 1.Écroudeserrage2. Vis de serrage
NOTE :Tenezfermementlapoignéesupérieurede
manièreànepaslalâcher.
3. Fixezlessupportsàlapoignée.Placezlecordon
d’alimentationcommeillustrésurlagure.
►Fig.15: 1. Support
Pose ou dépose de la lame de
tondeuse
AVERTISSEMENT : Avant de déposer ou de
poser la lame, retirez toujours la clé de sécurité
et la batterie. Vous risquez une grave blessure si
vous ne retirez pas la clé de sécurité et la batterie.
AVERTISSEMENT : La lame continue de
tourner pendant quelques secondes après la
libération de l’interrupteur. Ne démarrez aucune
opération tant que la lame n’est pas complète-
ment arrêtée.
AVERTISSEMENT : Portez toujours des
gants pour manipuler la lame.
Pourdéposerlalamedetondeuse,exécutezlesétapes
suivantes.
1. Basculezlatondeusesurlecôtépourquele
levier de réglage de la hauteur de tonte se place sur le
dessus.
2. Pourverrouillerlarotationdelalame,insérezun
tournevis ou un outil similaire dans un trou sur la base
de la lame.
3. Tournezleboulondanslesensinversedes
aiguilles d’une montre avec la clé.
►Fig.16: 1. Lame de tondeuse 2.Tournevis3. Clé
4. Déposezleboulon,laasqueextérieure,lalame
detondeuseetlaasqueintérieure(danscetordre).
►Fig.17: 1.Flasqueintérieure2. Flèche d’indication
du sens de rotation 3.Flasqueextérieure
4. Boulon 5. Lame de tondeuse
Pourinstallerlalamedetondeuse,suivezlaprocédure
de dépose en sens inverse.
AVERTISSEMENT : Installez la lame soi-
gneusement. Elle présente une face supérieure et
une face inférieure. Placez la lame de sorte que la
èche d’indication du sens de rotation soit tour-
née vers l’extérieur.
AVERTISSEMENT : Pour xer la lame, serrez
fermement le boulon en tournant dans le sens des
aiguilles d’une montre.
AVERTISSEMENT : Assurez-vous que la
lame et toutes les pièces de xation sont correc-
tement installées et solidement serrées.
AVERTISSEMENT : Lorsque vous remplacez
les lames, suivez toujours les instructions four-
nies dans ce mode d’emploi.
Pose du bac à herbe
1. Retirez la clé de sécurité.
2. Soulevez le carter de protection arrière de la
tondeuse.
►Fig.18
3. Accrochezlebacàherbesurlarainuredela
tondeusecommeillustrésurlagure.
►Fig.19: 1. Crochet 2. Rainure 3. Bac à herbe
UTILISATION
Tonte
AVERTISSEMENT : Avant de commencer à
tondre, enlevez les bouts de bois et les cailloux
de la zone à tondre. Enlevez également les mau-
vaises herbes au préalable de la zone à tondre.
AVERTISSEMENT : Lorsque vous utilisez la
tondeuse, portez toujours des lunettes de sécu-
rité ou lunettes à coques à écrans latéraux.
►Fig.20
Pendantlatonte,tenezfermementlapoignéedela
tondeuse à deux mains.
Les bords externes des roues avant donnent une indi-
cationapproximativedelalargeurdetonte.Enutilisant
lesbordsexternesdesrouesavantàtitreindicatif,
tondez en bandes, en chevauchant la bande précé-
dente de la moitié à un tiers, pour tondre la pelouse
uniformément.
Vériezrégulièrementl’herbetonduedanslebacà
herbe.Videzlebacàherbeavantqu’ilnesoitplein.
Avantchaquecontrôlepériodique,veillezàarrêterla
tondeuse et à enlever la clé de sécurité et la batterie.
NOTE : Si vous continuez d’utiliser la tondeuse alors
quelebacàherbeestplein,lalamenepourrapas
tournerlibrementetlemoteurserasurchargé,cequi
comporteunrisquedepanne.
Sayfa yükleniyor ...
Sayfa yükleniyor ...
Sayfa yükleniyor ...
Sayfa yükleniyor ...
Sayfa yükleniyor ...
Sayfa yükleniyor ...
Sayfa yükleniyor ...
Sayfa yükleniyor ...
Sayfa yükleniyor ...
Sayfa yükleniyor ...
Sayfa yükleniyor ...
Sayfa yükleniyor ...
Sayfa yükleniyor ...
Sayfa yükleniyor ...
Sayfa yükleniyor ...
Sayfa yükleniyor ...
Sayfa yükleniyor ...
Sayfa yükleniyor ...
Sayfa yükleniyor ...
Sayfa yükleniyor ...
Sayfa yükleniyor ...
Sayfa yükleniyor ...
Sayfa yükleniyor ...
Sayfa yükleniyor ...
Sayfa yükleniyor ...
Sayfa yükleniyor ...
Sayfa yükleniyor ...
Sayfa yükleniyor ...
Sayfa yükleniyor ...
Sayfa yükleniyor ...
Sayfa yükleniyor ...
Sayfa yükleniyor ...
Sayfa yükleniyor ...
Sayfa yükleniyor ...
Sayfa yükleniyor ...
Sayfa yükleniyor ...
Sayfa yükleniyor ...
Sayfa yükleniyor ...
Sayfa yükleniyor ...
Sayfa yükleniyor ...
Sayfa yükleniyor ...
Sayfa yükleniyor ...
Sayfa yükleniyor ...
Sayfa yükleniyor ...
Sayfa yükleniyor ...
Sayfa yükleniyor ...
Sayfa yükleniyor ...
Sayfa yükleniyor ...
Sayfa yükleniyor ...
Sayfa yükleniyor ...
Sayfa yükleniyor ...
Sayfa yükleniyor ...
Sayfa yükleniyor ...
Sayfa yükleniyor ...
Sayfa yükleniyor ...
Sayfa yükleniyor ...
Sayfa yükleniyor ...
Sayfa yükleniyor ...
Sayfa yükleniyor ...
Sayfa yükleniyor ...
Sayfa yükleniyor ...
Sayfa yükleniyor ...
Sayfa yükleniyor ...
Sayfa yükleniyor ...
Sayfa yükleniyor ...
Sayfa yükleniyor ...
Sayfa yükleniyor ...
Sayfa yükleniyor ...
Sayfa yükleniyor ...
Sayfa yükleniyor ...
Sayfa yükleniyor ...
Sayfa yükleniyor ...
Sayfa yükleniyor ...
Sayfa yükleniyor ...
Sayfa yükleniyor ...
Sayfa yükleniyor ...
-
 1
1
-
 2
2
-
 3
3
-
 4
4
-
 5
5
-
 6
6
-
 7
7
-
 8
8
-
 9
9
-
 10
10
-
 11
11
-
 12
12
-
 13
13
-
 14
14
-
 15
15
-
 16
16
-
 17
17
-
 18
18
-
 19
19
-
 20
20
-
 21
21
-
 22
22
-
 23
23
-
 24
24
-
 25
25
-
 26
26
-
 27
27
-
 28
28
-
 29
29
-
 30
30
-
 31
31
-
 32
32
-
 33
33
-
 34
34
-
 35
35
-
 36
36
-
 37
37
-
 38
38
-
 39
39
-
 40
40
-
 41
41
-
 42
42
-
 43
43
-
 44
44
-
 45
45
-
 46
46
-
 47
47
-
 48
48
-
 49
49
-
 50
50
-
 51
51
-
 52
52
-
 53
53
-
 54
54
-
 55
55
-
 56
56
-
 57
57
-
 58
58
-
 59
59
-
 60
60
-
 61
61
-
 62
62
-
 63
63
-
 64
64
-
 65
65
-
 66
66
-
 67
67
-
 68
68
-
 69
69
-
 70
70
-
 71
71
-
 72
72
-
 73
73
-
 74
74
-
 75
75
-
 76
76
-
 77
77
-
 78
78
-
 79
79
-
 80
80
-
 81
81
-
 82
82
-
 83
83
-
 84
84
-
 85
85
-
 86
86
-
 87
87
-
 88
88
-
 89
89
-
 90
90
-
 91
91
-
 92
92
-
 93
93
-
 94
94
-
 95
95
-
 96
96


Diğer dillerde
- español: Dolmar AM3743 El manual del propietario
- français: Dolmar AM3743 Le manuel du propriétaire
- italiano: Dolmar AM3743 Manuale del proprietario
- Deutsch: Dolmar AM3743 Bedienungsanleitung
- português: Dolmar AM3743 Manual do proprietário
- dansk: Dolmar AM3743 Brugervejledning
- Nederlands: Dolmar AM3743 de handleiding
İlgili Makaleler
Diğer Belgeler
-
Makita DLM462 Kullanım kılavuzu
-
Makita DLM537 Kullanım kılavuzu
-
-
Makita DLM Series Kullanım kılavuzu
-
EGO LM2000E El kitabı
-
Makita LM001J Kullanım kılavuzu
-
-
-
Skil 0705 AA Kullanım kılavuzu
-
Skil F0150715 El kitabı