Makita DUR189 Kullanım kılavuzu
- Kategori
- Elektrikli aletler
- Tip
- Kullanım kılavuzu

DUR189
EN Cordless Grass Trimmer INSTRUCTION MANUAL 7
FR MANUEL D’INSTRUCTIONS 17
DE Akku-Rasentrimmer BETRIEBSANLEITUNG 28
IT Tagliabordi a batteria ISTRUZIONI PER L’USO 40
NL Accugrastrimmer GEBRUIKSAANWIJZING 51
ES Cortador Inalámbrico de
Pasto
MANUAL DE
INSTRUCCIONES 62
PT TESOURA PARA GRAMA A
BATERIA MANUAL DE INSTRUÇÕES 73
DA Akku græstrimmer BRUGSANVISNING 84
EL 94
TR KULLANMA KILAVUZU 106

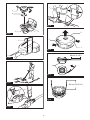
Fig.1
Fig.2
Fig.3
2
3
1
6
78
9
10
11
12 13
4
5
Fig.4
2

1
2
3
Fig.5
1
2
Fig.6
1
Fig.7
2
1
Fig.8
1
Fig.9
1
Fig.10
1
Fig.11
1
2
Fig.12
3

1
2
3
45
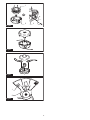
Fig.13
Fig.14
1
3
4
3
2
Fig.15
1
2
Fig.16
Fig.17
1
2
Fig.18
Fig.19
6
5
1
2
3
4
Fig.20
4

1
2
3
4
5
Fig.21
1
Fig.22
Fig.23
2
1
Fig.24
1
Fig.25
1
1
2
Fig.26
1
80 mm (3-1/8”)
Fig.27
100 mm (3-15/16”)
Fig.28
5

2
1
3
Fig.29
Fig.30
Fig.31
1
2
Fig.32
6

7ENGLISH
ENGLISH (Original instructions)
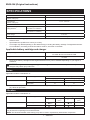
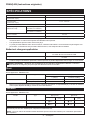
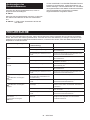
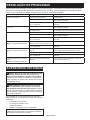
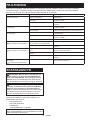
SPECIFICATIONS
Model: DUR189
No load speed
(without cutting tool)
4,000/5,000/6,000 min-1
Overall length
(without cutting tool)
1,510 - 1,610 mm
Nylon cord diameter 2.0 - 2.4 mm
Applicable cutting tool and
cutting diameter
Nylon cutting head
(P/N 198971-4 / 198972-2)
300 mm
Plastic blade
(P/N 198383-1 / 198384-9)
255 mm
Rated voltage D.C. 18 V
Net weight 3.0 - 3.3 kg
without notice.
-
est combination, according to EPTA-Procedure 01/2014, are shown in the table.
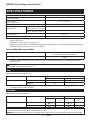
Applicable battery cartridge and charger
Battery cartridge BL1815N / BL1820 / BL1820B / BL1830 / BL1830B / BL1840 /
BL1840B / BL1850 / BL1850B / BL1860B
Charger DC18RC / DC18RD / DC18RE / DC18SD / DC18SE / DC18SF /
DC18SH
• Some of the battery cartridges and chargers listed above may not be available depending on your region of
residence.
WARNING: Only use the battery cartridges and chargers listed above. Use of any other battery cartridges
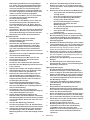
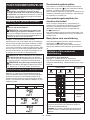
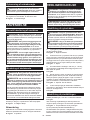
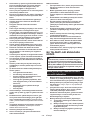
Noise
Applicable standard : EN50636-2-91
Model Type Sound pressure level average
LpA(dB(A)) Uncertainty K (dB(A))
DUR189 Nylon cutting head 78 2.0
Plastic blade 78 3.7
• Even if the sound pressure level listed above is 80 dB (A) or less, the level under working may exceed 80 dB
(A). Wear ear protection.
Vibration
Applicable standard : EN50636-2-91
Model Type Left hand Right hand
ah,W (m/s2)Uncertainty K
(m/s2)
ah,W (m/s2)Uncertainty K
(m/s2)
DUR189 Nylon cutting head 2.5 0.4 2.5 0.1
Plastic blade 2.5 0.6 2.5 0.3
NOTE: The declared vibration total value(s) has been measured in accordance with a standard test method and
may be used for comparing one tool with another.
NOTE: The declared vibration total value(s) may also be used in a preliminary assessment of exposure.

8ENGLISH
WARNING:
value(s) depending on the ways in which the tool is used especially what kind of workpiece is processed.
WARNING: Be sure to identify safety measures to protect the operator that are based on an estimation
of exposure in the actual conditions of use (taking account of all parts of the operating cycle such as the
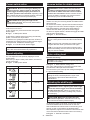
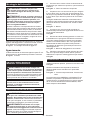
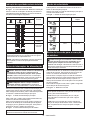
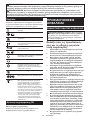
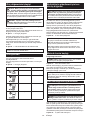
Symbols
The followings show the symbols which may be used
for the equipment. Be sure that you understand their
meaning before use.
Take particular care and attention.
Read instruction manual.
The distance between the tool and
bystanders must be at least 15 m.
360°
Keep bystanders away.
15m(50FT)Keep distance at least 15 m.
Wear a helmet, goggles and ear protection.
Wear protective gloves.
Wear sturdy boots with nonslip soles.
Steeltoed safety boots are recommended.
Do not expose to moisture.
Never use metal blade.
Ni-MH
Li-ion
Only for EU countries
Do not dispose of electric equipment or
battery pack together with household
waste material! In observance of the
European Directives, on Waste Electric
and Electronic Equipment and Batteries
and Accumulators and Waste Batteries and
Accumulators and their implementation
in accordance with national laws, electric
equipment and batteries and battery
pack(s) that have reached the end of
their life must be collected separately and
returned to an environmentally compatible
recycling facility.
EC Declaration of Conformity
For European countries only
The EC declaration of conformity is included as Annex A
to this instruction manual.
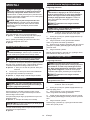
SAFETY WARNINGS
IMPORTANT SAFETY
INSTRUCTIONS
WARNING: Read all safety warnings and
all instructions. Failure to follow the warnings and
Save all warnings and instruc-
tions for future reference.
1. Be familiar with the controls and proper use of
the equipment.
2. Cutting elements continue to rotate after the
3. Never allow children or people unfamiliar with
the instructions to use the machine. Local reg-
ulations may restrict the age of the operator.
4. Stop using the machine while people, espe-
cially children, or pets are nearby.
5. Only use the machine in daylight or good
weather conditions especially when there is a
risk of lightning.
6. Before using the machine and after any
impact, check for signs of wear or damage and
repair as necessary.
7. Take care against injury from any device
After extending new cutter line always return
the machine to its normal operating position
before switching on.
8.
9. This appliance is not intended for use by
persons (including children) with reduced
physical, sensory or mental capabilities, or
lack of experience and knowledge, unless they
have been given supervision or instruction
concerning use of the appliance by a person
responsible for their safety. Children should be
supervised to ensure that they do not play with
the appliance.
10.
Use the tool with the utmost care and attention.
11. Operate the tool only if you are in good phys-
ical condition. Perform all work calmly and
carefully. Use common sense and keep in mind
that the operator or user is responsible for
accidents or hazards occurring to other people
or their property.
12. Never operate the tool when tired, feeling ill or
13.
it shows any signs of unusual operation.

9ENGLISH
14.
not operating the tool and when moving from
one operating position to another.
Intended use of the tool
1. Use right tool. The cordless grass trimmer is
only intended for cutting grass, light weeds. It
should not be used for any other purpose such
as hedge cutting as this may cause injury.
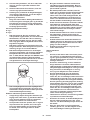
Personal protective equipment
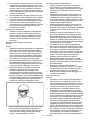
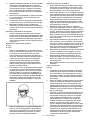
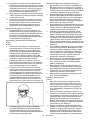
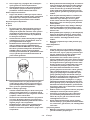
Fig.1
Fig.2
1. Dress Properly. The clothing worn should be
functional and appropriate, i.e. it should be
wear either jewelry or clothing which could
become entangled with high grass. Wear pro-
tective hair covering to contain long hair.
2. When using the tool, always wear sturdy shoes
with a non-slip sole. This protects against
injuries and ensures a good footing.
3. Always wear protective goggles to protect
your eyes from injury when using power tools.
The goggles must comply with ANSI Z87.1 in
the USA, EN 166 in Europe, or AS/NZS 1336
in Australia/New Zealand. In Australia/New
Zealand, it is legally required to wear a face
shield to protect your face, too.
It is an employer's responsibility to enforce
the use of appropriate safety protective equip-
ments by the tool operators and by other per-
sons in the immediate working area.
Electrical and battery safety
1. Avoid dangerous environment. Don't use the
tool in damp or wet locations or expose it to
rain. Water entering the tool will increase the
risk of electric shock.
2.
the manufacturer. A charger that is suitable for
one type of battery pack may create a risk of
3. -
nated battery packs. Use of any other battery
4. When battery pack is not in use, keep it away
from other metal objects, like paper clips,
coins, keys, nails, screws or other small metal
objects, that can make a connection from one
terminal to another. Shorting the battery termi-
5. Under abusive conditions, liquid may be
ejected from the battery; avoid contact. If con-
liquid contacts eyes, seek medical help. Liquid
ejected from the battery may cause irritation or
burns.
6.
cell may explode. Check with local codes for
possible special disposal instructions.
7. Do not open or mutilate the battery(ies).
Released electrolyte is corrosive and may
cause damage to the eyes or skin. It may be
toxic if swallowed.
8. Do not charge battery in rain, or in wet
locations.
Starting up the tool
Fig.3
1. Make sure that there are no children or other
people within a working range of 15 meters
(50 ft), also pay attention to any animals in the
working vicinity. Otherwise stop using the tool.
2. Before use always check that the tool is safe
for operation. Check the security of the cutting
tool and the guard and the switch trigger/lever
for easy and proper action. Check for clean
the switch.
3. Check damaged parts before further use of
the tool. A guard or other part that is damaged
should be carefully checked to determine
that it will operate properly and perform its
intended function. Check for alignment of
moving parts, binding of moving parts, break-
age of parts, mounting, and any other condi-
other part that is damaged should be properly
repaired or replaced by our authorized ser-
vice center unless indicated elsewhere in this
manual.
4. Switch on the motor only when hands and feet
are away from the cutting tool.
5. Before starting make sure that the cutting
tool has no contact with hard objects such as
branches, stones etc. as the cutting tool will
revolve when starting.
6. Make sure there are no electrical cables, water
pipes, gas pipes etc. that could cause a hazard
if damaged by use of the tool.
Method of operation
1. Never operate the machine with damaged
guards or without the guards in place.
2. Only use the tool in good light and visibility.
During the winter season beware of slippery
or wet areas, ice and snow (risk of slipping).
Always ensure a safe footing.
3. Take care against injury to feet and hands from
the cutting tool.
4. Keep hands and feet away from the cutting
means at all times and especially when switch-
ing on the motor.
5. Never cut above waist height.
6. Never stand on a ladder and run the tool.
7. Never work on unstable surfaces.

10 ENGLISH
8. Don't overreach. Keep proper footing and
balance at all times.
9. Remove sand, stones, nails etc. found within
the working range. Foreign particles may
damage the cutting tool and can cause to be
thrown away, resulting in a serious injury.
10. Should the cutting tool hit stones or other hard
inspect the cutting tool.
11. Before commencing cutting, the cutting tool
must have reached full working speed.
12. During operation always hold the tool with
both hands. Never hold the tool with one hand
during use. Always ensure a safe footing.
13. All protective equipment such as guards
supplied with the tool must be used during
operation.
14. Except in case of emergency, never drop
or cast the tool to the ground or this may
severely damage the tool.
15. Never drag the tool on the ground when mov-
ing from place to place, the tool may become
damaged if moved in this manner.
16. Always remove the battery cartridge from the
tool:
— whenever leaving the tool unattended;
— before clearing a blockage;
— before checking, cleaning or working on
the tool;
— before making any adjustments, chang-
ing accessories or storing;
— whenever the tool starts vibrating
unusually;
— whenever transporting the tool.
17. Don't force the tool. It will do the job better and
with less likelihood of a risk of injury at the
rate for which it was designed.
18. Do not operate power tools in explosive atmo-
liquids, gases or dust. Power tools create sparks
which may ignite the dust or fumes.
19. Take a rest to prevent loss of control caused
by fatigue. We recommend to take a 10 to
20-minute rest every hour.
20. Do not use the tool on steep slopes.
21. The shoulder harness must be used during
operation, if supplied with the tool.
Maintenance instructions
1. The condition of the cutting tool, protec-
tive devices and shoulder harness must be
checked before commencing work.
2.
cartridge before carrying out maintenance,
replacing the cutting tool and cleaning the
tool.
3. After use, disconnect the battery cartridge
from the tool and check for damage.
4. Check for loose fasteners and damaged parts
cutting tool.
5. When not in use store the equipment in a dry
location that is locked up or out of children's
reach.
6. Use only the manufacturer's recommended
replacement parts and accessories.
7. Always ensure that ventilation openings are
kept clear of debris.
8. Inspect and maintain the tool regularly, espe-
cially before/after use. Have the tool repaired
only by our authorized service center.
9. Keep handles dry, clean and free from oil and
grease.
SAVE THESE INSTRUCTIONS.
WARNING: DO NOT let comfort or familiarity
with product (gained from repeated use) replace
strict adherence to safety rules for the subject
product. MISUSE or failure to follow the safety
rules stated in this instruction manual may cause
serious personal injury.
Important safety instructions for
battery cartridge
1. Before using battery cartridge, read all instruc-
tions and cautionary markings on (1) battery
charger, (2) battery, and (3) product using
battery.
2. Do not disassemble or tamper with the battery
cartridge.
or explosion.
3. If operating time has become excessively
shorter, stop operating immediately. It may
result in a risk of overheating, possible burns
and even an explosion.
4. If electrolyte gets into your eyes, rinse them
out with clear water and seek medical atten-
tion right away. It may result in loss of your
eyesight.
5. Do not short the battery cartridge:
(1) Do not touch the terminals with any con-
ductive material.
(2) Avoid storing battery cartridge in a con-
tainer with other metal objects such as
nails, coins, etc.
(3) Do not expose battery cartridge to water
or rain.
A battery short can cause a large current
breakdown.
6. Do not store and use the tool and battery car-
tridge in locations where the temperature may
reach or exceed 50 °C (122 °F).
7. Do not incinerate the battery cartridge even if
it is severely damaged or is completely worn
8. Do not nail, cut, crush, throw, drop the battery
cartridge, or hit against a hard object to the
battery cartridge. Such conduct may result in a
9. Do not use a damaged battery.

11 ENGLISH
10. The contained lithium-ion batteries are subject
to the Dangerous Goods Legislation require-
ments.
For commercial transports e.g. by third parties,
forwarding agents, special requirement on pack-
aging and labeling must be observed.
For preparation of the item being shipped, consult-
ing an expert for hazardous material is required.
Please also observe possibly more detailed
national regulations.
battery in such a manner that it cannot move
around in the packaging.
11. When disposing the battery cartridge, remove
it from the tool and dispose of it in a safe
place. Follow your local regulations relating to
disposal of battery.
12. Use the batteries only with the products
Installing the batteries to
-
sive heat, explosion, or leak of electrolyte.
13. If the tool is not used for a long period of time,
the battery must be removed from the tool.
14. During and after use, the battery cartridge may
take on heat which can cause burns or low
temperature burns. Pay attention to the han-
dling of hot battery cartridges.
15. Do not touch the terminal of the tool imme-
diately after use as it may get hot enough to
cause burns.
16. Do not allow chips, dust, or soil stuck into the
terminals, holes, and grooves of the battery
cartridge. It may result in poor performance or
breakdown of the tool or battery cartridge.
17. Unless the tool supports the use near
high-voltage electrical power lines, do not use
the battery cartridge near high-voltage electri-
cal power lines. It may result in a malfunction or
breakdown of the tool or battery cartridge.
18. Keep the battery away from children.
SAVE THESE INSTRUCTIONS.
CAUTION: Only use genuine Makita batteries.
Use of non-genuine Makita batteries, or batteries that
have been altered, may result in the battery bursting
also void the Makita warranty for the Makita tool and
charger.
Tips for maintaining maximum
battery life
1. Charge the battery cartridge before completely
discharged. Always stop tool operation and
charge the battery cartridge when you notice
less tool power.
2. Never recharge a fully charged battery car-
tridge. Overcharging shortens the battery
service life.
3. Charge the battery cartridge with room tem-
perature at 10 °C - 40 °C (50 °F - 104 °F). Let
a hot battery cartridge cool down before
charging it.
4. When not using the battery cartridge, remove
it from the tool or the charger.
5. Charge the battery cartridge if you do not use
it for a long period (more than six months).
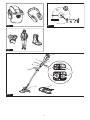
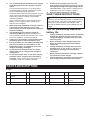
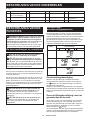
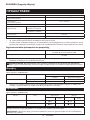
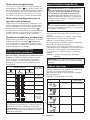
PARTS DESCRIPTION
Fig.4
1Battery cartridge 2 3Switch trigger 4Speed indicator
5Auto speed control
indicator
6Power lamp 7Main power button 8Reverse button
9Hanger 10 Lock sleeve 11 Handle 12 Protector (cutting tool
guard)
13 Shoulder harness - - - - - -

12 ENGLISH
FUNCTIONAL DESCRIPTION
WARNING: Always be sure that the tool is
before adjusting or checking function on the tool.
start-up.
Installing or removing battery cartridge
CAUTION:
installing or removing of the battery cartridge.
CAUTION: Hold the tool and the battery car-
cartridge. Failure to hold the tool and the battery
and result in damage to the tool and battery cartridge
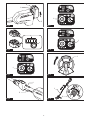
Fig.5: 1. Red indicator 2. Button 3. Battery cartridge
To remove the battery cartridge, slide it from the tool
while sliding the button on the front of the cartridge.
To install the battery cartridge, align the tongue on the
battery cartridge with the groove in the housing and slip
it into place. Insert it all the way until it locks in place
with a little click. If you can see the red indicator on the
upper side of the button, it is not locked completely.
CAUTION: Always install the battery cartridge
fully until the red indicator cannot be seen. If not,
you or someone around you.
CAUTION: Do not install the battery cartridge
forcibly. If the cartridge does not slide in easily, it is
not being inserted correctly.
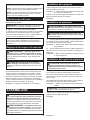
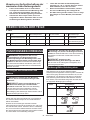
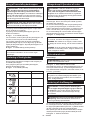
Tool / battery protection system
The tool is equipped with a tool/battery protection sys-
motor to extend tool and battery life. The tool will auto-
matically stop during operation if the tool or battery is
placed under one of the following conditions:
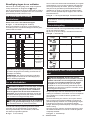
Status Indicator lamps
On Blinking
Overload
Overheat
Over
discharge
Overload protection
If the tool is overloaded by entangled weeds or other
debris, and the middle indicators start blinking and
the tool automatically stops.
that caused the tool to become overloaded. Then turn
the tool on to restart.
Overheat protection for tool or
battery
There are two types of overheating; tool overheating
and battery overheating. When the tool over heating
occurs, all speed indicators blink. When the battery over
heating occurs, indicator blinks.
If the overheating occurs, the tool stops automatically.
Let the tool and/or battery cool down before turning the
tool on again.
Overdischarge protection
When the battery capacity becomes low, the tool stops
automatically and indicator blinks.
If the tool does not operate even when the switches are
operated, remove the batteries from the tool and charge
the batteries.
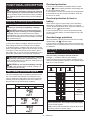
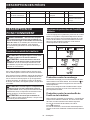
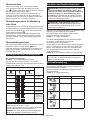
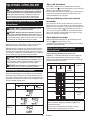
Indicating the remaining battery
capacity
Only for battery cartridges with the indicator
Fig.6: 1. Indicator lamps 2. Check button
Press the check button on the battery cartridge to indi-
cate the remaining battery capacity. The indicator lamps
light up for a few seconds.
Indicator lamps Remaining
capacity
Lighted Blinking
75% to 100%
50% to 75%
25% to 50%
0% to 25%
Charge the
battery.
The battery
may have
malfunctioned.
NOTE: Depending on the conditions of use and the
from the actual capacity.
NOTE:
the battery protection system works.

13 ENGLISH
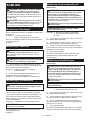
Power switch action
WARNING: Before installing the battery car-
tridge on the tool, always check to see that the
switch trigger actuates properly and returns to
the "OFF" position when released. Operating a tool
with a switch that does not actuate properly can lead
CAUTION:
switch when carrying. The tool may start uninten-
Press and hold the main power button for some sec-
onds to turn on the tool.
button again.
Fig.7: 1. Main power button
To prevent the switch trigger from being accidentally
released by the grasp) and then pull the switch trigger.
To stop the tool, release the switch trigger.
Fig.8: 1.2. Switch trigger
NOTE:
tool is left one minute without any operations.
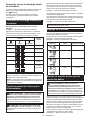
Speed adjusting
power button.
Each time you tap the main power button, the level of
speed will change.
Fig.9: 1. Main power button
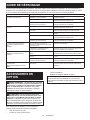
Indicator Mode Rotation speed
Auto 4,000 - 6,000 min-1
High 6,000 min-1
Medium 5,000 min-1
Low 4,000 min-1
Reverse button for debris removal
WARNING:
the battery cartridge before you remove entan-
gled weeds or debris which the reverse rotation
function can not remove.
remove the battery cartridge may result in serious
This tool has a reverse button to change the direction of
rotation. It is only for removing weeds and debris entan-
gled in the tool.
To reverse the rotation, tap the reverse button and pull
the trigger when the tool’s head is stopped. The power
lamp starts blinking, and the tool's head rotates in
reverse direction when you pull the switch trigger.
To return to regular rotation, release the trigger and wait
until the tool's head stops.
Fig.10: 1. Reverse button
NOTE: During the reverse rotation, the tool operates
only for a short period of time and then automatically
stops.
NOTE: Once the tool is stopped, the rotation returns
to regular direction when you start the tool again.
NOTE: If you tap the reverse button while the tool's
head is still rotating, the tool comes to stop and to be
ready for reverse rotation.
Nylon cutting head
Optional accessory
NOTICE: The bump feed will not operate properly if
the head is not rotating.
Fig.11: 1.
The nylon cutting head is a dual string trimmer head
provided with a bump & feed mechanism.
To feed out the nylon cord, tap the cutting head against
the ground while rotating.
NOTE: If the nylon cord does not feed out while
tapping the head, rewind/replace the nylon cord
by following the procedures described under
“Maintenance”.
Adjusting the shaft length
WARNING: Before adjusting the shaft length,
release the switch trigger and remove the battery
cartridge from the tool. Failure to release the trig-
ger and removing the battery cartridge may cause a
CAUTION: Make sure to tighten the lock
sleeve before operation. Otherwise the tool may
counterclockwise until the arrow mark on the lock
sleeve indicates the unlock mark on the housing, and
pull out or push in the shaft to the desired length.
on the lock sleeve indicates the lock mark on the housing.
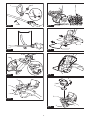
Fig.12: 1. Shaft 2. Lock sleeve

14 ENGLISH
ASSEMBLY
WARNING: Always be sure that the tool is
before carrying out any work on the tool. Failure to
WARNING: Never start the tool unless it is
completely assembled. Operation of the tool in a
partially assembled state may result in serious per-
Installing the handle
Fit the handle onto the shaft and secure it with the bolt
and the knob.
Fig.13: 1. Handle 2. Bolt 3. Knob 4. Cutting tool
side 5. Battery cartridge side
Make sure that the handle is located in the straight area
Fig.14
Installing the protector
WARNING: Never use the tool without the
protector illustrated in place. Failure to do so can
CAUTION: Take care not to injure yourself on
the cutter for cutting the nylon cord.
1. Attach the protector and the protector holder to the
-
tions and grooves on them to their counter parts.
Fig.15: 1. Protector 2. Groove 3.
4. Protector holder
2. Tighten the hex socket head bolts securely to
fasten the protector and the protector holder.
Fig.16: 1. Hex socket head bolt 2. Hex wrench
Installing the wire guard
CAUTION: Before adjusting the wire guard,
wait for the cutting head comes to standstill. Do
not adjust the wire guard with your foot.
Fig.17
cutting head, insert the wire guard so that it controls the
cutting range of the mowing line.
Slightly expand the wire guard outward and then insert
it into the holes on the protector.
Fig.18: 1. Wire guard 2. Hole (on both sides)
NOTICE: Do not expand the wire guard outward too
much. Otherwise it may break.
When wire guard is not in use, lift it for the idle position.
Fig.19
Installing nylon cutting head
Optional accessory
CAUTION: If the nylon cutting head acciden-
tally impacts a rock or hard object during oper-
ation, stop the tool and inspect for any damage.
If the nylon cutting head is damaged, replace it
immediately. Use of a damaged cutting tool could
CAUTION: Be sure to remove the hex wrench
after installation.
NOTICE: Be sure to use genuine Makita nylon
cutting head.
Fig.20: 1. Nylon cutting head 2. Metal guard
3. Spindle 4. Hex wrench 5. Tighten
6. Loosen
1. Turn the tool upside down so that you can replace
the cutting tool easily.
2. Insert the hex wrench through the hole on the
motor housing and rotate the spindle until the spindle is
locked.
3. Place the nylon cutting head onto the threaded
spindle directly and tighten it by turning in the tightening
4. Remove the hex wrench.
To remove the nylon cutting head, turn it in the opposite
direction while locking the spindle with the hex wrench.
Installing plastic blade
Optional accessory
CAUTION: If the plastic blade accidentally
impacts a rock or hard object during operation,
stop the tool and inspect for any damage. If the
plastic blade is damaged, replace it immediately.
Use of a damaged cutting tool could result in serious
CAUTION: Be sure to remove the hex wrench
after installation.
NOTICE: Be sure to use genuine Makita plastic
blade.
Fig.21: 1. Plastic blade 2. Metal guard 3. Hex
wrench 4. Tighten 5. Loosen
1. Turn the tool upside down so that you can replace
the cutting tool easily.
2. Insert the hex wrench through the hole on the
motor housing and rotate the spindle until the spindle is
locked.
3. Place the plastic blade onto the threaded spindle
directly and tighten it by turning in the tightening direc-
4. Remove the hex wrench.
To remove the plastic blade, turn it in the opposite direc-
tion while locking the spindle with the hex wrench.

15 ENGLISH
Hex wrench storage
CAUTION: Be careful not to leave the hex
wrench inserted in the tool head. It may cause
When not in use, store the hex wrench as shown in the
Fig.22: 1. Hex wrench
OPERATION
Correct handling of tool
WARNING: Always position the tool on your
right-hand side. Correct positioning of the tool allows
for maximum control and will reduce the risk of seri-
WARNING: Be extremely careful to maintain
control of the tool at all times. Do not allow the
work vicinity. Failure to keep control of the tool
operator.
WARNING: To avoid accident, leave more
than 15m (50 ft) distance between operators when
two or more operators work in one area. Also,
arrange a person to observe the distance between
operators. If someone or an animal enter the
working area, immediately stop the operation.
Fig.23
Attachment of shoulder harness
CAUTION:
Always use the shoulder harness
attached. Before operation, adjust the shoulder har-
ness according to the user size to prevent fatigue.
CAUTION: When you use the tool in combi-
nation of the backpack-type power supply such
as portable power pack, do not use the shoulder
harness included in the tool package, but use the
hanging band recommended by Makita.
If you put on the shoulder harness included in the
tool package and the shoulder harness of the back-
pack-type power supply at the same time, removing
case of an emergency, and it may cause an accident
Makita Authorized Service Centers.
Connect the clasp of the shoulder harness to the hanger
part of the housing. Put the shoulder harness on. Be sure
that the buckles are locked completely in place.
Fig.24: 1. Clasp 2. Hanger
Detachment
The buckle is provided with a means of quick release.
Simply squeeze the sides of the buckle to release the tool.
Fig.25: 1. Buckle
MAINTENANCE
WARNING:
Always be sure that the tool is
attempting to perform inspection or maintenance on the
tool.
NOTICE: Never use gasoline, benzine, thinner,
alcohol or the like. Discoloration, deformation or
cracks may result.
Replacing the nylon cord
WARNING:
Use nylon cord with diameter spec-
line, metal wire, rope or the like. Use recommended
nylon cord only, otherwise it may cause damage to the
WARNING:
Make sure that the cover of the nylon cut-
ting head is secured to the housing properly as described
below. Failure to properly secure the cover may cause the nylon
1.
cover, then remove the spool.
Fig.26: 1. Latch 2. Cover
2.
Prepare approximately 3 m (9 ft) of new nylon cord.
Fold the new nylon cord with one end become approxi-
the new nylon cord into the notch in the center of the spool.
rotation (right-hand direction indicated by RH on the side of the spool).
Fig.27: 1. Spool
3.
cords, leaving the ends temporarily hooked through a
notch on the side of the spool.
Fig.28
4.
Mount the spool in the housing so that the grooves and
protrusions on the spool match up with those in the housing.
Keep the side with letters on the spool visible on the top. Now,
unhook the ends of the cord from their temporary position and
feed the cords through the eyelets to come out of the housing.
Fig.29: 1. Spool 2. Housing 3. Eyelet
5. Align the protrusion on the underside of the cover
onto the housing to secure it.
Fig.30
Replacing the plastic blade
Replace the plastic blade if it is worn out or broken.
Fig.31
When installing the plastic blade, align the direction of
the arrow on the blade with that of the protector.
Fig.32:
1. Arrow on the protector 2. Arrow on the blade
To maintain product SAFETY and RELIABILITY,
be performed by Makita Authorized or Factory Service
Centers, always using Makita replacement parts.

16 ENGLISH
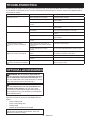
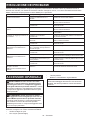
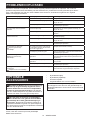
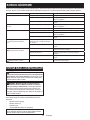
TROUBLESHOOTING
do not attempt to dismantle the tool. Instead, ask Makita Authorized Service Centers, always using Makita replace-
ment parts for repairs.
State of abnormality Probable cause (malfunction) Remedy
Motor does not run. Battery cartridge is not installed. Install the battery cartridge.
Battery problem (under voltage)
replace battery.
The drive system does not work
correctly.
Ask your local authorized service center for repair.
Motor stops running after a little use. Battery's charge level is low.
replace battery.
Overheating. Stop using of tool to allow it to cool down.
It does not reach maximum RPM. Battery is installed improperly. Install the battery cartridge as described in this
manual.
Battery power is dropping.
replace battery.
The drive system does not work
correctly.
Ask your local authorized service center for repair.
Cutting tool does not rotate:
stop the machine immediately!
cutting tool.
The drive system does not work
correctly.
Ask your local authorized service center for repair.
Abnormal vibration:
stop the machine immediately!
One end of the nylon cord has been
broken.
Tap the nylon cutting head against the ground while
it is rotating to cause the cord to feed.
Plastic blade(s) is broken. Replace broken plastic blade(s) with new one(s).
The drive system does not work
correctly.
Ask your local authorized service center for repair.
Cutting tool and motor cannot stop:
Remove the battery immediately!
Electric or electronic malfunction. Remove the battery and ask your local authorized
service center for repair.
OPTIONAL ACCESSORIES
WARNING: Do not mount a metal blade on
this tool and only use the recommended accesso-
ries or attachments indicated in this manual. The
use of a metal blade or any other accessory or attach-
CAUTION: These accessories or attachments
are recommended for use with your Makita tool
The use of any other
accessories or attachments might present a risk of
for its stated purpose.
If you need any assistance for more details regard-
ing these accessories, ask your local Makita Service
Center.
• Nylon cutting head
• Nylon cord (cutting line)
• Plastic blade
• Makita genuine battery and charger
NOTE: Some items in the list may be included in the
tool package as standard accessories. They may

17 FRANÇAIS
FRANÇAIS (Instructions originales)
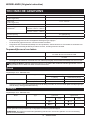
SPÉCIFICATIONS
Modèle : DUR189
Vitesse à vide
(sans outil de coupe)
4 000/5 000/6 000 min-1
Longueur totale
(sans outil de coupe)
1 510 - 1 610 mm
Diamètre du cordon en nylon 2,0 à 2,4 mm
Outil de coupe applicable et
diamètre de coupe
(P/N 198971-4 / 198972-2)
300 mm
Lame en plastique
(P/N 198383-1 / 198384-9)
255 mm
Tension nominale 18 V CC
Poids net 3,0 - 3,3 kg
plus lourde, conformément à la procédure EPTA 01/2014, sont indiquées dans le tableau.
Batterie et chargeur applicables
Batterie BL1815N / BL1820 / BL1820B / BL1830 / BL1830B / BL1840 /
BL1840B / BL1850 / BL1850B / BL1860B
Chargeur DC18RC / DC18RD / DC18RE / DC18SD / DC18SE / DC18SF /
DC18SH
•
Certains chargeurs et batteries répertoriés ci-dessus peuvent ne pas être disponibles selon la région où vous résidez.
AVERTISSEMENT : N’utilisez que les batteries et les chargeurs répertoriés ci-dessus. L’utilisation
d’autres batteries et chargeurs peut provoquer des blessures et/ou un incendie.
Bruit
Norme applicable : EN50636-2-91
Modèle Type Niveau de pression sonore moyenne
LpA(dB(A)) Incertitude K (dB(A))
DUR189 78 2,0
Lame en plastique 78 3,7
• Même si le niveau de pression sonore indiqué ci-dessus est inférieur ou égal à 80 dB (A), le niveau en fonction-
nement peut dépasser 80 dB (A). Portez un serre-tête antibruit.
Vibration
Norme applicable : EN50636-2-91
Modèle Type Main gauche Main droite
ah,W (m/s2)Incertitude K
(m/s2)
ah,W (m/s2)Incertitude K
(m/s2)
DUR189 2,5 0,4 2,5 0,1
Lame en plastique 2,5 0,6 2,5 0,3
NOTE : La ou les valeurs de vibration totales déclarées ont été mesurées conformément à la méthode de test
standard et peuvent être utilisées pour comparer les outils entre eux.
NOTE : La ou les valeurs de vibration totales déclarées peuvent aussi être utilisées pour l’évaluation préliminaire
de l’exposition.

18 FRANÇAIS
AVERTISSEMENT : -
rente de la ou des valeurs déclarées, suivant la façon dont l’outil est utilisé, particulièrement selon le type
de pièce usinée.
AVERTISSEMENT : Les mesures de sécurité à prendre pour protéger l’utilisateur doivent être basées
sur une estimation de l’exposition dans des conditions réelles d’utilisation (en tenant compte de toutes
les composantes du cycle d’utilisation, comme par exemple le moment de sa mise hors tension, lorsqu’il
tourne à vide et le moment de son déclenchement).
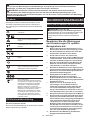
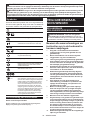
Symboles
Vous trouverez ci-dessous les symboles susceptibles
d’être utilisés pour l’appareil. Veillez à comprendre leur
Veuillez être prudent et rester attentif.
Lire le mode d’emploi.
La distance entre l’outil et les badauds doit
être d’au moins 15 m.
360°
Tenir les personnes à l’écart.
15m(50FT)Maintenez une distance d’au moins 15 m.
Portez un casque, des lunettes à coques et
un serre-tête antibruit.
Portez des gants de protection.
Portez des bottes robustes à semelles anti-
dérapantes. Il est conseillé de porter des
chaussures avec embout de sécurité.
Ne pas exposer à l’eau.
Ni-MH
Li-ion
Uniquement pour les pays européens
les batteries avec vos ordures ménagères !
Conformément aux directives européennes
relatives aux déchets d’équipements
électriques et électroniques et aux piles
et accumulateurs ainsi qu’aux déchets de
piles et d’accumulateurs et leur mise en
œuvre conformément aux lois nationales,
les équipements électriques et les piles et
une usine de recyclage respectueuse de
l’environnement.
Déclaration de conformité CE
Pour les pays européens uniquement
La déclaration de conformité CE est fournie en Annexe
A à ce mode d’emploi.
CONSIGNES DE
SÉCURITÉ
CONSIGNES DE SÉCURITÉ
IMPORTANTES
AVERTISSEMENT : Lisez toutes les
consignes de sécurité et toutes les instructions. Il
y a risque d’électrocution, d’incendie et/ou de graves
blessures si les mises en garde et les instructions ne
sont pas respectées.
Conservez toutes les mises en
garde et instructions pour réfé-
rence ultérieure.
1. Familiarisez-vous avec les commandes et
l’utilisation correcte de l’appareil.
2. Les éléments de coupe continuent de tourner
une fois le moteur coupé.
3. Ne laissez jamais les enfants ou les personnes
qui ne sont pas familiarisées avec ces instruc-
tions utiliser la machine. Les réglementations
locales peuvent limiter l’âge de l’utilisateur.
4. Arrêtez d’utiliser la machine en présence de
personnes, particulièrement les enfants et
animaux domestiques, à proximité.
5. N’utilisez la machine qu’à la lumière du jour ou
-
ser la machine par mauvais temps, particuliè-
rement en cas d’orage.
6. Avant d’utiliser la machine et après un impact,
-
rez au besoin.
7. Prenez garde de ne pas vous blesser avec le
ramenez toujours la machine à sa position
de fonctionnement normal avant de la mettre
sous tension.
8.
métalliques.
9. Cet appareil n’est pas destiné à être utilisé par
des personnes (y compris les enfants) aux
facultés physiques, sensorielles ou mentales
diminuées ou sans expérience ni expertise, à
moins qu’une personne responsable de leur
sécurité ne leur fournisse la surveillance et les
instructions nécessaires à l’utilisation de cet
appareil. Les enfants doivent être sous la sur-
jouent pas avec l’appareil.

19 FRANÇAIS
10. Soyez toujours très prudent et attentif lorsque
vous utilisez l’outil.
11. N’utilisez l’outil que si vous êtes en bonne
condition physique. Travaillez toujours en
faisant preuve de calme et de prudence. Faites
preuve de bons sens et gardez à l’esprit que
l’opérateur ou l’utilisateur est responsable des
accidents ou risques encourus par les per-
sonnes ou leur propriété.
12. N’utilisez jamais l’outil lorsque vous êtes
fatigué, malade ou sous l’emprise d’alcool, de
drogues ou de médicaments.
13. Si vous remarquez un fonctionnement inhabi-
tuel de l’outil, éteignez-le immédiatement.
14. Éloignez les doigts de la gâchette lorsque
vous n’utilisez pas l’outil et lorsque vous vous
déplacez d’un point à un autre.
Utilisation prévue de l’outil
1.
exclusivement conçu pour couper l’herbe ou les
exemple, sous peine de provoquer des blessures.
Équipement de protection individuelle
Fig.1
Fig.2
1. Portez des vêtements adéquats. Les vête-
ments portés doivent être fonctionnels et
adéquats, c’est-à-dire moulants sans être
toutefois gênants. Ne portez ni bijoux ni vête-
ments susceptibles de s’enchevêtrer dans
retenir les cheveux longs.
2. Lorsque vous utilisez l’outil, portez toujours
des chaussures robustes à semelles antidéra-
pantes. Ceci vous protègera des blessures et
garantira un bon appui.
3.
Pour protéger vos yeux des blessures lorsque
vous utilisez un outil électrique, portez tou-
jours des lunettes de protection, lesquelles
doivent être conformes à ANSI Z87.1 aux
États-Unis, EN 166 en Europe ou AS/NZS 1336
en Australie/Nouvelle-Zélande. En Australie/
Nouvelle-Zélande, la loi exige également le port
d’un écran facial pour se protéger le visage.
L’employeur est responsable d’imposer le
port d’équipements de sécurité appropriés
par les utilisateurs de l’outil et par les autres
personnes se trouvant à proximité de la zone
de travail.
Sécurité électrique et sécurité des batteries
1. Évitez les environnements dangereux.
N’utilisez pas l’outil dans un endroit humide, ni
ne l’exposez à la pluie. Le risque d’électrocu-
tion augmente si de l’eau pénètre dans l’outil.
2.
Rechargez la batterie uniquement avec le char-
pour un type de batterie peut être à l’origine d’un
incendie s’il est utilisé avec une autre batterie.
3. Utilisez l’outil électrique uniquement avec la
de toute autre batterie peut présenter un
risque de blessure et d’incendie.
4.
Lorsque vous n’utilisez pas la batterie, tenez-la à
l’écart des objets métalliques, comme des trom-
bones, pièces de monnaie, clés, clous, vis ou
autres petits objets métalliques, susceptibles de
créer une connexion entre deux bornes. Court-
circuiter les bornes d’une batterie entre elles
peut provoquer des brûlures ou un incendie.
5.
Dans des conditions d’utilisation inadéquate, il
peut y avoir une fuite de l’électrolyte de la batterie.
Le cas échéant, évitez tout contact avec ce liquide.
En cas de contact accidentel, rincez à l’eau. Si le
liquide entre en contact avec les yeux, consultez
un médecin. Le liquide s’échappant de la batterie
peut provoquer une irritation ou des brûlures.
6. Ne jetez pas la ou les batteries au feu.
L’élément de la pile pourrait exploser.
Consultez les codes locaux pour de possibles
instructions de mise au rebut spéciales.
7. N’ouvrez ni ne manipulez la ou les batteries.
L’électrolyte qui s’échappe de la batterie est
corrosif et peut irriter la peau ou les yeux. Il
peut être toxique en cas d’ingestion.
8. Ne chargez pas la batterie sous la pluie ou
dans un endroit mouillé.
Mise en marche de l’outil
Fig.3
1.
Assurez-vous qu’il n’y a pas d’enfants ou d’autres
personnes dans un rayon de 15 m autour de la zone
de travail. Faites également attention aux animaux à
proximité. Autrement, arrêtez d’utiliser l’outil.
2. -
de coupe, du carter de protection et de la
gâchette ou du levier pour un fonctionnement
sont propres et sèches et testez la fonction de
marche/arrêt de la gâchette.
3.
soigneusement le carter de protection ou toute
autre pièce endommagés pour vous assurer
qu’ils fonctionnent bien et remplissent leurs
fonctions respectives. Assurez-vous que les
pièces en mouvement ne sont pas désalignées
cassée ou la présence de toute autre condition
carter de protection ou toute autre pièce sont
endommagés, ils doivent être réparés ou rem-
placés de manière adéquate par notre centre
de service après-vente agréé sauf indication
contraire dans ce manuel.

20 FRANÇAIS
4. Démarrez le moteur uniquement lorsque les
mains et les pieds sont éloignés de l’outil de
coupe.
5. Avant la mise en marche, assurez-vous que
l’outil de coupe n’entre pas en contact avec
des objets durs comme des branches, des
pierres ou autres, car l’outil de coupe tourne
au démarrage.
6. Assurez-vous qu’il n’y a pas de câbles élec-
triques, de conduites d’eau, de conduites
de gaz, etc., présentant un risque s’ils sont
endommagés suite à l’utilisation de l’outil.
Utilisation
1. N’utilisez jamais la machine si le carter de
protection est endommagé ou n’est pas posé.
2. N’utilisez l’outil qu’avec une bonne visibilité
et un bon éclairage. En hiver, faites attention
aux sols glissants ou aux zones humides,
à la glace et à la neige (risque de glissade).
Assurez-vous toujours d’avoir une bonne
assise.
3. Prenez garde de ne pas vous blesser les pieds
et les mains avec l’outil de coupe.
4. Éloignez les mains et les pieds du mécanisme
de coupe en tout temps et particulièrement au
démarrage du moteur.
5. Ne réalisez jamais de coupe plus haut que
votre taille.
6. N’utilisez jamais l’outil en vous tenant sur une
échelle.
7. Ne travaillez jamais sur des surfaces instables.
8. Ne vous penchez pas trop loin. Maintenez
constamment une bonne assise et un bon
équilibre.
9. Enlevez le sable, les pierres, les clous ou
autres se trouvant dans le rayon d’utilisation
de l’outil. Les corps étrangers peuvent endom-
mager l’outil de coupe et être projetés, provo-
quant de graves blessures.
10. Si l’outil de coupe heurte des pierres ou
d’autres objets durs, coupez immédiatement le
moteur et inspectez l’outil de coupe.
11. Attendez que l’outil de coupe atteigne sa
pleine vitesse pour commencer la coupe.
12. Tenez toujours l’outil à deux mains pendant
le fonctionnement. Ne tenez jamais l’outil
d’une seule main pendant le fonctionnement.
Assurez-vous toujours d’avoir une bonne
assise.
13. L’ensemble des dispositifs de protection
comme les carters de protection fournis avec
l’outil doivent être utilisés pendant le fonction-
nement de l’outil.
14. Sauf en cas d’urgence, ne laissez jamais tom-
ber l’outil, ni ne le lancez au sol sous peine de
gravement l’endommager.
15. Ne traînez pas l’outil au sol en vous déplaçant
d’un endroit à l’autre sous peine d’endomma-
ger l’outil.
16. Retirez toujours la batterie de l’outil :
— chaque fois que vous devez laisser l’outil
sans surveillance ;
— avant de débloquer l’outil ;
— -
toyage ou l’entretien de l’outil ;
— -
cer des accessoires ou de ranger l’outil ;
— chaque fois que l’outil se met à vibrer de
manière inhabituelle ;
— chaque fois que vous transportez l’outil.
17. Ne forcez jamais sur l’outil. Si vous respectez
le régime pour lequel il a été conçu, il réalisera
un travail de meilleure qualité et avec moins de
risque de blessures.
18.
N’utilisez pas un outil électrique dans un envi-
ronnement explosif, en présence de liquides,
Les outils électriques produisent des étincelles qui
19. Reposez-vous régulièrement pour empêcher la
perte du contrôle due à la fatigue. Nous recom-
mandons de faire une pause de 10 à 20 minutes
toutes les heures.
20. N’utilisez pas l’outil dans les pentes trop
abruptes.
21. La bandoulière doit être utilisée pendant l’utili-
sation, si elle est fournie avec l’outil.
Instructions d’entretien
1. -
tifs de protection et de la bandoulière avant de
commencer la tâche.
2. Coupez le moteur et retirez la batterie avant
coupe ou de nettoyer l’outil.
3. Après utilisation, déconnectez la batterie de
4.
serrées ni de pièces endommagées, comme des
chutes à moitié découpées dans l’outil de coupe.
5. Rangez l’appareil dans un endroit sec fermé
ou hors de portée des enfants lorsque vous ne
l’utilisez pas.
6. N’utilisez que les pièces de rechange et acces-
soires recommandés par le fabricant.
7. Assurez-vous toujours que les bouches d’aé-
ration ne sont pas obstruées par des débris.
8. Procédez régulièrement à l’inspection et à
l’entretien de l’outil, particulièrement avant/
après son utilisation. Faites réparer l’outil
uniquement par notre centre de service après-
vente agréé.
9. Gardez toutes les poignées sèches, propres et
sans trace d’huile ou de graisse.
CONSERVEZ CES
INSTRUCTIONS.
AVERTISSEMENT : NE vous laissez PAS
sentiment d’aisance et de familiarité avec le
produit, en négligeant le respect rigoureux des
consignes de sécurité qui accompagnent le pro-
duit en question. La MAUVAISE UTILISATION de
l’outil ou l’ignorance des consignes de sécurité
indiquées dans ce mode d’emploi peut entraîner
de graves blessures.
Sayfa yükleniyor...
Sayfa yükleniyor...
Sayfa yükleniyor...
Sayfa yükleniyor...
Sayfa yükleniyor...
Sayfa yükleniyor...
Sayfa yükleniyor...
Sayfa yükleniyor...
Sayfa yükleniyor...
Sayfa yükleniyor...
Sayfa yükleniyor...
Sayfa yükleniyor...
Sayfa yükleniyor...
Sayfa yükleniyor...
Sayfa yükleniyor...
Sayfa yükleniyor...
Sayfa yükleniyor...
Sayfa yükleniyor...
Sayfa yükleniyor...
Sayfa yükleniyor...
Sayfa yükleniyor...
Sayfa yükleniyor...
Sayfa yükleniyor...
Sayfa yükleniyor...
Sayfa yükleniyor...
Sayfa yükleniyor...
Sayfa yükleniyor...
Sayfa yükleniyor...
Sayfa yükleniyor...
Sayfa yükleniyor...
Sayfa yükleniyor...
Sayfa yükleniyor...
Sayfa yükleniyor...
Sayfa yükleniyor...
Sayfa yükleniyor...
Sayfa yükleniyor...
Sayfa yükleniyor...
Sayfa yükleniyor...
Sayfa yükleniyor...
Sayfa yükleniyor...
Sayfa yükleniyor...
Sayfa yükleniyor...
Sayfa yükleniyor...
Sayfa yükleniyor...
Sayfa yükleniyor...
Sayfa yükleniyor...
Sayfa yükleniyor...
Sayfa yükleniyor...
Sayfa yükleniyor...
Sayfa yükleniyor...
Sayfa yükleniyor...
Sayfa yükleniyor...
Sayfa yükleniyor...
Sayfa yükleniyor...
Sayfa yükleniyor...
Sayfa yükleniyor...
Sayfa yükleniyor...
Sayfa yükleniyor...
Sayfa yükleniyor...
Sayfa yükleniyor...
Sayfa yükleniyor...
Sayfa yükleniyor...
Sayfa yükleniyor...
Sayfa yükleniyor...
Sayfa yükleniyor...
Sayfa yükleniyor...
Sayfa yükleniyor...
Sayfa yükleniyor...
Sayfa yükleniyor...
Sayfa yükleniyor...
Sayfa yükleniyor...
Sayfa yükleniyor...
Sayfa yükleniyor...
Sayfa yükleniyor...
Sayfa yükleniyor...
Sayfa yükleniyor...
Sayfa yükleniyor...
Sayfa yükleniyor...
Sayfa yükleniyor...
Sayfa yükleniyor...
Sayfa yükleniyor...
Sayfa yükleniyor...
Sayfa yükleniyor...
Sayfa yükleniyor...
Sayfa yükleniyor...
Sayfa yükleniyor...
Sayfa yükleniyor...
Sayfa yükleniyor...
Sayfa yükleniyor...
Sayfa yükleniyor...
Sayfa yükleniyor...
Sayfa yükleniyor...
Sayfa yükleniyor...
Sayfa yükleniyor...
Sayfa yükleniyor...
Sayfa yükleniyor...
-
 1
1
-
 2
2
-
 3
3
-
 4
4
-
 5
5
-
 6
6
-
 7
7
-
 8
8
-
 9
9
-
 10
10
-
 11
11
-
 12
12
-
 13
13
-
 14
14
-
 15
15
-
 16
16
-
 17
17
-
 18
18
-
 19
19
-
 20
20
-
 21
21
-
 22
22
-
 23
23
-
 24
24
-
 25
25
-
 26
26
-
 27
27
-
 28
28
-
 29
29
-
 30
30
-
 31
31
-
 32
32
-
 33
33
-
 34
34
-
 35
35
-
 36
36
-
 37
37
-
 38
38
-
 39
39
-
 40
40
-
 41
41
-
 42
42
-
 43
43
-
 44
44
-
 45
45
-
 46
46
-
 47
47
-
 48
48
-
 49
49
-
 50
50
-
 51
51
-
 52
52
-
 53
53
-
 54
54
-
 55
55
-
 56
56
-
 57
57
-
 58
58
-
 59
59
-
 60
60
-
 61
61
-
 62
62
-
 63
63
-
 64
64
-
 65
65
-
 66
66
-
 67
67
-
 68
68
-
 69
69
-
 70
70
-
 71
71
-
 72
72
-
 73
73
-
 74
74
-
 75
75
-
 76
76
-
 77
77
-
 78
78
-
 79
79
-
 80
80
-
 81
81
-
 82
82
-
 83
83
-
 84
84
-
 85
85
-
 86
86
-
 87
87
-
 88
88
-
 89
89
-
 90
90
-
 91
91
-
 92
92
-
 93
93
-
 94
94
-
 95
95
-
 96
96
-
 97
97
-
 98
98
-
 99
99
-
 100
100
-
 101
101
-
 102
102
-
 103
103
-
 104
104
-
 105
105
-
 106
106
-
 107
107
-
 108
108
-
 109
109
-
 110
110
-
 111
111
-
 112
112
-
 113
113
-
 114
114
-
 115
115
-
 116
116


Makita DUR189 Kullanım kılavuzu
- Kategori
- Elektrikli aletler
- Tip
- Kullanım kılavuzu
diğer dillerde
- español: Makita DUR189 Manual de usuario
- français: Makita DUR189 Manuel utilisateur
- italiano: Makita DUR189 Manuale utente
- Deutsch: Makita DUR189 Benutzerhandbuch
- português: Makita DUR189 Manual do usuário
- dansk: Makita DUR189 Brugermanual
- Nederlands: Makita DUR189 Handleiding