
AM3746
EN
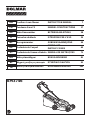
Cordless Lawn Mower INSTRUCTION MANUAL 7
FR
Tondeuse Sans Fil MANUEL D’INSTRUCTIONS 17
DE
Akku Rasenmäher BETRIEBSANLEITUNG 28
IT
Tosaerba a batteria ISTRUZIONI PER L’USO 39
NL
Accugrasmaaier GEBRUIKSAANWIJZING 50
ES
Cortadora de Cesped
MANUAL DE
INSTRUCCIONES
60
PT
Cortadora de Grama a Bateria MANUAL DE INSTRUÇÕES 71
DA
Akku-plæneklipper BRUGSANVISNING 81
EL
Μηχανή γκαζόν με μπαταρία ΕΓΧΕΙΡΙΔΙΟ ΟΔΗΓΙΩΝ 91
TR
Akülü Çim Biçme Makinasi KULLANMA KILAVUZU 102

1
2
3
6
5
4
Fig.1
1
2
3
6
45
Fig.2
12
3
Fig.3
1
Fig.4
1
2
Fig.5
1
Fig.6
2

13
2
Fig.7
1
2
Fig.8
1
2
Fig.9
1
2
Fig.10
1
Fig.11
1
Fig.12
1
2
Fig.13
3

2 31
4
5 6
Fig.14
1
3
2
Fig.15
1
Fig.16
1
2
Fig.17
1
2
3
21
Fig.18
Fig.19
4

Fig.20
12
33
Fig.21
Fig.22
Fig.23
1 2
3
Fig.24
1
2
Fig.25
1
3
2
Fig.26
5

1
2
2
Fig.27
1
2
3
Fig.28
1
2
3
Fig.29
6

7 ENGLISH
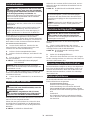
ENGLISH (Original instructions)
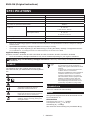
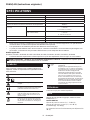
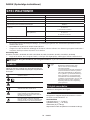
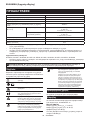
SPECIFICATIONS
Model: AM3746
Mowing width (blade diameter) 460 mm
No load speed 2,500 min
-1
Maximum speed 3,300 min
-1
Part number of replacement mower blade 199367-2
Dimensions
(L x W x H)
during operation L: 1,319 mm to 1,518 mm
W: 532 mm
H: 879 mm to 1,138 mm
when stored
(without grass basket)
L: 1,004 mm to 1,125 mm
W: 532 mm
H: 533 mm to 713 mm
Rated voltage D.C. 36 V
Net weight 25.3 - 27.6 kg
Protection degree IPX4
• Duetoourcontinuingprogramofresearchanddevelopment,thespecicationshereinaresubjecttochange
without notice.
• Specicationsandbatterycartridgemaydifferfromcountrytocountry.
• Theweightmaydifferdependingontheattachment(s),includingthebatterycartridge.Thelightestandheavi-
est combinations, according to EPTA-Procedure 01/2014, are shown in the table.
Applicable battery cartridge
BL1815N / BL1820 / BL1820B / BL1830 / BL1830B / BL1840 / BL1840B / BL1850 / BL1850B / BL1860B
• Someofthebatterycartridgeslistedabovemaynotbeavailabledependingonyourregionofresidence.
WARNING: Only use the battery cartridges listed above.Useofanyotherbatterycartridgesmaycause
injuryand/orre.
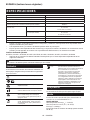
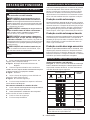
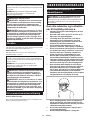
Symbols
Thefollowingsshowthesymbolsusedfortheequip-
ment.Besurethatyouunderstandtheirmeaningbefore
use.
Take particular care and attention.
Read instruction manual.
Danger;beawareofthrownobjects.
The distance between the tool and
bystandersmustbeatleast15m.
Neverputyourhandsandfeetnearthe
blade under the mower. Blades continue to
rotate after the motor is switched off.
Removethelockkeybeforeinspecting,
adjusting,cleaning,servicing,leavingand
storing the mower.
Ni-MH
Li-ion
OnlyforEUcountries
Donotdisposeofelectricequipmentor
batterypacktogetherwithhouseholdwaste
material!
In observance of the European Directives,
on Waste Electric and Electronic
EquipmentandBatteriesandAccumulators
and Waste Batteries and Accumulators
and their implementation in accordance
withnationallaws,electricequipmentand
batteriesandbatterypack(s)thathave
reached the end of their life must be col-
lectedseparatelyandreturnedtoanenvi-
ronmentallycompatiblerecyclingfacility.
Intended use
The tool is intended for lawn mowing.
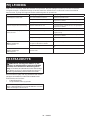
Noise
ThetypicalA-weightednoiseleveldeterminedaccord-
ing to EN60335-2-77:
Model AM3746
Sound pressure level (L
pA
) : 79 dB(A)
Sound power level (L
WA
) : 91 dB (A)
Uncertainty(K):3.4dB(A)
Thenoiselevelunderworkingmayexceed80dB(A).

8 ENGLISH
NOTE: The declared noise emission value(s) has
been measured in accordance with a standard test
methodandmaybeusedforcomparingonetoolwith
another.
NOTE: The declared noise emission value(s)
mayalsobeusedinapreliminaryassessmentof
exposure.
WARNING: Wear ear protection.
WARNING: The noise emission during actual
use of the power tool can differ from the declared
value(s) depending on the ways in which the
tool is used especially what kind of workpiece is
processed.
WARNING: Be sure to identify safety mea-
sures to protect the operator that are based on an
estimation of exposure in the actual conditions of
use (taking account of all parts of the operating
cycle such as the times when the tool is switched
off and when it is running idle in addition to the
trigger time).
Vibration
The vibration total value (tri-axial vector sum) deter-
mined according to EN60335-2-77:
Model AM3746
Vibration emission (a
h
) : 2.5 m/s
2
or less
Uncertainty(K):1.5m/s
2
NOTE: The declared vibration total value(s) has been
measured in accordance with a standard test method
andmaybeusedforcomparingonetoolwithanother.
NOTE:Thedeclaredvibrationtotalvalue(s)mayalso
beusedinapreliminaryassessmentofexposure.
WARNING: The vibration emission during
actual use of the power tool can differ from the
declared value(s) depending on the ways in which
the tool is used especially what kind of workpiece
is processed.
WARNING: Be sure to identify safety mea-
sures to protect the operator that are based on an
estimation of exposure in the actual conditions of
use (taking account of all parts of the operating
cycle such as the times when the tool is switched
off and when it is running idle in addition to the
trigger time).
EC Declaration of Conformity
For European countries only
TheECdeclarationofconformityisincludedasAnnexA
to this instruction manual.
SAFETY WARNINGS
Lawn Mower Safety Instructions
WARNING: Read all safety warnings and
all instructions. Failure to follow the warnings and
instructionsmayresultinelectricshock,reand/or
seriousinjury.
Save all warnings and instruc-
tions for future reference.
1. Do not insert the lock key into mower until it is
ready to be used.
2. Children should be supervised to ensure that
they do not play with the mower.
3. Never allow children or people unfamiliar with
these instructions to use the mower. Local
regulations can restrict the age of the operator.
4. Never operate the mower while people, espe-
cially children, or pets are nearby.
5. Keep in mind that the operator or user is
responsible for accidents or hazards occurring
to other people or their property.
6. While operating the mower, always wear sub-
stantial footwear and long trousers. Do not
operate the mower when barefoot or wearing
open sandals. Avoid wearing clothing or jew-
elry that is loose tting or that has hanging
cords or ties. They can be caught in moving
parts.
7. Always wear protective goggles to protect
your eyes from injury when using power tools.
The goggles must comply with ANSI Z87.1 in
the USA, EN 166 in Europe, or AS/NZS 1336
in Australia/New Zealand. In Australia/New
Zealand, it is legally required to wear a face
shield to protect your face, too.
It is an employer's responsibility to enforce
the use of appropriate safety protective equip-
ments by the tool operators and by other per-
sons in the immediate working area.
8. Operate the mower only in daylight or in good
articial light.
9. Avoid operating the mower in wet grass.

9 ENGLISH
10. Battery tool use and care
- Recharge only with the charger specied by
the manufacturer. A charger that is suitable for
onetypeofbatterycartridgemaycreateariskof
rewhenusedwithanotherbatterycartridge.
- Use power tools only with specically desig-
nated battery cartridges.Useofanyotherbat-
terycartridgesmaycreateariskofinjuryandre.
- When battery cartridge is not in use, keep
it away from other metal objects, like paper
clips, coins, keys, nails, screws or other small
metal objects, that can make a connection
from one terminal to another. Shorting the bat-
teryterminalstogethermaycauseburnsorare.
- Under abusive conditions, liquid may be
ejected from the battery; avoid contact. If con-
tact accidentally occurs, ush with water. If
liquid contacts eyes, additionally seek medical
help.Liquidejectedfromthebatterymaycause
irritation or burns.
- Do not dispose of the battery(ies) in a re.
Thecellmayexplode.Checkwithlocalcodesfor
possible special disposal instructions.
- Do not open or mutilate the battery(ies). Released
electrolyteiscorrosiveandmaycausedamagetothe
eyesorskin.Itmaybetoxicifswallowed.
- Do not charge battery in rain, or in wet
locations.
11. Always keep a rm hold on the handle.
12. Always be sure of your footing on slopes.
13. Walk, never run.
14. Don't grasp the exposed cutting blades or
cutting edges when picking up or holding the
mower.
15. Physical condition - Do not operate mower
while under the inuence of drugs, alcohol, or
any medication.
16. Keep hands and feet away from rotating
blades. Caution - Blades coast after the mower
is switched off.
17. Use only the manufacturer genuine blades
specied in this manual.
18. Check the blades or blade bolts carefully for
cracks or damage before operation. Replace
cracked or damaged blades or blade bolts
immediately.
19. Be sure the area is clear of other people before
mowing. Stop mower if anyone enters the area.
20. Remove foreign matters such as rocks, wire,
bottles, bones and large sticks from the work
area before mowing to prevent personal injury
or damage to the mower.
21. Stop operation immediately if you notice
anything unusual. Switch off the mower and
remove the key. Then inspect the mower.
22. Never attempt to make cutting height adjust-
ments while mower is running if the mower
has cutting height adjustment feature.
23. Release switch lever and wait for blade rota-
tion to stop before crossing driveways, walks,
roads, and any gravel-covered areas. Also
remove the lock key if you leave the mower,
reach to pick up or remove something out of
your way, or for any other reason that may
distract you from what you are doing.
24. Objects struck by the mower blade can cause
severe injuries to persons. The lawn should
always be carefully examined and cleared of
all objects prior to each mowing.
25. If the mower strikes a foreign object, follow
these steps:
- Stop the mower, release the switch lever and
wait until the blade comes to a complete stop.
- Remove the lock key and the battery
cartridge.
- Thoroughly inspect the mower for any
damage.
- Replace the blade if it is damaged in any way.
Repair any damage before restarting and con-
tinuing to operate the mower.
26. Check the grass basket frequently for wear or
deterioration. For storage, always make sure
the grass basket is empty. Replace a worn
grass basket with a new factory replacement
for safety.
27. Use extreme caution when reversing or pulling
the mower towards you.
28. Stop the blade(s) if the mower has to be tilted
for transportation when crossing surfaces
other than grass, and when transporting the
mower to and from the area to be used.
29. Never operate the mower with defective
guards or shields, or without safety devices,
for example deectors and/or grass basket, in
place.
30. Switch on the mower carefully according to
instructions and with feet well away from the
blade(s).
31. Do not tilt the mower when switching on the
motor, except if the mower has to be tilted for
starting. In this case, do not tilt it more than
absolutely necessary and lift only the part,
which is away from the operator.
32. Do not start the mower when standing in front
of the discharge opening.
33. Do not put hands or feet near or under rotating
parts. Keep clear of the discharge opening at
all times.
34. Do not transport the mower while the mower is
turned on.
35. Stop the mower, and remove the disabling
device. Make sure that all moving parts have
come to a complete stop
- whenever you leave the mower,
- before clearing blockages or unclogging
chute,
- before checking, cleaning or working on the
mower,
- after striking a foreign object. Inspect the
mower for damage and make repairs before
restarting and operating the mower.
36. If the mower starts to vibrate abnormally
(check immediately)
- inspect for damage,
- replace or repair any damaged parts,
- check for and tighten any loose parts.
37. Be careful during adjustment of the mower
to prevent entrapment of the ngers between
moving blades and xed parts of the mower.

10 ENGLISH
38. Mow across the face of slopes, never up and
down. Exercise extreme caution when chang-
ing direction on slopes. Do not mow exces-
sively steep slopes.
39. Check the blade mounting bolt at frequent
intervals for proper tightness.
40. Keep all nuts, bolts, and screws tight to
be sure the equipment is in safe working
condition.
41. Always allow the mower to cool down before
storing.
42. When servicing the blades be aware that, even
though the power source is switched off, the
blades can still be moved.
43. Replace worn or damaged parts for safety.
Use only genuine replacement parts and
accessories.
44. Do not use the machine when there is a risk of
lightning.
45. When you use the machine on muddy ground,
wet slope, or slippery place, pay attention to
your footing.
46. Avoid working in poor environment where
increased user fatigue is expected.
47. Do not use the machine in bad weather where
visibility is limited.Failuretodosomaycause
fallorincorrectoperationduetolowvisibility.
48. Do not replace the battery in the rain.
49. Do not submerge the machine into a puddle.
50. Do not leave the machine unattended outdoors
in the rain.
51. Do not insert or remove the lock key in the
rain.
52. When wet leaves or dirt adhere to the suc-
tion mouth (ventilation window) due to rain,
remove them.
53. Do not wash the machine with high pressure
water.
54. When washing the machine, be sure to remove
the battery and lock key and close the battery
cover, and pour water toward the bottom of the
machine to which the blade is attached.
55. When storing the machine, avoid direct sun-
light and rain, and store it in a place where it
does not get hot or humid.
56. Perform inspection or maintenance in a place
where rain can be avoided.
57. After using the machine, remove the adhered
dirt and dry the machine completely before
storing. Depending on the season or the area,
there is a risk of malfunction due to freezing.
58. Do not wet the terminal of battery with liquid
such as water, or submerge the battery. Do not
leave the battery in the rain, nor charge, use,
or store the battery in a damp or wet place. If
theterminalgetswetorliquidentersinsideofbat-
tery,thebatterymaybeshortcircuitedandthereis
ariskofoverheat,re,orexplosion.
59. After removing the battery from the machine or
charger, be sure to attach the battery cover to
the battery and store it in a dry place.
60. Do not replace the battery with wet hands.
61. Do not use the machine in the snow.
62. If the cut-off grass is wet, it is likely to be
clogged inside of the machine. Check the con-
dition of the machine regularly, and remove the
adhered grass as necessary.
SAVE THESE INSTRUCTIONS.
WARNING: DO NOT let comfort or familiarity
with product (gained from repeated use) replace
strict adherence to safety rules for the subject
product.
MISUSE or failure to follow the safety rules stated
in this instruction manual may cause serious
personal injury.
Important safety instructions for
battery cartridge
1. Before using battery cartridge, read all instruc-
tions and cautionary markings on (1) battery
charger, (2) battery, and (3) product using
battery.
2. Do not disassemble battery cartridge.
3. If operating time has become excessively
shorter, stop operating immediately. It may
result in a risk of overheating, possible burns
and even an explosion.
4. If electrolyte gets into your eyes, rinse them
out with clear water and seek medical atten-
tion right away. It may result in loss of your
eyesight.
5. Do not short the battery cartridge:
(1) Do not touch the terminals with any con-
ductive material.
(2) Avoid storing battery cartridge in a con-
tainer with other metal objects such as
nails, coins, etc.
(3) Do not expose battery cartridge to water
or rain.
A battery short can cause a large current
ow, overheating, possible burns and even a
breakdown.
6. Do not store the tool and battery cartridge in
locations where the temperature may reach or
exceed 50 °C (122 °F).
7. Do not incinerate the battery cartridge even if
it is severely damaged or is completely worn
out. The battery cartridge can explode in a re.
8. Be careful not to drop or strike battery.
9. Do not use a damaged battery.
10. The contained lithium-ion batteries are subject
to the Dangerous Goods Legislation require-
ments.
Forcommercialtransportse.g.bythirdparties,
forwardingagents,specialrequirementonpack-
aging and labeling must be observed.
For preparation of the item being shipped, consult-
inganexpertforhazardousmaterialisrequired.
Pleasealsoobservepossiblymoredetailed
national regulations.
Tape or mask off open contacts and pack up the
batteryinsuchamannerthatitcannotmove
around in the packaging.
11. Follow your local regulations relating to dis-
posal of battery.

11 ENGLISH
12. Use the batteries only with the products
specied by Makita. Installing the batteries to
non-compliantproductsmayresultinare,exces-
siveheat,explosion,orleakofelectrolyte.
SAVE THESE INSTRUCTIONS.
CAUTION: Only use genuine Makita batteries.
Use of non-genuine Makita batteries, or batteries that
havebeenaltered,mayresultinthebatterybursting
causingres,personalinjuryanddamage.Itwill
alsovoidtheMakitawarrantyfortheMakitatooland
charger.
Tips for maintaining maximum
battery life
1. Charge the battery cartridge before completely
discharged. Always stop tool operation and
charge the battery cartridge when you notice
less tool power.
2. Never recharge a fully charged battery car-
tridge. Overcharging shortens the battery
service life.
3. Charge the battery cartridge with room tem-
perature at 10 °C - 40 °C (50 °F - 104 °F). Let
a hot battery cartridge cool down before
charging it.
4. Charge the battery cartridge if you do not use
it for a long period (more than six months).
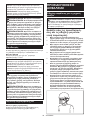
ASSEMBLY
WARNING: Always be sure that the lock key
and battery cartridge are removed before carrying
out any work on the mower. Failure to remove the
lockkeyandthebatterycartridgemayresultinseri-
ouspersonalinjuryfromaccidentalstart-up.
WARNING: Never start the mower unless it is
completely assembled. Operation of the tools in a
partiallyassembledstatemayresultinseriousper-
sonalinjuryfromaccidentalstart-up.
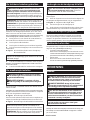
Installing the handle
NOTICE: When installing handles, position the
cords so that they are not caught by anything
between the handles. If the cord is damaged, the
mower switch may not work.
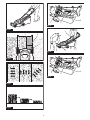
1. Attach the lower handle so that the holes in the
handletintheprotrusionsonthemowerbody.Insert
the bolts from inside, then attach washer A from outside,
and then tighten the thumb nuts.
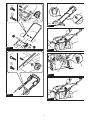
►Fig.1: 1. Lower handle 2. Washer A 3. Thumb nut
4. Protrusion 5. Hole 6. Bolt
2. Align the hole in the lower handle with the hole
in the upper handle, then insert the bolts from inside,
then attach washer B from outside, and then tighten the
thumb nuts.
►Fig.2: 1. Upper handle 2. Hole 3. Washer B
4. Thumb nut 5. Lower handle 6. Bolt
CAUTION: Hold the upper handle rmly so
that it does not drop off your hand. Otherwise, the
handlemayfallandcauseaninjury.
3. Attach holder A and holder B to the handle.
Positionthecordsasshowninthegure.
►Fig.3: 1. Cord 2. Holder A 3. Holder B
NOTE: When attaching holder A, be sure to x the
cord with the holder as shown in the gure.
Removing the mulching attachment
1. Open the rear cover.
►Fig.4: 1. Rear cover
2. Remove the mulching attachment while holding
down the lever.
►Fig.5: 1. Lever 2. Mulching attachment
Installing the grass basket
1. Open the rear cover.
►Fig.6: 1. Rear cover
2. Hook the grass basket on the rod of the mower
bodyasshowninthegure.
►Fig.7: 1. Rod 2. Guard 3. Grass basket
NOTICE: Make sure that the guard on the grass
basket is facing downward. Otherwise, the grass
basketmaynotcatchallofcut-offgrass.
Attaching the mulching attachment
1. Open the rear cover, and then remove the grass
basket.
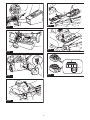
►Fig.8: 1. Rear cover 2. Grass basket
2. Attach the mulching attachment while holding
down the lever, and then release the lever to lock the
mulching attachment.
►Fig.9: 1. Lever 2. Mulching attachment

12 ENGLISH
FUNCTIONAL
DESCRIPTION
Installing or removing battery
cartridge
CAUTION: Always switch off the tool before
installing or removing of the battery cartridge.
CAUTION: Hold the tool and the battery car-
tridge rmly when installing or removing battery
cartridge.Failuretoholdthetoolandthebattery
cartridgermlymaycausethemtoslipoffyourhands
andresultindamagetothetoolandbatterycartridge
andapersonalinjury.
CAUTION: Make sure that you lock the battery
cover before use. Otherwise,mud,dirt,orwatermay
causedamagetotheproductorthebatterycartridge.
CAUTION: Always install the battery cartridge
fully until the red indicator cannot be seen. If not,
itmayaccidentallyfalloutofthetool,causinginjuryto
youorsomeonearoundyou.
CAUTION: Do not install the battery cartridge
forcibly.Ifthecartridgedoesnotslideineasily,itis
notbeinginsertedcorrectly.
NOTE:Thetooldoesnotworkwithonlyonebattery
cartridge.
To install the battery cartridge;
1. Pullupthelockinglever,andthenopenthebattery
cover.
►Fig.10: 1.Batterycover2. Locking lever
2. Alignthetongueonthebatterycartridgewiththe
slot on the mower then slide the cartridge until it locks in
place with a little click.
►Fig.11: 1.Batterycartridge
3. Insertthelockkeyintheplaceshowninthegure
as far as it will go.
►Fig.12: 1.Lockkey
4. Closethebatterycoverandpushituntilitis
latched with the locking lever.
To remove the battery cartridge from the mower;
1. Pullupthebatterycoverlockingleverandopen
thebatterycover.
2. Pulloutthebatterycartridgefromthemowerwhile
sliding the button on the front of the cartridge.
3. Pulloutthelockkey.
4. Closethebatterycover.
Tool / battery protection system
Thetoolisequippedwithatool/batteryprotectionsys-
tem.Thissystemautomaticallycutsoffpowertothe
motortoextendtoolandbatterylife.Thetoolwillauto-
maticallystopduringoperationifthetoolorbatteryis
placed under one of the following conditions:
Overload protection
Whenthebatteryisoperatedinamannerthatcauses
ittodrawanabnormallyhighcurrent,thetoolautomati-
callystopsandthemainpowerlampblinksingreen.In
this situation, turn the tool off and stop the application
that caused the tool to become overloaded. Then turn
the tool on to restart.
Overheat protection
Whenthetoolorbatteryisoverheated,thetoolstops
automaticallyandthemainpowerlamplightsupinred.
Inthiscase,letthetoolandbatterycoolbeforeturning
the tool on again.
Overdischarge protection
Whenthebatterycapacityisnotenough,thetoolstops
automaticallyandthemainpowerlampblinksinred.In
thiscase,removethebatteryfromthetoolandcharge
thebatterycartridgesorchangethebatterycartridges
tofullychargedones.
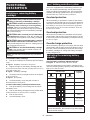
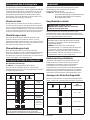
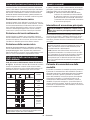
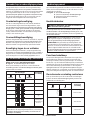
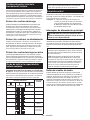
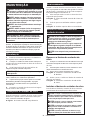
Indicating the remaining battery
capacity
Only for battery cartridges with the indicator
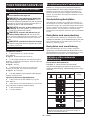
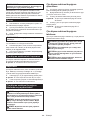
►Fig.13: 1. Indicator lamps 2. Check button
Pressthecheckbuttononthebatterycartridgetoindi-
catetheremainingbatterycapacity.Theindicatorlamps
light up for a few seconds.
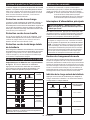
Indicator lamps Remaining
capacity
Lighted Off Blinking
75% to 100%
50% to 75%
25% to 50%
0% to 25%
Charge the
battery.
Thebattery
mayhave
malfunctioned.
NOTE: Depending on the conditions of use and the
ambienttemperature,theindicationmaydifferslightly
fromtheactualcapacity.

13 ENGLISH
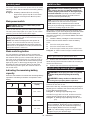
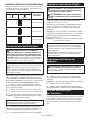
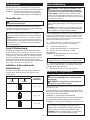
Control panel
The control panel has the main power switch, the mode
switchingbutton,andtheindicatorofremainingbattery
capacity.
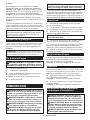
►Fig.14: 1.Batteryindicator2. Mode switching
lamp 3. Main power lamp 4. Check button
5. Mode switching button 6. Main power
switch
Main power switch
WARNING: Always turn off the main power
switch when not in use.
To turn on the machine, press the main power switch.
The main power lamp lights up in green. To turn off the
machine, press the main power switch again.
NOTE: If the main power lamp lights up in red or
blinks in red or green, refer to the instructions for tool/
batteryprotectionsystem.
NOTE:Thismachineemploystheautopower-off
function. To avoid unintentional start up, the main
powerswitchwillautomaticallyshutdownwhenthe
switch lever is not pulled for a certain period after the
main power switch is turned on.
Mode switching button
Youcanswitchtheoperatingmodebypressingthe
mode switching button. When the machine is turned on,
themachinestartsupinthenormalmode.Whenyou
press the mode switching button, the machine shifts to
theenergy-savingmodeandthemodeswitchinglamp
lightsupingreen.Intheenergy-savingmode,youcan
decreasethenoiseatmowing.Whenyoupressthe
mode switching button again, the machine returns to
the normal mode.
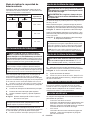
Indicating the remaining battery
capacity
Pressthecheckbuttontoindicatetheremainingbattery
capacities.Thebatteryindicatorscorrespondtoeach
battery.
Battery indicator status
Remaining battery
capacity
On
Off
50% - 100%
20% - 50%
0% - 20%
Switch action
WARNING: Before installing the battery car-
tridge, always check to see that the switch lever
actuates properly and returns to the original posi-
tion when released. Operating a tool with a switch
thatdoesnotactuateproperlycanleadtolossof
controlandseriouspersonalinjury.
NOTE: The mower does not start without pressing the
switch button even the switch lever is pulled.
NOTE:Mowermaynotstartduetotheoverload
whenyoutrytomowlongordensegrassatatime.
Increase the mowing height in this case.
Thismowerisequippedwiththeinterlockswitchand
handleswitch.Ifyounoticeanythingunusualwitheither
oftheseswitches,stopoperationimmediatelyand
havethemcheckedbyyournearestMakitaAuthorized
Service Center.
1. Installthebatterycartridges.Insertthelockkey
intotheinterlockswitchandthenclosethebattery
cover.
2. Press the main power switch.
3. Press the switch button and hold it.
4. Grab the upper handle and pull the switch lever.
►Fig.15: 1. Switch button 2. Upper handle 3. Switch
lever
NOTE:Ifthelockkeyisnotinserted,thepowerlamp
blinksingreenwhenyoupulltheswitchlever.
5. Release the switch button as soon as the motor
startsrunning.Themowerwillcontinuetorununtilyou
release the switch lever.
6. Release the switch lever to stop the motor.
Adjusting the mowing height
WARNING: Never put your hand or leg under
the mower body when adjusting the mowing
height.
WARNING: Always make sure that the lever
ts in the groove properly before operation.
Themowingheightcanbeadjustedintherangeof
between 20 mm and 75 mm.
Removethelockkey,andthenpullthemowingheight
adjustingleveroutwardofthemowerbodyandmoveit
toyourdesiredmowingheight.
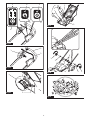
►Fig.16: 1.Mowingheightadjustinglever
Hold the front grip with one hand, and then move the
mowingheightadjustingleverwiththeotherhand.
►Fig.17: 1.Mowingheightadjustinglever2. Front
grip
NOTE:Themowingheightguresshouldbeused
justasaguideline.Dependingontheconditionsof
thelawnortheground,theactuallawnheightmay
becomeslightlydifferentfromthesetheight.
NOTE:Tryatestmowingofgrassinalessconspicu-
ousplacetogetyourdesiredheight.

14 ENGLISH
Adjusting the handle height
CAUTION: Before removing the bolts, hold
the upper handle rmly.Otherwise,thehandlemay
fallandcauseaninjury.
Thehandleheightcanbeadjustedinthreelevels.
1. Loosen the thumb nuts of the lower handle, and
then remove the bolts, washer, and thumb nuts.
►Fig.18: 1. Thumb nut 2. Washer 3. Bolt
2. Adjustthehandleheight.
3. Insert the bolts from inside, then attach washers
from outside, and then tighten the thumb nuts.
Using mulching attachment
Themulchingattachmentallowsyoutoreturnthecut
grass to the ground without gathering the cut grass in
thegrassbasket.Whenyouoperatethemachinewith
the mulching attachment, be sure to remove the grass
basket.
Electronic function
Themachineisequippedwiththeelectronicfunctions
foreasyoperation.
• Constant speed control
Electronic speed control for obtaining constant
speed.Possibletogetnenish,becausethe
rotating speed is kept constant even under load
condition.
• Soft start
The soft-start function minimizes start-up shock,
andmakesthemachinestartsmoothly.
OPERATION
Mowing
WARNING: Before mowing, clear away sticks
and stones from mowing area. Furthermore, clear
away any weeds from mowing area in advance.
WARNING: Always wear the safety goggles or
safety glasses with side shields when operating
the mower.
CAUTION: If the cut grass or foreign object
blocks up inside of the mower body, be sure to
remove the lock key and battery cartridge and
wear gloves before removing the grass or foreign
object.
NOTICE: Use this machine for mowing lawn only.
Do not mow weeds with this machine.
►Fig.19
Firmlyholdthehandlewithbothhandswhenmowing.
Themowingspeedguidelineisapproximately1meter
per 4 seconds.
►Fig.20
The center lines of the front wheels are guidelines to
mowing width. Using the center lines as guidelines,
mowinstrips.Overlapbyonehalftoonethirdtheprevi-
ousstriptomowthelawnevenly.
►Fig.21: 1. Mowing width 2. Overlapping area
3. Center line
Change the mowing direction each time to prevent the
grassgrainpatternfromforminginjustonedirection.
►Fig.22
Periodicallycheckthegrassbasketformowedgrass.
Emptythegrassbeforeitbecomesfull.Beforeevery
periodical check, be sure to stop the mower then
removethelockkeyandthebatterycartridge.
NOTE: Using the mower with the grass basket full
prevents smooth blade rotation and places an extra
loadonthemotor,whichmaycausebreakdown.
Mowing a long-grass lawn
Donottrytocutlonggrassallatonce.Instead,mow
thelawninsteps.Leaveadayortwobetweenmowings
untilthelawnbecomesevenlyshort.
►Fig.23
NOTE: Mowing long grass to a short length all at
oncemaycausethegrasstodie.Thecutgrassmay
alsoblockupinsideofthemowerbody.
Emptying the grass basket
WARNING: To reduce a risk of accident, reg-
ularly check the grass basket for any damage or
weakened strength. Replace the grass basket if
necessary.
1. Release the switch lever.
2. Removethelockkey.
3. Open the rear cover and take out the grass basket
byholdingthehandle.
►Fig.24: 1. Rear cover 2. Handle 3. Grass basket
4. Emptythegrassbasket.
MAINTENANCE
WARNING: Always be sure that the lock
key and battery cartridge are removed from the
mower before storing or carrying the mower or
attempting to perform inspection or maintenance.
WARNING: Always remove the lock key when
the mower is not in use. Store the lock key in a
safe place out of reach of children.
WARNING: Wear gloves when performing
inspection or maintenance.
WARNING: Always wear the safety goggles or
safety glasses with side shields when performing
inspection or maintenance.

15 ENGLISH
NOTICE: Never use gasoline, benzine, thinner,
alcohol or the like. Discoloration, deformation or
cracks may result.
To maintain product SAFETY and RELIABILITY,
repairs,anyothermaintenanceoradjustmentshould
beperformedbyMakitaAuthorizedorFactoryService
Centers,alwaysusingMakitareplacementparts.
Maintenance
1. Removethelockkeyandbatterycartridges,and
thenclosethebatterycover.
2. Put the mower on its side and clean grass clip-
pings accumulated on the underside of mower deck.
3. Pour water toward the bottom of the machine to
which the blade is attached.
NOTICE: Do not wash the machine with high
pressure water.
4. Check all nuts, bolts, knobs, screws, fasteners etc.
for tightness.
5. Inspect moving parts for damage, breakage, and
wear. Damaged or missing parts should be repaired or
replaced.
6. Store the mower in a safe place out of the reach of
children.
Carrying the mower
Whencarryingthemower,holdthefrontgripandlower
handlewithtwopeopleasshowninthegure.
►Fig.25: 1. Lower handle 2. Front grip
Storing
Storemowerindoorsinacool,dryandlockedplace.
Don't store the mower and charger in locations where
thetemperaturemayreachorexceed40°C(104°F).
1. Open the rear cover and take out the grass basket
byholdingthehandle.
►Fig.26: 1. Rear cover 2. Handle 3. Grass basket
2. Loosen the thumb nuts and fold the upper handle.
►Fig.27: 1. Upper handle 2. Thumb nut
Removing or installing the mower
blade
WARNING: Always remove the lock key and
battery cartridge when removing or installing the
blade. Failure to remove the lock key and battery
cartridge may cause a serious injury.
WARNING: The blade coasts for a few sec-
onds after releasing the switch. Do not start any
operation until the blade comes to a complete
stop.
WARNING: Always wear gloves when han-
dling the blade.
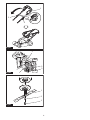
Removing the mower blade
1. Put the mower on its side so that the mowing
heightadjustinglevercomestotheupperside.
2. To lock the blade, insert a lumber or similar into
the mower.
3. Turn the bolt counterclockwise with the wrench.
►Fig.28: 1. Mower blade 2. Wrench 3. Lumber
4. Remove the bolt, washer, mower blade in order.
►Fig.29: 1. Mower blade 2. Washer 3. Bolt
Installing the mower blade
To install the mower blade, take the removal procedure
in reverse.
WARNING: Install the blade carefully. It has
a top/bottom facing. Place the blade so that the
rotational direction arrow faces outward.
WARNING: Tighten the bolt clockwise rmly
to secure the blade.
WARNING: Make sure that the blade and all
the xing parts are installed correctly and tight-
ened securely.
WARNING: When you replace the blades,
always follow the instructions provided in this
manual.

16 ENGLISH
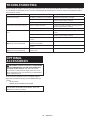
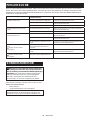
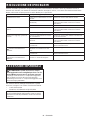
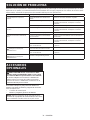
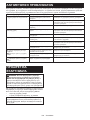
TROUBLESHOOTING
Beforeaskingforrepairs,conductyourowninspectionrst.Ifyoundaproblemthatisnotexplainedinthemanual,
donotattempttodismantlethetool.Instead,askMakitaAuthorizedServiceCenters,alwaysusingMakitareplace-
ment parts for repairs.
State of abnormality Probable cause (malfunction) Remedy
Mower does not start. Twobatterycartridgesarenotinstalled. Installthechargedbatterycartridges.
Batteryproblem(undervoltage) Rechargethebatterycartridge.Ifrechargingisnot
effective,replacebatterycartridge.
Thelockkeyisnotinserted. Insertthelockkey.
Motor stops running after a little use. Battery'schargelevelislow. Rechargethebatterycartridge.Ifrechargingisnot
effective,replacebatterycartridge.
Cutting height is too low. Raise the cutting height.
Motor does not reach maximum
RPM.
Batterycartridgeisinstalledimproperly. Installthebatterycartridgeasdescribedinthis
manual.
Batterypowerisdropping. Rechargethebatterycartridge.Ifrechargingisnot
effective,replacebatterycartridge.
Thedrivesystemdoesnotwork
correctly.
Askyourlocalauthorizedservicecenterforrepair.
Cutting tool does not rotate:
stopthemowerimmediately!
Foreignobjectsuchasabranchis
jammedneartheblade.
Removetheforeignobject.
Thedrivesystemdoesnotwork
correctly.
Askyourlocalauthorizedservicecenterforrepair.
Abnormal vibration:
stopthemowerimmediately!
Bladeisimbalanced,excessivelyor
unevenlyworn.
Replace the blade.
OPTIONAL
ACCESSORIES
CAUTION: These accessories or attachments
are recommended for use with your Makita tool
specied in this manual.Theuseofanyother
accessories or attachments might present a risk of
injurytopersons.Onlyuseaccessoryorattachment
for its stated purpose.
Ifyouneedanyassistanceformoredetailsregard-
ingtheseaccessories,askyourlocalMakitaService
Center.
• Mower blade
• Makitagenuinebatteryandcharger
NOTE:Someitemsinthelistmaybeincludedinthe
toolpackageasstandardaccessories.Theymay
differfromcountrytocountry.

17 FRANÇAIS
FRANÇAIS (Instructions originales)
SPÉCIFICATIONS
Modèle : AM3746
Largeur de tonte (diamètre de la lame) 460 mm
Vitesse à vide 2 500 min
-1
Vitesse maximale 3 300 min
-1
Numéro de référence de la lame de tondeuse de remplacement 199367-2
Dimensions
(L x l x H)
pendant l’utilisation L : 1 319 mm à 1 518 mm
l : 532 mm
H : 879 mm à 1 138 mm
pendant le rangement
(sans le bac à herbe)
L : 1 004 mm à 1 125 mm
l : 532 mm
H : 533 mm à 713 mm
Tension nominale 36 VCC
Poids net 25,3 - 27,6 kg
Degré de protection IPX4
• Étantdonnél’évolutionconstantedenotreprogrammederechercheetdedéveloppement,lesspécications
contenuesdanscemanuelsontsujettesàmodicationsanspréavis.
• Lesspécicationsetlabatteriepeuventêtredifférentessuivantlespays.
• Lepoidspeutêtredifférentselonlesaccessoires,notammentlabatterie.Lesassociationslapluslégèreetla
pluslourde,conformémentàlaprocédureEPTA01/2014,sontindiquéesdansletableau.
Batterie applicable
BL1815N / BL1820 / BL1820B / BL1830 / BL1830B / BL1840 / BL1840B / BL1850 / BL1850B / BL1860B
• Certainesbatteriesrépertoriéesci-dessuspeuventnepasêtredisponiblesselonlarégionoùvousrésidez.
AVERTISSEMENT : N’utilisez que les batteries répertoriées ci-dessus.L’utilisationden’importequelle
autrebatteriepeutprovoquerdesblessureset/ouunincendie.
Symboles
Voustrouverezci-dessouslessymbolesutiliséspour
l’appareil.Veillezàcomprendreleursignicationavant
toute utilisation.
Veuillezêtreprudentetresterattentif.
Lire le mode d’emploi.
Danger;prendregardeauxprojections
d’objets.
La distance entre l’outil et les personnes
présentesdoitêtred’aumoins15m.
Nemettezjamaislesmainsoulespieds
près de la lame sous la tondeuse. Les
lames continuent de tourner une fois le
moteur coupé.
Retirez la clé de sécurité avant d’inspec-
ter,derégler,denettoyer,deréparer,de
laisser sans surveillance ou de ranger la
tondeuse.
Ni-MH
Li-ion
Pourlespaysdel’Unioneuropéenne
uniquement
Nejetezpaslesappareilsélectriquesou
les batteries avec vos ordures ménagères !
Conformément aux directives européennes
relativesauxdéchetsd’équipements
électriquesetélectroniquesetauxpiles
etaccumulateursainsiqu’auxdéchetsde
piles et d’accumulateurs et leur mise en
œuvre conformément aux lois nationales,
leséquipementsélectriques,lespilesetles
batteriesenndeviedoiventfairel’objet
d’unecollectesélectiveetêtreconésà
uneusinederecyclagerespectueusede
l’environnement.
Utilisations
L’outil est conçu pour tondre la pelouse.
Bruit
NiveaudebruitpondéréAtypique,déterminéselon
EN60335-2-77 :
Modèle AM3746
Niveau de pression sonore (L
pA
) : 79 dB (A)
Niveau de puissance sonore (L
WA
) : 91 dB (A)
Incertitude(K):3,4dB(A)
Le niveau de bruit en fonctionnement peut dépasser 80
dB (A).

18 FRANÇAIS
NOTE : La ou les valeurs d’émission de bruit décla-
rées ont été mesurées conformément à la méthode
deteststandardetpeuventêtreutiliséespourcom-
parer les outils entre eux.
NOTE : La ou les valeurs d’émission de bruit décla-
réespeuventaussiêtreutiliséespourl’évaluation
préliminaire de l’exposition.
AVERTISSEMENT : Portez un serre-tête
antibruit.
AVERTISSEMENT : L’émission de bruit
lors de l’usage réel de l’outil électrique peut être
différente de la ou des valeurs déclarées, suivant
la façon dont l’outil est utilisé, particulièrement
selon le type de pièce usinée.
AVERTISSEMENT : Les mesures de sécurité
à prendre pour protéger l’utilisateur doivent être
basées sur une estimation de l’exposition dans
des conditions réelles d’utilisation (en tenant
compte de toutes les composantes du cycle
d’utilisation, comme par exemple le moment de
sa mise hors tension, lorsqu’il tourne à vide et le
moment de son déclenchement).
Vibrations
Valeur totale de vibrations (somme de vecteur triaxial)
déterminée selon EN60335-2-77 :
Modèle AM3746
Émission de vibrations (a
h
) : 2,5 m/s
2
ou moins
Incertitude(K):1,5m/s
2
NOTE : La ou les valeurs de vibration totales décla-
rées ont été mesurées conformément à la méthode
deteststandardetpeuventêtreutiliséespourcom-
parer les outils entre eux.
NOTE : La ou les valeurs de vibration totales décla-
réespeuventaussiêtreutiliséespourl’évaluation
préliminaire de l’exposition.
AVERTISSEMENT : L’émission de vibrations
lors de l’usage réel de l’outil électrique peut être
différente de la ou des valeurs déclarées, suivant
la façon dont l’outil est utilisé, particulièrement
selon le type de pièce usinée.
AVERTISSEMENT : Les mesures de sécurité
à prendre pour protéger l’utilisateur doivent être
basées sur une estimation de l’exposition dans
des conditions réelles d’utilisation (en tenant
compte de toutes les composantes du cycle
d’utilisation, comme par exemple le moment de
sa mise hors tension, lorsqu’il tourne à vide et le
moment de son déclenchement).
Déclaration de conformité CE
Pour les pays européens uniquement
La déclaration de conformité CE est fournie en Annexe
A à ce mode d’emploi.
CONSIGNES DE SÉCURITÉ
Consignes de sécurité pour
tondeuse à gazon
AVERTISSEMENT : Lisez toutes les
consignes de sécurité et toutes les instructions. Il
yarisqued’électrocution,d’incendieet/oudegraves
blessures si les mises en garde et les instructions ne
sont pas respectées.
Conservez toutes les mises en
garde et instructions pour réfé-
rence ultérieure.
1. N’insérez la clé de sécurité dans la tondeuse
qu’une fois celle-ci prête pour l’utilisation.
2. Les enfants doivent être sous la surveillance
d’un adulte an de s’assurer qu’ils ne jouent
pas avec la tondeuse.
3. Ne laissez jamais les enfants ou les personnes
qui ne sont pas familiarisées avec ces instruc-
tions utiliser la tondeuse. Les réglementations
locales peuvent spécier un âge minimum
pour l’utilisation.
4. N’utilisez jamais la tondeuse alors que des
personnes — et tout particulièrement des
enfants — ou des animaux domestiques se
trouvent à proximité.
5. Gardez à l’esprit que l’opérateur ou l’utilisa-
teur est responsable des accidents ou risques
encourus par les personnes ou leur propriété.
6. Pendant l’utilisation de la tondeuse, portez
toujours des chaussures résistantes et un
pantalon long. N’utilisez pas la tondeuse
pieds nus ou avec des sandales qui laissent
les pieds partiellement découverts. Évitez
de porter des vêtements et bijoux amples ou
dotés de cordons ou attaches qui pendent. Les
pièces mobiles risqueraient de les happer.
7.
Pour protéger vos yeux des blessures lorsque
vous utilisez un outil électrique, portez tou-
jours des lunettes de protection, lesquelles
doivent être conformes à ANSI Z87.1 aux
États-Unis, EN 166 en Europe ou AS/NZS 1336
en Australie/Nouvelle-Zélande. En Australie/
Nouvelle-Zélande, la loi exige également le port
d’un écran facial pour se protéger le visage.

19 FRANÇAIS
L’employeur est responsable d’imposer le port
d’équipements de sécurité appropriés par les
utilisateurs de l’outil et par les autres personnes
se trouvant à proximité de la zone de travail.
8. N’utilisez la tondeuse qu’à la lumière du jour
ou sous un bon éclairage articiel.
9. Évitez d’utiliser la tondeuse sur de l’herbe
mouillée.
10. Utilisation et entretien des outils fonctionnant
sur batterie
- Rechargez la batterie uniquement avec le
chargeur spécié par le fabricant. Un chargeur
conçupouruntypedebatteriedonnépeutpré-
senterunrisqued’incendies’ilestutiliséavecune
batteried’unautretype.
- Utilisez les outils électriques uniquement
avec les batteries spéciquement désignées.
L’utilisationdetoutautretypedebatteriepeut
présenterunrisquedeblessureoud’incendie.
- Lorsque vous n’utilisez pas la batterie, tenez-la
à l’écart des objets métalliques, tels que trom-
bones, pièces de monnaie, clés, clous, vis ou
autres petits objets métalliques susceptibles
de créer une connexion entre deux bornes. Le
court-circuitage des bornes de la batterie peut cau-
ser des brûlures ou entraîner un incendie.
- Dans des conditions d’utilisation inadéquate,
il peut y avoir une fuite de l’électrolyte de la
batterie. Le cas échéant, évitez tout contact
avec ce liquide. En cas de contact accidentel,
rincez à l’eau. Si le liquide entre en contact
avec les yeux, consultez un médecin.Leliquide
s’échappantdelabatteriepeutprovoquerune
irritation ou des brûlures.
- Ne jetez pas la ou les batteries au feu.
L’élément de la pile pourrait exploser. Consultez
les codes locaux pour de possibles instructions de
mise au rebut spéciales.
- N’ouvrez ni n’abîmez la ou les batteries.
L’électrolytequis’échappedelabatterieestcor-
rosifetpeutirriterlapeauoulesyeux.Ilpeutêtre
toxiqueencasd’ingestion.
- Ne chargez pas la batterie sous la pluie ou
dans un endroit mouillé.
11. Tenez toujours la poignée fermement.
12. Assurez-vous toujours d’être en position
stable dans les pentes.
13. Ne courez jamais ; marchez.
14. Ne saisissez pas les lames de coupe exposées
ou les bords tranchants pour soulever ou tenir
la tondeuse.
15. Condition physique - N’utilisez pas la ton-
deuse après avoir consommé une drogue, de
l’alcool ou un médicament.
16. Gardez mains et pieds à l’écart des lames en
rotation. Attention - Les lames continuent de
tourner une fois la tondeuse éteinte.
17. Utilisez exclusivement les lames authen-
tiques du fabricant spéciées dans ce mode
d’emploi.
18. Vériez soigneusement l’absence de ssures
ou de dommages sur les lames ou les boulons
des lames avant l’utilisation. Remplacez immé-
diatement les lames ou les boulons des lames
ssurés ou abîmés.
19. Assurez-vous qu’il n’y a personne à proximité
avant de commencer à tondre. Arrêtez la ton-
deuse si quelqu’un s’approche.
20. Pour éviter de vous blesser ou d’abîmer la
tondeuse, enlevez les corps étrangers tels que
pierres, câbles, bouteilles, os et gros bouts de
bois dans la zone de travail avant de commen-
cer à tondre.
21. Cessez immédiatement l’utilisation si vous
remarquez quoi que ce soit d’inhabituel.
Coupez le contact de la tondeuse et retirez la
clé. Inspectez ensuite la tondeuse.
22. N’essayez jamais de régler la hauteur de coupe
pendant que la tondeuse tourne si celle-ci est
pourvue d’une fonction de réglage de la hau-
teur de coupe.
23. Libérez le levier d’interrupteur et attendez que
la lame ait cessé de tourner avant de traverser
une allée, un trottoir, une route ou une zone
recouverte de gravier. Pensez également à
retirer la clé de sécurité si vous laissez la ton-
deuse sans surveillance, si vous vous penchez
pour ramasser ou enlever un objet qui fait
obstacle, ou pour toute autre raison pouvant
vous distraire de votre travail.
24.
Les objets heurtés par la lame de tondeuse
peuvent provoquer de graves blessures. Pensez
toujours à inspecter soigneusement le gazon et
à retirer tous les objets avant de tondre.
25. Si la tondeuse heurte un corps étranger, pro-
cédez comme suit :
- Arrêtez la tondeuse, libérez le levier d’inter-
rupteur et attendez que la lame ait complète-
ment cessé de tourner.
- Retirez la clé de sécurité et la batterie.
- Inspectez minutieusement la tondeuse pour
vous assurer qu’elle n’a subi aucun dommage.
- Si la lame est abîmée, remplacez-la. Réparez
tout dégât avant de redémarrer et de continuer
à utiliser la tondeuse.
26. Inspectez régulièrement le bac à herbe pour
vérier l’absence d’usure ou de détérioration.
Avant le rangement, assurez-vous toujours
que le bac à herbe est vide. Si le bac à herbe
est usé, remplacez-le par un bac de rechange
neuf pour votre sécurité.
27. Soyez très prudent lorsque vous faites reculer
la tondeuse ou la tirez vers vous.
28. Immobilisez la ou les lames si vous devez
incliner la tondeuse pour la transporter en
traversant une surface autre que du gazon, et
lorsque vous transportez la tondeuse vers ou
hors de la zone d’utilisation.
29.
N’utilisez jamais la tondeuse si ses carters ou
écrans de protection ne fonctionnent pas, ou si
ses dispositifs de sécurité (tels que les déec-
teurs et/ou le bac à herbe) ne sont pas posés.
30. Démarrez la tondeuse prudemment, en suivant
les instructions et en gardant les pieds bien à
l’écart de la ou des lames.
31. N’inclinez pas la tondeuse en allumant le
moteur, sauf si la tondeuse doit être inclinée
pour le démarrage. Le cas échéant, ne l’incli-
nez pas plus que nécessaire et ne soulevez
que la partie opposée à vous.

20 FRANÇAIS
32. Ne vous tenez pas devant l’ouverture de
décharge pour démarrer la tondeuse.
33. Ne mettez pas les mains ou les pieds près des
pièces en rotation, ou sous celles-ci. Restez
en tout temps à l’écart de l’ouverture de
décharge.
34. Ne transportez pas la tondeuse pendant
qu’elle tourne.
35. Arrêtez la tondeuse et retirez l’objet bloqué.
Assurez-vous que toutes les pièces mobiles
sont parfaitement arrêtées
- chaque fois que vous laissez la tondeuse
sans surveillance,
- avant de retirer un objet bloqué ou de débou-
cher la goulotte,
- avant d’effectuer la vérication, le nettoyage
ou l’entretien de la tondeuse,
- après avoir heurté un corps étranger. Avant
de redémarrer et d’utiliser la tondeuse, vériez
l’absence de dommages et effectuez les répa-
rations nécessaires.
36. Si la tondeuse se met à vibrer anormalement
(vériez immédiatement)
- inspectez les dommages,
- remplacez ou réparez les pièces
endommagées,
- vériez et resserrez les pièces mal serrées.
37. Lorsque vous réglez la tondeuse, évitez de
vous coincer les doigts entre les lames en
mouvement et les pièces xes de la tondeuse.
38. Tondez toujours les pentes latéralement,
jamais de haut en bas ou vice-versa. Soyez
très prudent lorsque vous changez de direc-
tion dans les pentes. Ne tondez pas dans les
pentes trop abruptes.
39. Vériez régulièrement le boulon de montage
de la lame pour vous assurer qu’il est bien
serré.
40. Gardez tous les écrous, boulons et vis bien
serrés pour garantir le fonctionnement sûr de
l’équipement.
41. Laissez toujours refroidir la tondeuse avant de
la ranger.
42. Lors de l’entretien des lames, gardez à l’esprit
qu’elles peuvent tourner même si la source
d’alimentation est coupée.
43. Pour votre propre sécurité, remplacez les
pièces usées ou endommagées. Utilisez exclu-
sivement des pièces de rechange et acces-
soires authentiques.
44. N’utilisez pas la machine en cas d’orage.
45. Lorsque vous utilisez la machine sur un sol
boueux, une pente trempée ou un endroit
glissant, faites attention de ne pas perdre
l’équilibre.
46. Évitez de travailler dans un piètre environ-
nement susceptible d’accroître la fatigue de
l’utilisateur.
47. N’utilisez pas la machine par mauvais temps
avec une visibilité réduite. Le non-respect de
cette précaution pourrait entraîner votre chute ou
un fonctionnement incorrect en raison de la faible
visibilité.
48. Ne remplacez pas la batterie sous la pluie.
49. Ne plongez pas la machine dans une aque.
50. Ne laissez pas la machine sans surveillance à
l’extérieur sous la pluie.
51. N’insérez ni ne retirez la clé de sécurité sous la
pluie.
52. Si des feuilles mouillées ou des saletés se
collent sur la bouche d’aspiration (ouverture
d’aération) en raison de la pluie, retirez-les.
53. Ne lavez pas la machine avec de l’eau sous
pression.
54. Lorsque vous lavez la machine, veillez à retirer
la batterie et la clé de sécurité, et à refermer le
couvercle de batterie, puis versez l’eau vers la
partie inférieure de la machine sur laquelle la
lame est xée.
55. Lorsque vous rangez la machine, évitez les
endroits exposés aux rayons directs du soleil
ou à la pluie, et rangez-la dans un endroit
tempéré et sec.
56. Procédez à l’inspection ou à l’entretien de la
machine dans un endroit non affecté par la
pluie.
57. Après avoir utilisé la machine, retirez la saleté
collée et séchez-la complètement avant de la
ranger. Selon la saison ou la région, le gel peut
présenterunrisquededysfonctionnement.
58. Ne mouillez pas la borne de la batterie avec un
liquide comme de l’eau, ni ne plongez la batte-
rie dans un liquide. Ne laissez pas la batterie
sous la pluie et évitez de charger, utiliser ou
ranger la batterie dans un endroit humide ou
mouillé.Silaborneestmouilléeousiunliquide
pénètre à l’intérieur de la batterie, un court-circuit
estpossibleetrisquedeprovoquerunesur-
chauffe, un incendie ou une explosion.
59. Après avoir retiré la batterie de la machine
ou du chargeur, veillez à xer le couvercle de
batterie sur la batterie et à la ranger dans un
endroit sec.
60. Ne remplacez pas la batterie avec les mains
mouillées.
61. N’utilisez pas la machine dans la neige.
62. Si l’herbe coupée est mouillée, elle risque de
se coincer dans la machine. Vériez réguliè-
rement l’état de la machine et retirez l’herbe
collée au besoin.
CONSERVEZ CES
INSTRUCTIONS.
AVERTISSEMENT : NE vous laissez PAS
tromper (au l d’une utilisation répétée) par un
sentiment d’aisance et de familiarité avec le
produit, en négligeant le respect rigoureux des
consignes de sécurité qui accompagnent le pro-
duit en question.
La MAUVAISE UTILISATION de l’outil ou l’igno-
rance des consignes de sécurité indiquées
dans ce mode d’emploi peut entraîner de graves
blessures.
Sayfa yükleniyor ...
Sayfa yükleniyor ...
Sayfa yükleniyor ...
Sayfa yükleniyor ...
Sayfa yükleniyor ...
Sayfa yükleniyor ...
Sayfa yükleniyor ...
Sayfa yükleniyor ...
Sayfa yükleniyor ...
Sayfa yükleniyor ...
Sayfa yükleniyor ...
Sayfa yükleniyor ...
Sayfa yükleniyor ...
Sayfa yükleniyor ...
Sayfa yükleniyor ...
Sayfa yükleniyor ...
Sayfa yükleniyor ...
Sayfa yükleniyor ...
Sayfa yükleniyor ...
Sayfa yükleniyor ...
Sayfa yükleniyor ...
Sayfa yükleniyor ...
Sayfa yükleniyor ...
Sayfa yükleniyor ...
Sayfa yükleniyor ...
Sayfa yükleniyor ...
Sayfa yükleniyor ...
Sayfa yükleniyor ...
Sayfa yükleniyor ...
Sayfa yükleniyor ...
Sayfa yükleniyor ...
Sayfa yükleniyor ...
Sayfa yükleniyor ...
Sayfa yükleniyor ...
Sayfa yükleniyor ...
Sayfa yükleniyor ...
Sayfa yükleniyor ...
Sayfa yükleniyor ...
Sayfa yükleniyor ...
Sayfa yükleniyor ...
Sayfa yükleniyor ...
Sayfa yükleniyor ...
Sayfa yükleniyor ...
Sayfa yükleniyor ...
Sayfa yükleniyor ...
Sayfa yükleniyor ...
Sayfa yükleniyor ...
Sayfa yükleniyor ...
Sayfa yükleniyor ...
Sayfa yükleniyor ...
Sayfa yükleniyor ...
Sayfa yükleniyor ...
Sayfa yükleniyor ...
Sayfa yükleniyor ...
Sayfa yükleniyor ...
Sayfa yükleniyor ...
Sayfa yükleniyor ...
Sayfa yükleniyor ...
Sayfa yükleniyor ...
Sayfa yükleniyor ...
Sayfa yükleniyor ...
Sayfa yükleniyor ...
Sayfa yükleniyor ...
Sayfa yükleniyor ...
Sayfa yükleniyor ...
Sayfa yükleniyor ...
Sayfa yükleniyor ...
Sayfa yükleniyor ...
Sayfa yükleniyor ...
Sayfa yükleniyor ...
Sayfa yükleniyor ...
Sayfa yükleniyor ...
Sayfa yükleniyor ...
Sayfa yükleniyor ...
Sayfa yükleniyor ...
Sayfa yükleniyor ...
Sayfa yükleniyor ...
Sayfa yükleniyor ...
Sayfa yükleniyor ...
Sayfa yükleniyor ...
Sayfa yükleniyor ...
Sayfa yükleniyor ...
Sayfa yükleniyor ...
Sayfa yükleniyor ...
Sayfa yükleniyor ...
Sayfa yükleniyor ...
Sayfa yükleniyor ...
Sayfa yükleniyor ...
Sayfa yükleniyor ...
Sayfa yükleniyor ...
Sayfa yükleniyor ...
Sayfa yükleniyor ...
-
 1
1
-
 2
2
-
 3
3
-
 4
4
-
 5
5
-
 6
6
-
 7
7
-
 8
8
-
 9
9
-
 10
10
-
 11
11
-
 12
12
-
 13
13
-
 14
14
-
 15
15
-
 16
16
-
 17
17
-
 18
18
-
 19
19
-
 20
20
-
 21
21
-
 22
22
-
 23
23
-
 24
24
-
 25
25
-
 26
26
-
 27
27
-
 28
28
-
 29
29
-
 30
30
-
 31
31
-
 32
32
-
 33
33
-
 34
34
-
 35
35
-
 36
36
-
 37
37
-
 38
38
-
 39
39
-
 40
40
-
 41
41
-
 42
42
-
 43
43
-
 44
44
-
 45
45
-
 46
46
-
 47
47
-
 48
48
-
 49
49
-
 50
50
-
 51
51
-
 52
52
-
 53
53
-
 54
54
-
 55
55
-
 56
56
-
 57
57
-
 58
58
-
 59
59
-
 60
60
-
 61
61
-
 62
62
-
 63
63
-
 64
64
-
 65
65
-
 66
66
-
 67
67
-
 68
68
-
 69
69
-
 70
70
-
 71
71
-
 72
72
-
 73
73
-
 74
74
-
 75
75
-
 76
76
-
 77
77
-
 78
78
-
 79
79
-
 80
80
-
 81
81
-
 82
82
-
 83
83
-
 84
84
-
 85
85
-
 86
86
-
 87
87
-
 88
88
-
 89
89
-
 90
90
-
 91
91
-
 92
92
-
 93
93
-
 94
94
-
 95
95
-
 96
96
-
 97
97
-
 98
98
-
 99
99
-
 100
100
-
 101
101
-
 102
102
-
 103
103
-
 104
104
-
 105
105
-
 106
106
-
 107
107
-
 108
108
-
 109
109
-
 110
110
-
 111
111
-
 112
112


Diğer dillerde
- español: Dolmar AM3746 El manual del propietario
- français: Dolmar AM3746 Le manuel du propriétaire
- italiano: Dolmar AM3746 Manuale del proprietario
- Deutsch: Dolmar AM3746 Bedienungsanleitung
- português: Dolmar AM3746 Manual do proprietário
- dansk: Dolmar AM3746 Brugervejledning
- Nederlands: Dolmar AM3746 de handleiding
İlgili Makaleler
Diğer Belgeler
-
Makita DLM460 Kullanım kılavuzu
-
Makita DLM Series Kullanım kılavuzu
-
Makita DLM462 Kullanım kılavuzu
-
Makita DLM537 Kullanım kılavuzu
-
-
Makita LM001J Kullanım kılavuzu
-
-
-
Skil 0705 AA Kullanım kılavuzu
-
Worx WG780E Kullanma talimatları