
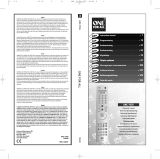
URC-8350
705085
RDN-1210208
Universal Electronics BV
Europe & International
P.O. Box 3332
7500 DH, Enschede
The Netherlands
URC-8350 ONE FOR ALL 705085
English
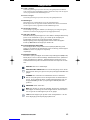
UNIVERSAL ELECTRONICS INC./ONE FOR ALL warrants to the original purchaser that this product will be free from
defects in materials and workmanship under normal and correct use for a period of one (1) year from the date of
original purchase. This product will be replaced free of charge if it has been proven to be defective within the one (1)
year warranty period. This warranty does not cover cartons, carrying cases, batteries, broken or marred cabinets or any
other item used in connection with the product. Any further obligation than listed above is excluded. To obtain
warranty service during the warranty period, please call us at the number mentioned on the Customer Service page.
Please notice that we need your purchase receipt so that we may establish your eligibility for service.
If you have bought this product for purposes which are not related to your trade, business or profession, please remind
that you may have legal rights under your national legislation governing the sale of consumer goods. This guarantee
does not affect those rights.
Dansk
Universal Electronics Inc./ONE FOR ALL garanterer hermed over for den oprindelige køber, at dette produkt ikke bør
fremvise materielle eller tekniske fejl ved normal og korrekt brug inden for en periode af et (1) år fra den oprindelige
købsdato. Produktet erstattes u/b, hvis det har vist sig at være defekt inden for garantiperioden på et (1) år. Denne garanti
omfatter ikke emballage, etui, batterier, ødelagte/skæmmede kabinetter eller andre enheder, der er benyttet sammen med
produktet. Erstatningspligten gælder kun under de ovenfor anførte forhold. Opstår der fejl inden for garantiperioden,
bedes De venligst ringe til os på nummeret nævnt under "Kundeservice" i manualen. Bemærk venligst, at vi skal have
Deres købsnota for at kunne fastslå, hvorvidt De er berettiget til garantiservice.
Hvis du har købt dette produkt med et formål der ikke har relation til dit erhverv, forretning eller branche så husk, at du
muligvis har legale rettigheder under din nationale lovgivnings bestemmelser om salg af forbrugervarer. Denne garanti
påvirker ikke disse rettigheder.
Norsk
UNIVERSAL ELECTRONICS INC./ONE FOR ALL garanterer dette produktet for materielle og tekniske feil som oppstår ved
normal og riktig bruk for en periode på 1 år fra kjøpsdato. Produktet vil bli erstattet kostnadsfritt hvis det viser seg å
være defekt innen 1 år. Denne garantien gjelder ikke pakning, emballasje, batterier, ødelagte eller skadede kabinett eller
noen annen gjenstand brukt i forbindelse med produktet. Annet ansvar enn nevnt over gjelder ikke. For å få
garantiservice i garantiperioden, vennligst ring oss på det telefonnummeret som står på kundeservice-siden. Vennligst
merk at vi trenger gyldig kvittering fra forhandler.
Hvis du har kjøpt dette produktet til formål som ikke har relasjon til ditt erhverv, forretning eller bransje, så husk at du
kan ha legale rettigheter etter nasjonale lovgivnings bestemmelser om salg av forbrukervarer. Denne garanti påvirker
ikke disse rettigheter.
Svenska
UNIVERSAL ELECTRONICS INC./ONE FOR ALL lämnar till köparen ett års garanti från inköpsdatum - att denna produkt är
felfri avseende material och tillverkning. Om produkten är felaktig under normal användning bytes denna mot en ny
utan kostnad för köparen under garanti-tiden. Garantin omfattar ej förpackning, bärväska, batterier - skadat hölje eller
andra enheter som används i anslutning till produkten. För att erhålla garanti-service under garanti-tiden vänligen
kontakta vår kundsupport på det telefonnummer som återfinns på sidan för kundservice i bruksanvisningen. Spar ditt
inköpskvitto för att styrka din garanti på produkten.
Om du har köpt denna produkt för ett syfte som inte är besläktad till din bransch, affärsverksamhet eller yrke kom ihåg
att du kan ha andra nationella lagar som täcker försäljning av konsumentvaror. Denna garanti påverkar inte dessa
rättigheter.
Suomi
UNIVERSAL ELECTRONICS INC./ONE FOR ALL myöntää tuotteilleen yhden (1) vuoden takuun alkuperäisestä ostopäivästä
lukien koskien tuotteissa takuuaikana ilmeneviä materiaali- ja valmistusvikoja. Tuote vaihdetaan takuunalaisissa
vikatapauksissa veloituksetta uuteen samanlaiseen tai vähintään vastaavilla ominaisuuksilla varustettuun tuotteeseen.
Takuu ei koske mm. paristoja, kantolaukkuja, pakkauksia, suojakoteloita tai muita oheistuotteita. Toimintaohjeet
takuuhuoltoa varten saat soittamalla puhelinnumeroon, joka on mainittu Asiakaspalvelu-sivulla. Muista liittää
lähetykseen kopio ostokuitista. Huomaa, että tuotteemme eivät yleensä sisällä käyttäjän huollettavaksi tarkoitettuja
osia, joten esim. laitteen kuoren avaaminen johtaa takuun raukeamiseen.
Jos olet hankkinut tämän tuotteen tarkoitukseen, joka ei liity kauppaan, liiketoimintaan tai ammattiin, sinulla saattaa
olla oikeuksia, jotka perustuvat oman maasi kansalliseen kuluttajatuotteita koskevaan lainsäädäntöön.
Tämä takuu ei koske näitä oikeuksia.
E
E
Ï
Ï
Ï
Ï
Ë
Ë
Ó
Ó
È
È
Î
Î
¿
¿
∏ UNIVERSAL ELECTRONICS INC./ONE FOR ALL ÂÁÁ˘¿Ù·È ÛÙÔÓ ·Ú¯ÈÎfi ·ÁÔÚ·ÛÙ‹ fiÙÈ ·˘Ùfi ÙÔ ÚÔ˚fiÓ ‰ÂÓ ÚfiÎÂÈÙ·È Ó· ·ÚÔ˘ÛÈ¿ÛÂÈ
ÚÔ‚Ï‹Ì·Ù· Û ۯ¤ÛË Ì ٷ ˘ÏÈο Î·È ÙËÓ Î·Ù·Û΢‹ ÙÔ˘ οو ·fi Ê˘ÛÈÔÏÔÁÈΤ˜ Û˘Óı‹Î˜ ¯Ú‹Û˘ ÁÈ· ÙËÓ ¯ÚÔÓÈ΋ ÂÚ›Ô‰Ô ÂÓfi˜
(1) ¤ÙÔ˘˜ ·fi ÙËÓ ·Ú¯È΋ ËÌÂÚÔÌËÓ›· ·ÁÔÚ¿˜. ∆Ô ÚÔ˚fiÓ ı· ÂÈÛ΢·ÛÙ› Î·È ·Ó ¯ÚÂÈ·ÛÙ› ı· ·ÓÙÈηٷÛÙ·ı› ¯ˆÚ›˜ ¯Ú¤ˆÛË ·Ó
·Ô‰ÂȯÙ› fiÙÈ Â›Ó·È ÂÏ·Ùو̷ÙÈÎfi ̤۷ ÛÙË ‰È¿ÚÎÂÈ· ÂÁÁ‡ËÛ˘ ÙÔ˘ ÂÓfi˜ (1) ¤ÙÔ˘˜. ∆· ÌÂÙ·ÊÔÚÈο ¤ÍÔ‰· ı· ‚·Ú‡ÓÔ˘Ó ÙÔÓ Î¿ÙÔ¯Ô.
∆· ¤ÍÔ‰· ÂÈÛÙÚÔÊ‹˜ ‚·Ú‡ÓÔ˘Ó ÙË UNIVERSAL ELECTRONICS/ONE FOR ALL. ∏ ÂÁÁ‡ËÛË ‰ÂÓ Î·Ï‡ÙÂÈ ˙ËÌÈ¿ ‹ ÌË ÏÂÈÙÔ˘ÚÁ›· Ô˘
ÚÔηÏÂ›Ù·È ·fi ÚÔ˚fiÓÙ· ‹ ˘ËÚÂۛ˜ Ô˘ ‰ÂÓ ÚÔ¤Ú¯ÔÓÙ·È ·fi ÙË UNIVERSAL ELECTRONICS/ONE FOR ALL, ‹ Ô˘ ÚÔ·ÙÔ˘Ó
·fi ÌË Î·Ï‹ ÙÔÔı¤ÙËÛË ÙÔ˘ ÚÔ˚fiÓÙÔ˜ Û‡Ìʈӷ Ì ÙȘ Ô‰ËÁ›Â˜ ¯Ú‹Ûˆ˜. ∞˘Ùfi ÈÛ¯‡ÂÈ Â›Û˘ Î·È ÛÙȘ ÂÚÈÙÒÛÂȘ fiÔ˘ ÙÔ ÚÔ˚fiÓ
¤¯ÂÈ ÌÂÙ·ÔÈËı›/ ÂÈÛ΢·ÛÙ› ·fi ¿ÏÏÔ˘˜ Î·È fi¯È ·fi ÙË UNIVERSAL ELECTRONICS/ONE FOR ALL ‹ ·Ó ÙÔ Ï¿ıÔ˜ ÔÊ›ÏÂÙ·È ÛÂ
·Ù‡¯ËÌ·, η΋ ÌÂÙ·¯Â›ÚÈÛË, ·Ì¤ÏÂÈ·, η΋ ÂÊ·ÚÌÔÁ‹, η΋ ÂÁηٿÛÙ·ÛË, η΋ ‰È·Ù‹ÚËÛË, ÌÂÙ·ÙÚÔ‹, ÙÚÔÔÔ›ËÛË, ʈÙÈ¿, ÓÂÚfi,
Ê˘ÛÈΤ˜ ηٷÛÙÚÔʤ˜, η΋ ¯Ú‹ÛË ‹ ·ÚÔÛÂÍ›·.. °È· Ó· ·ÔÎÙ‹ÛÂÙ ÂÁÁ‡ËÛË service ÁÈ· ÙË ‰È¿ÚÎÂÈ· Ù˘ ÂÚÈfi‰Ô˘ ÂÁÁ‡ËÛ˘,
·Ú·Î·ÏÒ ¤¯ÂÙ ˘’ fi„ÈÓ Û·˜ fiÙÈ ¯ÚÂÈ¿˙ÂÙ·È Ó· ¤¯ÂÙ ÙËÓ ·fi‰ÂÈÍË ·ÁÔÚ¿˜ ÁÈ· Ó· ¤¯ÂÙ ‰Èη›ˆÌ· service. ∞Ó ¤¯ÂÙ ·ÁÔÚ¿ÛÂÈ ·˘Ùfi
ÙÔ ÚÔ˚fiÓ ÁÈ· ÏfiÁÔ˘˜ Ô˘ ‰ÂÓ Û˘Ó¿‰Ô˘Ó Ì ÙËÓ ÂÌÔÚÈ΋ Û·˜ ‰Ú·ÛÙËÚÈfiÙËÙ· ‹ ÂȉÈÎfiÙËÙ·, ·Ú·Î·ÏÒ Ó· ı˘Ì¿ÛÙ fiÙÈ ÌÔÚ› Ó·
¤¯ÂÙ ÓÔÌÈο ‰ÈηÈÒÌ·Ù· ‚¿ÛÂÈ Ù˘ ÓÔÌÔıÂÛ›·˜ Ô˘ ÈÛ¯‡ÂÈ ÛÙË ¯ÒÚ· Û·˜ ÁÈ· ÙËÓ ÒÏËÛË Î·Ù·Ó·ÏˆÙÈÎÒÓ ·Á·ıÒÓ. ∏ ÂÁÁ‡ËÛË ·˘Ù‹
‰ÂÓ ÂËÚ¿˙ÂÈ ·˘Ù¿ Ù· ‰ÈηÈÒÌ·Ù·.
Universal remote
Universal fjernbetjening
Universal fjernkontroll
Universal fjärrkontroll
Yleiskaukosäädin
∆
∆Ë
ËÏ
ÏÂ
¯
¯Â
ÂÈ
ÈÚ
ÚÈ
ÈÛ
ÛÙ
Ù‹
‹Ú
ÚÈ
ÈÔ
Ô
Универсальный пульт
дистанционного управления
Evrensel uzaktan kumanda
Universal Fernbedienung
Mando a Distancia Universal
URC-8350
Instruction manual . . . . . . . . . . . . . . . . . . . . . . . . . . . . . . . . . . . . . .P. 1
Brugsanvisning . . . . . . . . . . . . . . . . . . . . . . . . . . . . . . . . . . . . . . . . .S. 14
Bruksanvisning . . . . . . . . . . . . . . . . . . . . . . . . . . . . . . . . . . . . . . . . . .P. 27
Bruksanvisning . . . . . . . . . . . . . . . . . . . . . . . . . . . . . . . . . . . . . . . . . .P. 40
Käyttöohje . . . . . . . . . . . . . . . . . . . . . . . . . . . . . . . . . . . . . . . . . . . . . . .P. 53
√
√‰
‰Ë
ËÁ
Á›
›Â
˜
˜
¯
¯Ú
Ú‹
‹Û
ÛÂ
ˆ
ˆ˜
˜
. . . . . . . . . . . . . . . . . . . . . . . . . . . . . . . . . . . . . . .P. 66
Инструкция пользователя
. . . . . . . . . . . . . . . . . . . .P. 79
Kullanım kılavuzu
. . . . . . . . . . . . . . . . . . . . . . . . . . . . . . . . . . . . . . .P. 92
Bedienungsanleitung . . . . . . . . . . . . . . . . . . . . . . . . . . . . . . . .P. 105
Guía del usario . . . . . . . . . . . . . . . . . . . . . . . . . . . . . . . . . . . . . . . .P. 118
English
Dansk
Norsk
Svensk
Suomi
EÏÏËÓÈο
Русский
Türkçe
Deutsch
Español
AVL_8350_omslag_V_2:Kameleon_5_omslag_11mm_rug 21-02-2008 13:52 Pagina 1

WWW.ONEFORALL.COM 1
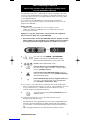
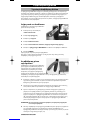
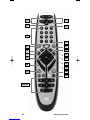
PICTURE OF URC-8350
2
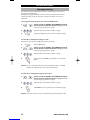
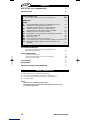
THE KEYPAD
3
SETTING UP THE URC-8350
How to set up the URC-8350 to control your devices 5
SEARCH METHOD
6
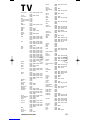
CODES
TV : Television / LCD / Plasma / Projector / Rear Projector
131
VCR : Video Cassette Recorder / TV/VCR Combi / DVD/VCR Combi /
PVR
140
SAT : Satellite Receiver / Set-Top-Box / DVB-S / DVB-T / Freeview (UK)
/ TNT (F) / Digitenne (NL) / SAT/HDD
142
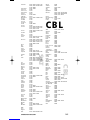
CBL : Cable Converter / Set-Top-Box / DVB-C
145
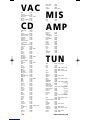
VAC : Video Accessory like Media Centres / AV Accessories /
AV Selectors
146
CD : CD Player / CD-R / MD
146
MIS : Audio / Miscellaneous Audio
146
AMP : Audio / Amplifier / Active Speaker System
146
TUN : Audio / Audio Receiver/Tuner/Amplifier / (DVD) Home Cinema
146
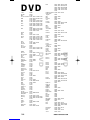
DVD : DVD Player / DVD-R / DVD Home Cinema / DVD Combi /
DVD/HDD
148
THE LEARNING FEATURE
(How to copy functions from your original working
remote onto the URC-8350)
7
EXTRA FEATURES
• Volume Punch-Through 8
• Macros (Sequence of commands within a certain mode) 9
• Code Upgrade technology 10
TROUBLE-SHOOTING
11
CUSTOMER SERVICE
11
USING THE ENERGY SAVER KEY
12
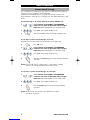
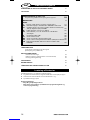
Table of Contents
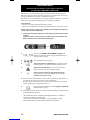
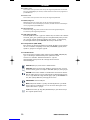
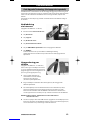
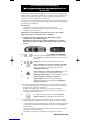
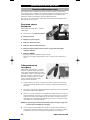
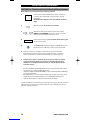
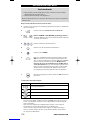
Your URC-8350 requires 2 new “AAA/LR03” alkaline batteries.
1. Remove the battery cover from the back of your URC-8350 by pressing down
on the tab.
2. Match the batteries to the + and - marks inside the battery case, then insert
the batteries.
3. Press the battery cover back into place.
Important notes:
- Do not use rechargeable batteries.
- Upon changing the batteries, your set-up codes and advanced
programming will be retained.
Installing the Batteries
English
URC_8350_V_2_19feb08.qxd:Ofa5_Digital_URC7555_EURO_10_Talen 20-02-2008 16:24 Pagina 1


WWW.ONEFORALL.COM 3
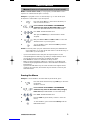
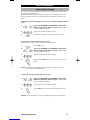
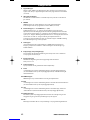
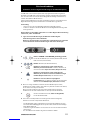
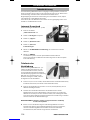
1. Device Keys
The TV, DVD, AUDIO and STB keys select the home entertainment device to
be controlled. The device keys can also be programmed with a Macro (see
page 9).
2. LED (red light)
During operation of the URC-8350 the LED will light up to indicate that it is
sending out infrared.
3. POWER
The POWER key operates the same function it did on your original remote
control. The Power key can be programmed with a Power Macro.
4. Number Keys (0 – 9 and letters, -/- -, AV)
The Number keys (0-9, -/- -, AV) provide functions just like your original
remote, such as direct access to channel selection. If your original remote
uses one/two digit input switching (-/- - symbol), this function can be
obtained by pressing the -/- - key. If your original remote has a 10 key, this
function can also be found under the -/- - key. If your original remote has a
20 key, this function can also be found under the AV key. In AUDIO mode
the Number keys may provide source (input) selection.
5. AV key
In TV mode you will obtain the AV / Input function. In AUDIO mode this key
may give an Input/Source function. In DVD mode this key may give a
TV/DVD function.
6. Replay key
Press Replay to command your PVR to instantly replay the last 7 seconds of a
program you are watching.
7. Energy Saver Key
This key will allow you to switch to energy saving mode. Please go to page
12 – 13 for more information.
8. Advance key
Press Advance to return to Advance/Quick Skip.
9. Guide
In TV and/or STB mode you will obtain the “Guide” function, if available on
your original remote. In AUDIO mode you will obtain the DSP mode func-
tion.
10. MENU Key
The MENU key controls the same function as it did on your original remote.
11. EXIT
In TV and/or STB mode you will obtain the “Menu Exit” function,
if available on your original remote.
12. Info
In TV and/or STB mode you may obtain the ‘Display”, “OSD” or “Info”
function, if available on your original remote.
13. Directional Keys
If available on your original remote, these keys will allow you to navigate
through the menu mode of your device.
14. OK
The OK key will confirm your choice in menu operation and programming
mode.
The Keypad
URC_8350_V_2_19feb08.qxd:Ofa5_Digital_URC7555_EURO_10_Talen 20-02-2008 16:24 Pagina 3

4WWW.ONEFORALL.COM
15. Volume +/- Keys
These keys operate in the same way as the keys on your original remote. If
no volume-function is present on your device, you will obtain the volume of
the device that is programmed on the AUDIO key.
16. Channel +/- Keys
These keys operate in the same way as the keys on your original remote.
17. MUTE Key
The Mute key operates the same function it did on your original remote
control. If no mute-function is present on your device, you will obtain the
mutefunction of the device that is programmed on the AUDIO key.
18. LAST Key
This key will provide you the “LAST” (or Recall or Previous Program)
function (if available on your original remote).
19. Red, Green Yellow and Blue
After pressing the TV key and accessing the text mode, the keys marked
red,green,yellow and blue, allow you to access the Fastext functions of
your television. If on your original remote control these keys are used
for Menu navigation, the URC-8350 Fastext keys may operate in the
same way. These keys are also available in the STB mode.
20. Transport keys
These keys operate the transport functions (PLAY, FF, REW etc.) of your
device.
21. Teletext Keys
After pressing the TV key, the transport keys (REW, PLAY, PAUSE, FF) are
used to operate the main Teletext functions. The symbols below the keys are
for Teletext.
The text keys are used to access the Teletext functions of your
television. Of course, your television must have Teletext capability.
TEXT ON: Puts the television in the Teletext mode.
TEXT OFF: Switches the television back to regular viewing mode.
On some televisions, this may be done by pressing the TEXT ON key
several times.
EXPAND: Shows the top half of the Teletext page in larger letters.
By pressing again, you can see the bottom half of the Teletext page
enlarged. To return to regular Teletext viewing, press the EXPAND key
again, or press the TEXT ON key, depending on your television.
HOLD/STOP: Stops changing pages.
MIX: Shows teletext and regular television simultaneously.
You may also use this key for subtitling. On some televisions
this function is accessed by pressing the text key twice.
16:9: This key provides you the (16:9) wide screen view
function (if available on your original remote).
The Keypad
URC_8350_V_2_19feb08.qxd:Ofa5_Digital_URC7555_EURO_10_Talen 20-02-2008 16:24 Pagina 4

WWW.ONEFORALL.COM 5
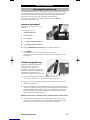
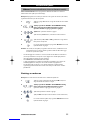
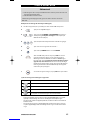
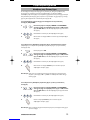
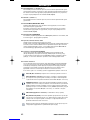
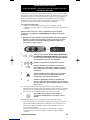
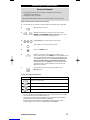
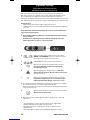
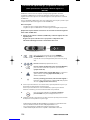
Example: To set up the URC-8350 for your Television (on the TV key):
1.Find the code for your device in the Code list. Codes are
listed by device type and brand name. The most popular
code is listed first. Make sure your device is switched
on (not on standby).
2. Press and release the TV key on the URC-8350.
3.Press and hold down REWIND + FASTFORWARD simulta-
neously until the URC-8350’s LED (red light) blinks twice
(the LED will blink once and then twice).
4. Enter your five-digit device code using the number keys.
The LED will blink twice.
5. Now, aim the URC-8350 at your device and press POWER.
If your device switches off, the URC-8350 is ready to oper-
ate your device.
6. Turn your device back on and try all the remote’s functions to ensure they
are working properly. If the functions do not work properly, repeat steps 1-5
using another code listed under your brand.
7. If your device does not respond, follow steps 1 to 5 with each code
listed for your brand. If none of the codes listed for your brand
operate your device, or if your brand is not listed at all, try the
Search Method described on page 6.
- Most TV’s do not switch on pressing the POWER key. Please try pressing a
“number” key or the “TV-text off” key to switch your TV back on.
- If your device’s original remote control does not have a POWER key, press
PLAY instead of POWER when setting up your device.
- Some codes are quite similar. If your device does not respond or is not
functioning properly with one of the codes, try another code listed under
your brand.
- Remember to press the corresponding device key before operating your
device.
The TV, STB and AUDIO keys are not mode specific. So it is possible to
set up a second Television on the STB key (If you do not have a Set-Top-Box)
or a second satellite receiver on the AUDIO key for example.
Setting up the URC 8350
How to set up the URC 8350 to control your Devices
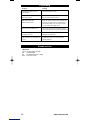
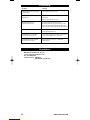
ONEFOR A
Acura
Admiral
Adyson
Agazi
AGB
Agef
Aiko
0009
0087,0093,0363,041
0217,0216
0264
0516
0087
0216,0009,0037,
0037,0274
0361,0208,0371
_ _ _ _ _
URC_8350_V_2_19feb08.qxd:Ofa5_Digital_URC7555_EURO_10_Talen 20-02-2008 16:24 Pagina 5

6WWW.ONEFORALL.COM
Setting up the URC 8350
Search Method
--> If your device does not respond to the URC-8350 after you have tried all
the codes listed for your brand.
--> If your brand is not listed at all.
The Search Method allows you to scan through all the codes contained
in the memory of the URC-8350.
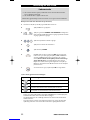
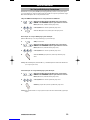
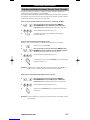
Example: To search for your TV code (on the TV key):
1. Switch ON your television (not on standby) and aim your URC-8350
at your TV.
2. Press and release the TV key.
3.Press and hold down REWIND + FASTFORWARD
simultaneously until the URC-8350’s LED (red light)
blinks twice (the LED will blink once and then twice).
4. Press 9 9 1. The LED will blink twice.
5. Press 1 to scan through all TV codes. *
6. Next, press POWER.
7. Aim the URC-8350 at your Television. Now press UP over
and over, until your Television turns off (every time you
press the UP key theURC-8350 will send out a POWER
signal from the next code containedin the memory).
You may have to press this key many times (up to 150
times) so please be patient. If you skip past a code, you
can go to the previous code(s) by pressing the DOWN key.
Remember to keep pointing the URC-8350 at your
Television while pressing this key.
8. As soon as your television turns off, press OK to store the
code.
(*) to scan through other device types:
- Most TV’s do not switch on pressing the POWER key. Please try pressing a
“number” key or the “TV-text off” key to switch your TV back on.
- If you cannot control your Television properly, please continue the Search
Method, you may be using the wrong Code.
- To search for the code for another device follow the instructions above only
press the appropriate device key instead of TV during step 2 and the
appropriate number during step 5.
Press: to scan through codes for:
Television / LCD / Plasma
DVD player/recorder or PVR
Amplifier or Amp./Tuner or CD Player or Miscellaneous
Set-Top-Box or Satellite Receiver or Cable Converter
URC_8350_V_2_19feb08.qxd:Ofa5_Digital_URC7555_EURO_10_Talen 20-02-2008 16:24 Pagina 6

WWW.ONEFORALL.COM 7
The URC-8350 comes with a complete library of pre-programmed codes. After
you have set up the URC-8350 for your device, you may find that there are one
or more keys that you had on your original remote, which do not have a place
on the URC-8350 keypad.
As a convenience, the URC-8350 offers a special Learning feature that
allows you to copy any function from your original remote control onto the
keypad of the URC-8350.
Before you start:
-Make sure your original remote control is working correctly.
-Make sure neither your URC-8350, nor your original remote control is
pointing at your device.
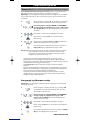
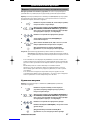
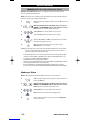
Example: To copy the “mono/stereo” function from your original TV
remote onto the “LAST” key of your URC-8350.
1. Place both remote controls (the URC-8350 and your original) on a flat
surface. Make sure the ends which you normally point at your device
are facing each other. Keep the remotes at a distance of 2 to 5 cm.
2. Press and hold down REWIND + FASTFORWARD
simultaneously until the URC-8350’s LED (red light)
blinks twice (the LED will blink once and then twice).
3. Press 9 7 5 (the LED will blink twice).
4. Press the device key (on the URC-8350 remote) to
select the mode to which you want to copy the learned
function (example: TV key).
5. Press the key (on the URC-8350 remote) where you
want to place the learned function (example: LAST key).
The LED will flash rapidly.
6. Press and hold the key (on your original remote) that
you want to copy until the LED on the URC-8350 blinks
twice (example: “mono/stereo” key).
7. If you want to copy other functions within the same mode, simply repeat
steps 5 and 6 pressing the next key you want to copy by learning. If you want
to copy other functions to a different mode, then repeat from step 4
onwards and press the applicable mode key.
8. To exit the learning mode, press and hold OK until the
LED blinks twice.
9. Learning is mode specific. To access your learned function, press
the appropriate device key first.
- The URC-8350 can learn approximately 25 - 40 functions (depending on the
function to be learned). Memory full will be indicated by two long blinks.
- You can replace a learned function by placing another learned function on
top.
- Upon changing the batteries, your learned functions will be retained.
The Learning Feature
(How to copy functions from your original working remote
onto the ONE FOR ALL URC 8350)
URC_8350_V_2_19feb08.qxd:Ofa5_Digital_URC7555_EURO_10_Talen 20-02-2008 16:24 Pagina 7

Extra Features
If no volume-function is present on your device, you will obtain the volume of
the device that is programmed on the AUDIO key.
Volume Punch Through allows you to use the volume from another mode
without having to select this. E.g. controlling your TV volume while being in STB
mode.
To punch through to TV volume while in the STB or AUDIO mode:
1. Press and hold down REWIND + FASTFORWARD
simultaneously until the URC-8350’s LED (red light)
blinks twice (the LED will blink once and then twice).
2. Press 993. The red light will blink twice.
3. Then press the TV key and the red light will blink twice.
To cancel the “Volume Punch Through” per mode:
(Example: to cancel the “Volume Punch Through” for the STB mode)
1.Press STB once.
2. Press and hold down REWIND + FASTFORWARD
simultaneously until the URC-8350’s LED (red light)
blinks twice (the LED will blink once and then twice).
3. Press 993. The red light will blink twice.
4. Then press the Volume (-) key and the red light will blink
four times.
Result: being in STB mode, you will be able to control VOL+/- or MUTE
functions of your STB (provided it has volume control).
To cancel the „Volume Punch Through“ for all modes:
1. Press and hold down REWIND + FASTFORWARD
simultaneously until the URC-8350’s LED (red light)
blinks twice (the LED will blink once and then twice).
2. Press 993. The red light will blink twice.
3. Press the Volume (+) key and the red light will blink
four times.
Result: all devices will operate their own volume-function again
(provided it is present).
8WWW.ONEFORALL.COM
Volume Punch Through
URC_8350_V_2_19feb08.qxd:Ofa5_Digital_URC7555_EURO_10_Talen 20-02-2008 16:24 Pagina 8

Within a certain device mode you can program your URC-8350 to issue a
sequence of commands at the press of one key.
Example: To program a macro on the LAST key to go to “AV” mode (in TV
mode) then to channel 801 of your Set-Top-Box.
1. Press and release TV key to select the mode where you
want to execute the macro.
2. Press and hold down REWIND + FASTFORWARD
simultaneously until the URC-8350’s LED (red light)
blinks twice (the LED will blink once and then twice).
3. Press 995. The LED will blink twice.
4.Then press the LAST key (to which the Macro will be
assigned).
5.Next press TV then AV then STB then 801to select the
desired channel on your Set-Top-Box.
6.To store the Macro, press and hold the OK key until the
LED will blink twice.
Result: In TV mode, when you press and hold the LAST key the URC-8350 will
send commands to go in “AV” mode then switch to STB mode and go to
channel 801 of your Set-Top-Box.
- If you need to build in some delay into the sequence please use the
corresponding device-mode key (e.g. STB key in example above) to do so.
You may press this key several times to build in more delay.
- Each MACRO can consist of a maximum of 32 key strokes.
- Make sure that you program a Macro on a spare key, as the Macro will
overwrite the pre-programmed function in the mode where the Macro is
programmed.
- If you had to hold down a key for a few seconds on the original remote
control to get a function, this function may not work in a macro on your
URC-8350 remote.
Erasing the Macro
Example: To erase the Macro from the LAST key in STB mode, press:
1. Press and release the device key (e.g. STB key) to select the
mode where
the macro is stored.
2. Press and hold down REWIND + FASTFORWARD
simultaneously until the URC-8350’s LED (red light)
blinks twice (the LED will blink once and then twice).
3. Press 995. The LED will blink twice.
4. Press the LAST key (from which you want to erase the
macro).
5. To clear the Macro, press and hold the OK key until the
LED will blink twice.
Extra Features
WWW.ONEFORALL.COM 9
Macros (Sequence of commands within a certain mode)
URC_8350_V_2_19feb08.qxd:Ofa5_Digital_URC7555_EURO_10_Talen 20-02-2008 16:24 Pagina 9

Extra Features
10 WWW.ONEFORALL.COM
Your URC-8350 Remote contains a unique feature, which allows new codes to
be added simply by holding it to your telephone. In a matter of seconds,
our magnetic coupling technology quickly and reliably transfers information
to the URC-8350 Remote without complex plugs, adapters or attachments.
This means, as you buy new products in the future, the URC-8350 Remote will
never become obsolete.
Internet download
(Upgrade your URC-8350 Remote…via
your PC)
1.Visit our website
“www.oneforall.com”.
2. Select your region.
3. Select “Support”.
4. Select “Download center”.
5. Select “Universal Remote Controls”.
6. Select the ONE FOR ALL remote you want to upgrade: URC-8350.
7. Select “DWNLD” Now you have entered our special Online Download sec-
tion. From this point just follow the instructions on the screen for easy
upgrade of your remote.
Phone upgrade
(Upgrade your URC-8350 remote…via
your phone). Alternatively ring our
consumer help-line and one of our
customer service representatives will
assist you through the entire process of
upgrading your URC-8350 Remote.
To ensure the process goes smoothly,
here are a few steps to follow:
1. Write down the brand name(s) and model number(s) of your device(s)
(see the table provided on the Consumer Service page) before you call.
2. Ring our consumer help-line and explain which device(s) you would like to
add to your URC-8350 Remote.
3. After our customer service agent records the brand name(s) and model
number(s) of your device(s), he/she will lead you through the set up
procedure and then will ask you to hold the URC-8350 Remote to
the speaker portion of your telephone (see diagram below). In doing this,
the information needed for your device is transferred through the
telephone into your URC-8350 Remote in a matter of seconds.
IMPORTANT: cordless telephones, speaker telephones and mobile
telephones are not recommended.
4. After your URC-8350 Remote has been upgraded by telephone, stay on the
line. Our customer service agent will ensure that your URC-8350 Remote is
working properly with your device(s) and will answer any other questions
you may have.
Code Upgrade Technology
URC_8350_V_2_19feb08.qxd:Ofa5_Digital_URC7555_EURO_10_Talen 20-02-2008 16:24 Pagina 10

WWW.ONEFORALL.COM 11
Problem:
Your brand is not listed in the
code section?
The URC-8350 does not
operate your device(s)?
The URC-8350 is not
performing commands
properly?
Problems changing channels?
The URC-8350 does not
respond after pressing a key?
The LED does not blink when
you press a key?
Solution:
Try the search method on page 6.
A) Try all the codes listed for your brand.
B) Try the search method on page 6.
You may be using the wrong code. Try
repeating the Direct Set-Up using another
code listed under your brand or start
the search method over again to locate
the proper code.
Enter the programme number exactly as
you would on your original remote.
Make sure you are using new batteries and
are aiming the URC-8350 at your device.
Replace batteries with 2 fresh, new
“AAA/LR03” alkaline batteries.
Trouble-Shooting
Customer Service
In the UK In Ireland
E-mail : ofahelp@uebv.com (*) E-mail : ofahelp@uebv.com (*)
Fax : +31 53 432 9816 Fax : +31 53 432 9816
Tel. : 0901-5510010
(£ 0,50 per minute)
Tel. : 016015986
In Australia In South Africa
Fax : 03 9672 2479 Fax : 011 298 2302
Tel. : 1 300 888 298 Tel. : 0860 100551
Tel. : 011 4173000
In New Zealand Ukraine
Fax : (06) 878 2760 Fax : +38 044 4890187
Tel. : 0508 ONE 4 ALL (663 4 255) Tel. : +38 044 4890188
Web. : www.oneforall.com.ua
Slovakia Croatia
Fax : +421 55 611 8111 Fax : +385 1 48 16 807
Tel. : +421 55 611 8131 Fax : +385 1 48 16 806
Web. : www.dsi.sk Web. : www.tehnocentar.hr
(*) Just send a blank message, you’ll get auto-reply.
URC_8350_V_2_19feb08.qxd:Ofa5_Digital_URC7555_EURO_10_Talen 20-02-2008 16:24 Pagina 11

12 WWW.ONEFORALL.COM
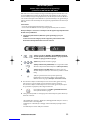
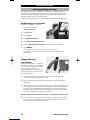
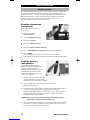
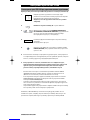
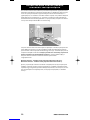
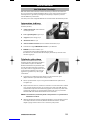
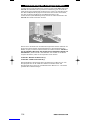
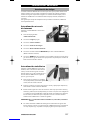
In combination with the included On/Off Power Plug (HC-8000), your One For All
URC 8350 can be used as a convenient remote control for switching your Audio
Video devices completely off, saving more energy than the standby mode. The
optimal way to do this is to plug all of your devices into one power strip or
multi-way extension
lead (see illustration below)and then plug that into the One For All Power Plug.
You can then shut the Power to all devices using the URC 8350. To do this first
enter the Energy Saving Mode by pressing the Energy Saver Key. Now you need
to select which Power Plug you want to control. Each Plug has a number and
the one that shipped with this kit defaults to number 1, so press
the number. You can now turn the Power completely off by pressing the
following keys:
Power ON – Press Channel Up (+)
Power OFF – Press Channel Down (-)
The remote will remember the last plug you controlled, so if you switch from
Energy Saving Mode l to TV mode and then back again you will be able to
control the last plug control switch you accessed without needing select it by
pressing 1.
Using the Energy Saver Key
URC_8350_V_2_19feb08.qxd:Ofa5_Digital_URC7555_EURO_10_Talen 20-02-2008 16:24 Pagina 12

WWW.ONEFORALL.COM 13
If you should wish to remotely control lamps and lighting as well as Energy
Saving, you can also use the Energy Saver remote to control the separately
available One For All Light Accessories.
Lighting Control
- Voltage and Load: 230V~
- Degree of Protection: IP 20
- Radio Frequency: 433.92MHz
- RF Range: Typically 30m in open area.
- Max power for HC-8000: 1000 Watt
Specification HC-8000
It is possible to change the number you use to select the HC8000 Power Plug. This is useful
if you have purchased a second Power Plug (available from One For All), or if you already
have a Power Plug operating as number 1.
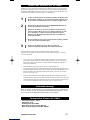
To assign a number to the plug, follow these steps:
•Plug your device (or extension lead) the HC-8000 into the wall If you are
setting up a device with an in-line switch (such as a lamp), make sure the
switch is set to On
•Press the Energy Saver key on your ONE FOR ALL URC-8350 so that it is
in Energy Saving Mode.
•Press the number you wish to assign to the Power Plug Switch
(HC-8000). If this is your first Plug, number 1 is recommended, number 2
for the second etc. The IR Indicator (LED) at the top of the URC-8350
should blink twice.
•Press and hold the button on the Power Plug (HC-8000) until the red
light begins to blink.
•Press the Channel Up (+) key. The red light on the Light Power Plug
(HC-8000) should stop flashing.
The remote should now operate the Power Plug (HC-8000).
To test it, check if the Channel Up (+) and (-) keys work to switch your light ON
and OFF respectively,.
•If you require more than 10 plugs to control, you can also use the Red, Green, Yellow
and Blue keys on your remote to control 11-14. Simply assign these keys to the Power
Plugs HC-8000) as you would do a number.
•If you experience interference, it is possible to change the code of the Energy Saver
Mode on your remote to avoid this. The default code is 41000, but it is possible to
change the code to 41001, 41002 etc up to 41015. To change the code, set the Light
Mode up as you would do a normal device (see page 5), using codes 41000 - 41015.
•If you should wish to reset your Power Plug HC-8000 to factory defaults so you can
assign it a new number, hold down the button on the Light Control Switch until the
red light starts to blink, release the button and then hold it down again until the red
light goes out.
How to change the number of your HC-8000
1
2
3
URC_8350_V_2_19feb08.qxd:Ofa5_Digital_URC7555_EURO_10_Talen 20-02-2008 16:24 Pagina 13

14 WWW.ONEFORALL.COM
AFBILDNING AF URC8350 FJERNBETJENING
15
TASTATUR
16
PROGRAMMERING AF URC8350
Programmering af URC-8350 til betjening af dine apparater 18
SØGEMETODE
19
KODER
TV : Fjernsyn / LCD / Plasma / Projektor / Bagprojektor
131
VCR : Videobåndoptager / Tv/VCR kombi / DVD/VCR kombi / PVR
140
SAT : Satellitmodtager / Set-top box / DVB-S / DVB-T / Freeview (UK) /
TNT (F) / Digitenne (NL) / SAT/HDD
142
CBL : Kabelomformer / Set-top box / DVB-C
145
VAC : Video-tilbehør, son f. eks. mediecentre / AV-tilbehør /
AV-vælgere
146
CD : Cd-afspiller / CD-R / MD
146
MIS : Audio / Diverse audio
146
AMP : Audio / Forstærker / Aktivt højtalersystem
146
TUN : Audio / Audio-modtager/tuner/forstærker / (DVD) Home Cinema
146
DVD : DVD-afspiller/ DVD-R / DVD Home Cinema / DVD kombi /
DVD/HDD
148
LÆREFUNKTION
(Sådan kopierer du funktioner fra din originale
fjernbetjening over på URC-8350)
20
EKSTRA FUNKTIONER
•Volume Punch-Through 21
•Makroer (Sekvenser af kommandoer i en bestemt modus) 22
•Kode opgraderingsteknologi 23
FEJLFINDING
24
KUNDESERVICE
24
SÅDAN BRUGES ENERGISPARETASTEN
25
Indholdsfortegnelse
Din URC-8350 kræver 2 nye “AAA/LR03” alkaliske batterier.
1. Tag dækslet af batterirummet på bagsiden af URC-8350 ved at trykke på tappen.
2. Sæt batterierne i batterirummet som vist ved mærkerne + og -.
3. Tryk dækslet tilbage på plads.
Vigtige bemærkninger:
- Brug ikke genopladelige batterier.
- Efter du har sat nye batterier i, bibeholdes dine programmeringskoder og
avanceret programmering.
Isætning af batterier
Dansk
URC_8350_V_2_19feb08.qxd:Ofa5_Digital_URC7555_EURO_10_Talen 20-02-2008 16:24 Pagina 14


16 WWW.ONEFORALL.COM
1. Apparat taster
Med TV, DVD, AUDIO og STB tasterne vælges det apparat, der skal betjenes.
Apparat tasterne kan også programmeres med en makro (se side 22).
2. LED (rødt lys)
Når URC-8350 bruges, lyser LED’et for at vise, at den sender infrarødt.
3.POWER
POWER tasten betjener den samme funktion som på din originale fjernbetjening.
Power tasten kan også programmeres med en makro (se side 22).
4.Nummertaster (0 – 9 og bogstaver, -/- -, AV)
Nummertasterne (0-9, -/- -, AV) har de samme funktioner som på din originale
fjernbetjening, f.eks. direkte adgang til valg af kanal. Hvis der på din originale
fjernbetjening skal bruges en/to-ciffer indtastning for skift -/- - symbol), kan du
få denne funktion ved at trykke på -/- - tasten. Hvis din originale fjernbetjening
har en 10 tast, kan denne funktion også findes under -/- - tasten. Hvis din originale
fjernbetjening har en 20 tast, kan denne funktion også findes på AV tasten. I AUDIO
modus vil nummertasterne måske give kilde (input) select.
5. AV tast
I TV modus får du AV / Input funktionen. I AUDIO modus giver denne tast måske en
Input/kilde funktion. I DVD modus giver denne tast måske en TV/DVD funktion.
6. Replay tast
Tryk på Replay for at få din PVR til straks at gentage de sidste 7 sekunder af et
program, du er ved at se.
7. Energispare-tast
Med denne tast kan du indstille på energibesparelse. Se side 25 – 26 for yderligere
information.
8. Advance taster
Tryk på Advance for at vende tilbage til Advance/Quick Skip.
9. Guide
I TV og/eller STB modus får du “Guide” funktionen, hvis den var på din originale
fjernbetjening. I AUDIO modus får du DSP funktionen.
10. MENU tast
MENU tasten betjener den samme funktion som på din originale fjernbetjening.
11. EXIT
I TV og/eller STB modus får du “Menu Exit” funktionen, hvis den var på din originale
fjernbetjening.
12. Info
I TV og/eller STB modus får du “Display”, ”OSD” eller ”Info” funktionen, hvis den var på
din originale fjernbetjening.
13. Retningstaster
Hvis de var tilgængelige på din original fjernbetjening, vil disse taster gøre det muligt
for dig at navigere gennem menuen på dit apparat.
14. OK
OK tasten bekræfter dit valg i menu og programmering modus.
Tastatur
URC_8350_V_2_19feb08.qxd:Ofa5_Digital_URC7555_EURO_10_Talen 20-02-2008 16:24 Pagina 16

WWW.ONEFORALL.COM 17
15. Volumen taster +/-
Disse taster fungerer på samme måde som tasterne på din originale fjernbetjening.
Hvis der ikke er en volumen-funktion på dit apparat, får du apparatets volumen,
som er programmeret på AUDIO tasten.
16. Kanal taster +/-
Disse taster fungerer på samme måde som tasterne på din originale fjernbetjening.
17. MUTE tast
Mute tasten betjener den samme funktion som på din originale fjernbetjening.
Hvis der ikke er en mute-funktion på dit apparat, får du apparatets mute funktion,
som er programmeret på AUDIO tasten.
18. LAST tast
Denne tast giver dig den sidste “LAST” funktionen (hvis den var på din originale
fjernbetjening).
19. rød, grøn, gul, blå
Når du har trykket på TV-tasten og har fået adgang til tekst-tv, vil de taster,
der har farverne rød, grøn, gul og blå, give dig mulighed for at få adgang
til hurtigtekst-funktionerne på dit fjernsyn. Hvis disse taster på din originale
fjernbetjening bruges til menunavigation, vil ONE FOR ALL hurtigtekst-tas-
terne muligvis fungere på samme måde.
20. Transporttaster (VCR / DVD)
Disse taster styrer transportfunktionerne (PLAY, FF, REW etc.) på dit apparat.
For at undgå utilsigtet optagelse skal OPTAGE-tasten trykkes ned to gange
for at påbegynde optagelse.
21. Tekst-tv-taster
Efter at have trykket på TV-tasten bruges (REW, PLAY, PAUSE, FF) til at styre
de vigtigste tekst-tv-funktioner. Symbolerne under
tasterne er til tekst-tv. Tasterne bruges til at få adgang til tekst-tv- funktio-
nerne på dit fjernsyn. Dit fjernsyn skal selvfølgelig kunne vise tekst-tv.
TEXT ON: Sætter fjernsynet i tekst-TV-indstilling.
TEXT OFF: Skifter fjernsynet tilbage til almindeligt tv-billede. På nogle
fjernsyn gøres dette muligvis ved at trykke på TEXT ON-tasten adskillige
gange.
EXPAND: Viser den øverste halvdel af tekst-tv-siden med stor skrift. Hvis
du trykker en gang til, kan du se den nederste halvdel af tekst-tv-siden
forstørret. Hvis du vil tilbage til almindelig visning af tekst-tv, skal du
trykke på EXPAND-tasten igen eller trykke på TEXT ON-tasten, alt
afhængigt af dit fjernsyn.
HOLD/STOP: Stopper sideskift.
MIX: Viser tekst-tv og almindeligt fjernsyn på samme tid. Du kan mulig-
vis også bruge denne tast til undertekster. På nogle fjernsyn er denne
funktion tilgængelig ved at trykke på tekst-tasten to gange.
16:9: Denne tast giver dig (16:9) widescreen-billedefunktionen, hvis den
var tilgængelig på din originale fjernbetjening).
Tastatur
URC_8350_V_2_19feb08.qxd:Ofa5_Digital_URC7555_EURO_10_Talen 20-02-2008 16:24 Pagina 17

18 WWW.ONEFORALL.COM
Eksempel: For at programmere URC-8350 til dit fjernsyn (på TV tasten):
1.Find koden til dit apparat i Kode-listen. Koderne er listede efter
apparat-type og fabrikat. De mest populære koder står øverst.
Sørg for at apparatet er tændt (ikke i standby).
2.Tryk på og slip TV tasten på URC-8350.
3. Tryk på og hold REWIND + FASTFORWARD samtidig, indtil
URC-8350’s LED (rødt lys) blinker to gange (LED blinker først
en gang og derefter to gange).
4.Indtast din fem-cifrede kode med nummertasterne.
LED’et blinker to gange.
5.Ret nu URC-8350 mod dit apparat og tryk på POWER.
Hvis apparatet slukkes, er URC-8350 klar til at betjene det.
6. Tænd apparatet igen og afprøv alle fjernbetjeningens funktioner for at sikre, at de
virker korrekt. Hvis funktionerne ikke virker korrekt, skal du gentage punkt 1-5 og
bruge en anden kode, som står ved dit mærke.
7. Hvis apparatet ikke reagerer, skal du følge punkt 1 til 5 med hver kode for dit
mærke. Hvis ingen af koderne til dit mærke kan betjene apparatet, eller hvis dit
mærke ikke står på listen, skal du prøve Søgemetoden, beskrevet på side 19.
- De fleste fjernsyn tændes ikke ved tryk på POWER tasten. Prøv at trykke på en nummertast
eller “TV-text off” tasten for at tænde fjernsynet igen.
- Hvis den originale fjernbetjening til apparatet ikke har en POWER tast, skal du trykke på
PLAY i stedet for POWER, når du programmerer dit apparat.
- Nogle koder ligner hinanden meget. Hvis dit apparat ikke reagerer eller ikke fungerer
korrekt med en af koderne, skal du prøve en anden kode for dit mærke på listen.
- Husk at trykke på den tilsvarende apparat tast, før apparatet betjenes.
TV, STB og AUDIO tasterne er ikke modus-specifikke. Det er derfor muligt at programmere
for eksempel endnu et fjernsyn på STB tasten (hvis du ikke har en Set-Top-Box) eller en
anden satellitmodtager på AUDIO tasten.
Programmering af URC 8350
Programmering af URC8350 til betjening af dine apparater
ONEFOR A
Acura
Admiral
Adyson
Agazi
AGB
Agef
Aiko
0009
0087,0093,0363,041
0217,0216
0264
0516
0087
0216,0009,0037,
0037,0274
0361,0208,0371
_ _ _ _ _
URC_8350_V_2_19feb08.qxd:Ofa5_Digital_URC7555_EURO_10_Talen 20-02-2008 16:24 Pagina 18

WWW.ONEFORALL.COM 19
Programmering af URC 8350
Søgemetode
--> Hvis dit apparat ikke reagerer på URC-8350, efter du har prøvet alle koderne for dit
mærke på listen.
--> Hvis dit mærke slet ikke er på listen.
Med Søgemetoden kan du scanne gennem alle koderne, som er i URC-8350’s
hukommelse.
Eksempel: For at søge din TV kode (på TV tasten):
1. Tænd for fjernsynet (ikke i standby) og ret din URC-8350 mod fjernsynet.
2.Tryk på og slip TV tasten.
3.Tryk på og hold REWIND + FASTFORWARD samtidig, indtil
URC-8350’s LED (rødt lys) blinker to gange (LED blinker først en
gang og derefter to gange).
4. Tryk på 991. LED blinker to gange.
5. Tryk på 1for at scanne gennem alle TV koder. *
6. Tryk derefter på POWER.
7. Ret URC-8350 mod fjernsynet. Tryk nu på UP flere gange, indtil
fjernsynet slukkes (hver gang du trykker på UP tasten, sender
URC-8350 et POWER signal fra den næste kode i hukommelsen).
Det er måske nødvendigt at trykke på denne tast adskillige
gange (op til 150 gange), så vær tålmodig. Hvis du springer
over en kode, kan du gå til de(n) foregående kode(r) ved at trykke
på DOWN tasten. Husk hele tiden at rette URC-8350 mod
fjernsynet, mens du trykker på denne tast.
8. Så snart fjernsynet slukkes, trykker du på OK for at gemme koden.
(*) for at scanne gennem andre apparattyper:
- De fleste fjernsyn tændes ikke ved tryk på POWER tasten. Prøv at trykke på en nummertast
eller “TV-text off” tasten for at tænde fjernsynet igen.
- Hvis du ikke kan betjene fjernsynet korrekt, kan du prøve søgemetoden, for måske bruger
du en forkert kode.
- For at søge efter koden til et andet apparat skal du følge instruktionerne ovenfor og blot
huske at trykke på den tilsvarende apparat tast i stedet for TV tasten i punkt 2 og det
tilsvarende nummer i punkt 5.
Tryk: for at scanne gennem koder til:
Fjernsyn / LCD / Plasma
DVD-afspiller/optager eller PVR
Forstærker eller forstærker/tuner eller audioudstyr eller CD Afspiller
Set-Top-Box eller satellitmodtager eller kabeldekoder
URC_8350_V_2_19feb08.qxd:Ofa5_Digital_URC7555_EURO_10_Talen 20-02-2008 16:24 Pagina 19
Sayfa yükleniyor...
Sayfa yükleniyor...
Sayfa yükleniyor...
Sayfa yükleniyor...
Sayfa yükleniyor...
Sayfa yükleniyor...
Sayfa yükleniyor...
Sayfa yükleniyor...
Sayfa yükleniyor...
Sayfa yükleniyor...
Sayfa yükleniyor...
Sayfa yükleniyor...
Sayfa yükleniyor...
Sayfa yükleniyor...
Sayfa yükleniyor...
Sayfa yükleniyor...
Sayfa yükleniyor...
Sayfa yükleniyor...
Sayfa yükleniyor...
Sayfa yükleniyor...
Sayfa yükleniyor...
Sayfa yükleniyor...
Sayfa yükleniyor...
Sayfa yükleniyor...
Sayfa yükleniyor...
Sayfa yükleniyor...
Sayfa yükleniyor...
Sayfa yükleniyor...
Sayfa yükleniyor...
Sayfa yükleniyor...
Sayfa yükleniyor...
Sayfa yükleniyor...
Sayfa yükleniyor...
Sayfa yükleniyor...
Sayfa yükleniyor...
Sayfa yükleniyor...
Sayfa yükleniyor...
Sayfa yükleniyor...
Sayfa yükleniyor...
Sayfa yükleniyor...
Sayfa yükleniyor...
Sayfa yükleniyor...
Sayfa yükleniyor...
Sayfa yükleniyor...
Sayfa yükleniyor...
Sayfa yükleniyor...
Sayfa yükleniyor...
Sayfa yükleniyor...
Sayfa yükleniyor...
Sayfa yükleniyor...
Sayfa yükleniyor...
Sayfa yükleniyor...
Sayfa yükleniyor...
Sayfa yükleniyor...
Sayfa yükleniyor...
Sayfa yükleniyor...
Sayfa yükleniyor...
Sayfa yükleniyor...
Sayfa yükleniyor...
Sayfa yükleniyor...
Sayfa yükleniyor...
Sayfa yükleniyor...
Sayfa yükleniyor...
Sayfa yükleniyor...
Sayfa yükleniyor...
Sayfa yükleniyor...
Sayfa yükleniyor...
Sayfa yükleniyor...
Sayfa yükleniyor...
Sayfa yükleniyor...
Sayfa yükleniyor...
Sayfa yükleniyor...
Sayfa yükleniyor...
Sayfa yükleniyor...
Sayfa yükleniyor...
Sayfa yükleniyor...
Sayfa yükleniyor...
Sayfa yükleniyor...
Sayfa yükleniyor...
Sayfa yükleniyor...
Sayfa yükleniyor...
Sayfa yükleniyor...
Sayfa yükleniyor...
Sayfa yükleniyor...
Sayfa yükleniyor...
Sayfa yükleniyor...
Sayfa yükleniyor...
Sayfa yükleniyor...
Sayfa yükleniyor...
Sayfa yükleniyor...
Sayfa yükleniyor...
Sayfa yükleniyor...
Sayfa yükleniyor...
Sayfa yükleniyor...
Sayfa yükleniyor...
Sayfa yükleniyor...
Sayfa yükleniyor...
Sayfa yükleniyor...
Sayfa yükleniyor...
Sayfa yükleniyor...
Sayfa yükleniyor...
Sayfa yükleniyor...
Sayfa yükleniyor...
Sayfa yükleniyor...
Sayfa yükleniyor...
Sayfa yükleniyor...
Sayfa yükleniyor...
Sayfa yükleniyor...
Sayfa yükleniyor...
Sayfa yükleniyor...
Sayfa yükleniyor...
Sayfa yükleniyor...
Sayfa yükleniyor...
Sayfa yükleniyor...
Sayfa yükleniyor...
Sayfa yükleniyor...
Sayfa yükleniyor...
Sayfa yükleniyor...
Sayfa yükleniyor...
Sayfa yükleniyor...
Sayfa yükleniyor...
Sayfa yükleniyor...
Sayfa yükleniyor...
Sayfa yükleniyor...
Sayfa yükleniyor...
Sayfa yükleniyor...
Sayfa yükleniyor...
Sayfa yükleniyor...
Sayfa yükleniyor...
Sayfa yükleniyor...
Sayfa yükleniyor...
Sayfa yükleniyor...
Sayfa yükleniyor...
-
 1
1
-
 2
2
-
 3
3
-
 4
4
-
 5
5
-
 6
6
-
 7
7
-
 8
8
-
 9
9
-
 10
10
-
 11
11
-
 12
12
-
 13
13
-
 14
14
-
 15
15
-
 16
16
-
 17
17
-
 18
18
-
 19
19
-
 20
20
-
 21
21
-
 22
22
-
 23
23
-
 24
24
-
 25
25
-
 26
26
-
 27
27
-
 28
28
-
 29
29
-
 30
30
-
 31
31
-
 32
32
-
 33
33
-
 34
34
-
 35
35
-
 36
36
-
 37
37
-
 38
38
-
 39
39
-
 40
40
-
 41
41
-
 42
42
-
 43
43
-
 44
44
-
 45
45
-
 46
46
-
 47
47
-
 48
48
-
 49
49
-
 50
50
-
 51
51
-
 52
52
-
 53
53
-
 54
54
-
 55
55
-
 56
56
-
 57
57
-
 58
58
-
 59
59
-
 60
60
-
 61
61
-
 62
62
-
 63
63
-
 64
64
-
 65
65
-
 66
66
-
 67
67
-
 68
68
-
 69
69
-
 70
70
-
 71
71
-
 72
72
-
 73
73
-
 74
74
-
 75
75
-
 76
76
-
 77
77
-
 78
78
-
 79
79
-
 80
80
-
 81
81
-
 82
82
-
 83
83
-
 84
84
-
 85
85
-
 86
86
-
 87
87
-
 88
88
-
 89
89
-
 90
90
-
 91
91
-
 92
92
-
 93
93
-
 94
94
-
 95
95
-
 96
96
-
 97
97
-
 98
98
-
 99
99
-
 100
100
-
 101
101
-
 102
102
-
 103
103
-
 104
104
-
 105
105
-
 106
106
-
 107
107
-
 108
108
-
 109
109
-
 110
110
-
 111
111
-
 112
112
-
 113
113
-
 114
114
-
 115
115
-
 116
116
-
 117
117
-
 118
118
-
 119
119
-
 120
120
-
 121
121
-
 122
122
-
 123
123
-
 124
124
-
 125
125
-
 126
126
-
 127
127
-
 128
128
-
 129
129
-
 130
130
-
 131
131
-
 132
132
-
 133
133
-
 134
134
-
 135
135
-
 136
136
-
 137
137
-
 138
138
-
 139
139
-
 140
140
-
 141
141
-
 142
142
-
 143
143
-
 144
144
-
 145
145
-
 146
146
-
 147
147
-
 148
148
-
 149
149
-
 150
150
-
 151
151
-
 152
152
-
 153
153


diğer dillerde
İlgili makaleler
-
 One For All URC 7555 Kullanım kılavuzu
-
 One For All URC-8308 Kullanım kılavuzu
-
 One For All URC-3435 Kullanım kılavuzu
-
One For All Essence 2 Kullanım kılavuzu
-
One For All URC 7990 El kitabı
-
 One For All 705016 Kullanım kılavuzu
-
 One For All URC 6440 El kitabı
-
 One For All 704918 Kullanım kılavuzu
-
Curtis URC 3-1 El kitabı


